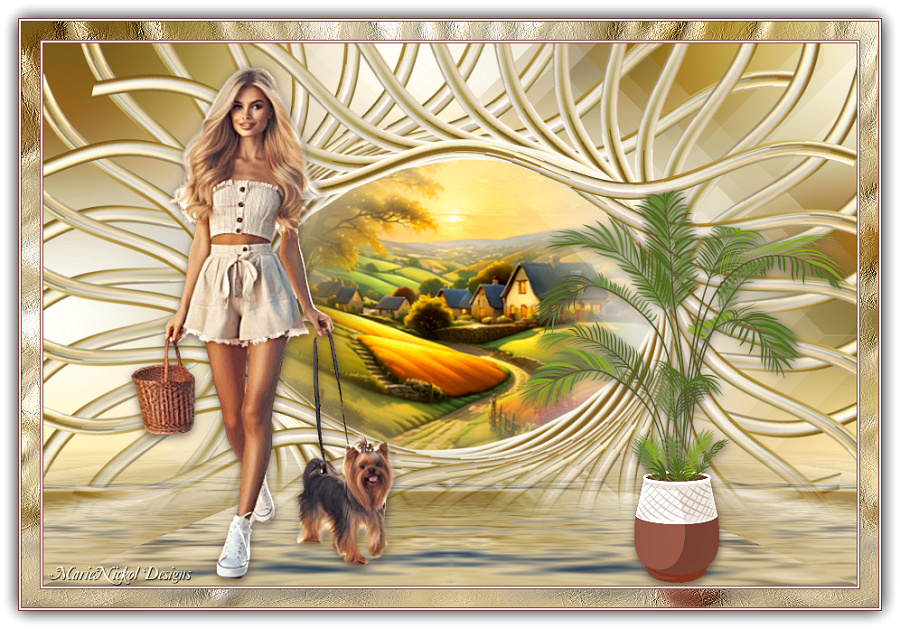
Original tutorial by Loiva
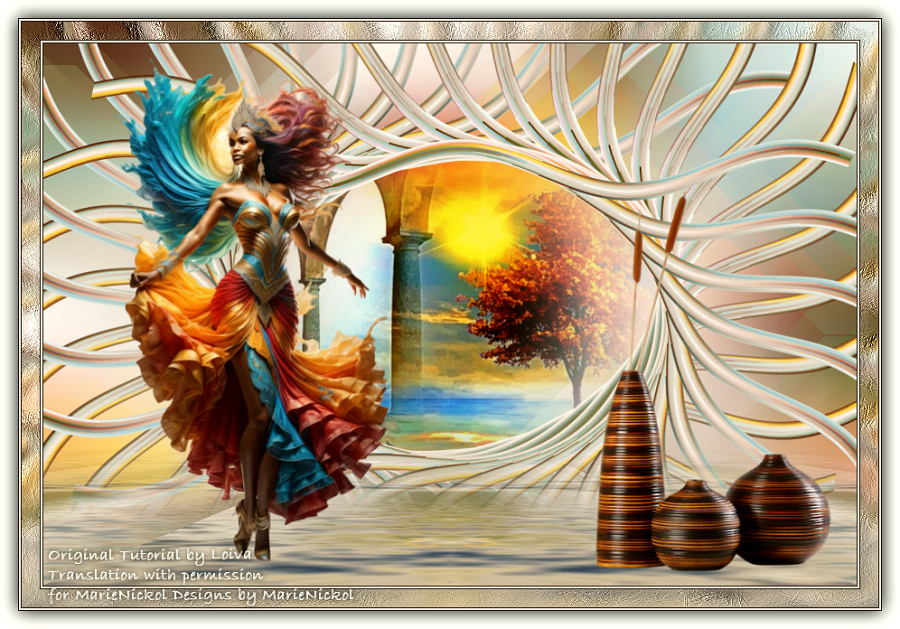
Thank you Loiva for the permission to translate your tutorial.
Translated by Marie Nickol.
You will find the original tutorial here:

This tutorial is a personal creation by Loiva.
Any resemblance with another one would only be pure coincidence.
Thank you for the respect of Loiva’s work and the tubers work.
These translations are mine and are intended for personal use only and it is forbidden to copy part or all of it.
You can use this tutorial for PSP lessons but please put the link back to it.
Do not hesitate to let Loiva or me know if you have any problem with the present tutorial.

Materials used:
Disclaimer: Modifying or renaming files or removing watermarks from the tubes of the original tubers provided in the materials and sharing them as your own or using them for sale online or otherwise is prohibited.
1 character tube
1 deco tube by Kamil
1 misted image
Plugins used:
Mehdi - Sorting Tiles
Toadies - What Are You
MuRa's Meister - Copies and Perspective Tiling
Flaming Pear - Flood
You can find my plugins page - Here
Materials

This translation is written with PSP 2020, if you work with other versions some things might be different but the result will be the same.
Note: In the latest versions of PSP the command
Image-Mirror has become Image - Mirror - Mirror Horizontal
and Image-Flip has become Image - Mirror - Mirror Vertical
I use the old versions of Image-Mirror and Image-Flip
Preparations
Duplicate all the tubes and work with the copies to preserve the originals.
If you don't have the plugins install them into your Plugins folder for PSP
Colors
Choose a light color and a dark color from your tubes
Loiva chose the following colors:

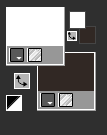
Materials Properties: Set your Foreground color to color 1  #ffffff
Materials Properties - Set your Background color to color 2  #322924
The Tutorial
Step 1
File - New - Open a new Transparent image 900 x 600 pixels
Flood fill tool / Fill in the Layer with white - Color 1  #ffffff
Step 2
Selections - Select All
Open the misted tube - 953bb7361
Edit - Copy
Edit - Paste Into Selection
Selections - Select None
Step 3
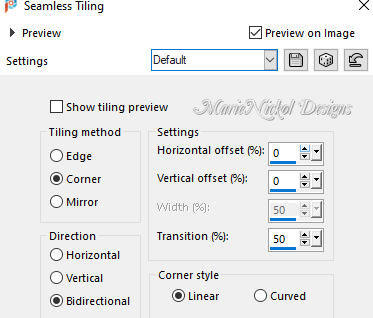
Effects - Image Effects - Seamless Tiling (default settings)
Step 4
Adjust - Blur - Gaussian Blur (Radius 30)
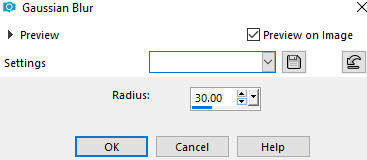
Step 5
Effects - Plugins - Mehdi - Sorting Tiles
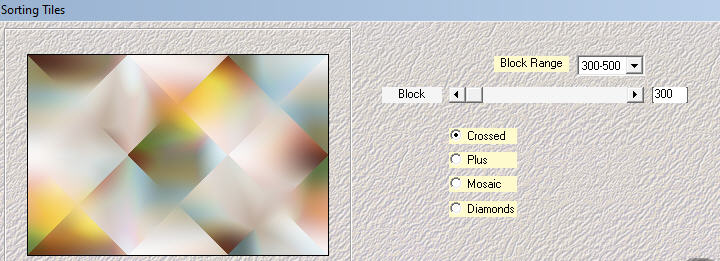
Step 6
Layers - Duplicate
Step 7
Activate the bottom layer - Raster 1
Effects - Plugins - Toadies - What Are You?

Step 8
Activate the top layer - Copy of Raster 1
Activate the Pick Tool (K) 
Push the top knot to 280 and the bottom knot to 300
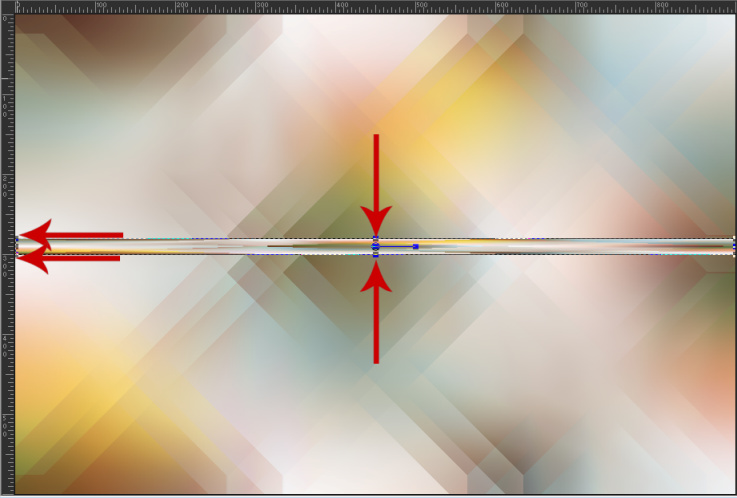
Press M on your keyboard to release the Pick Tool
Step 9
Effects - Distortion Effects - Wave
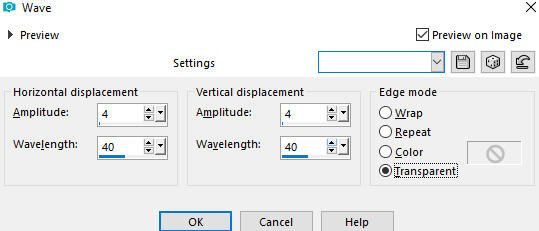
Step 10
Activate the Pick Tool (K) 
Stretch the right end of the strip to the right end side of your working image
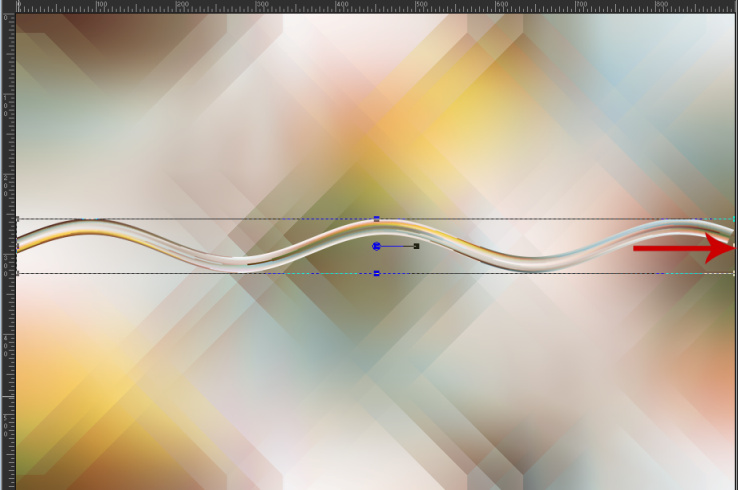
Press M on your keyboard to release the Pick Tool
Step 11
Effects - Plugins - MuRa's Meister - Copies
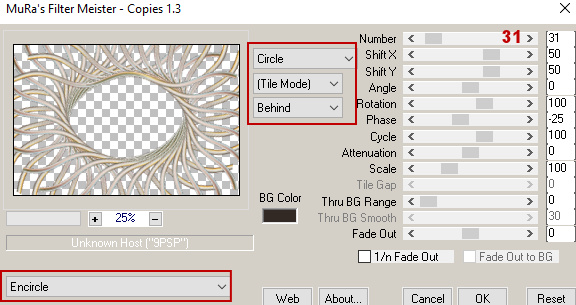
Step 12
Edit - Copy Special - Copy Merged
Edit - Paste As New Layer (on top of layer - Copy of Raster 1)
Step 13
Effects - Plugins - Flaming Pear - Flood
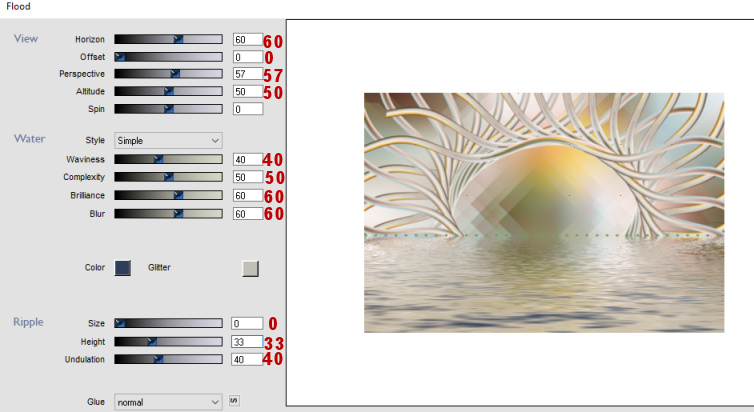
Step 14
Activate the Selection Tool (S)  - Custom Selection
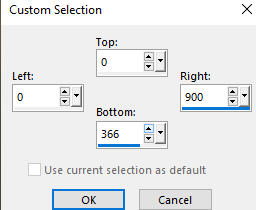
Press Delete on your keyboard
Step 15
Selections - Select None
Step 16
Effects - Plugins - MuRa's Meister - Perspective Tiling
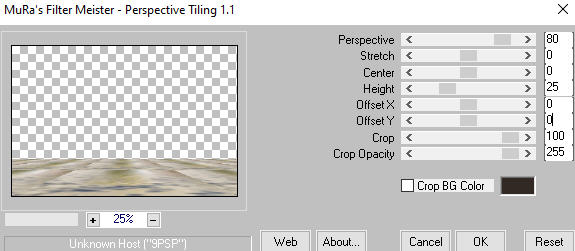
Step 17
Activate the Magic Wand Tool  - Tolerance 0 and Feather 80
Click on the empty space above
Step 18
Press the Delete key on your keyboard - 4 times
(Don't forget to put Feather back to 0)
Step 19
Effects - Reflection Effects - Rotating Mirror
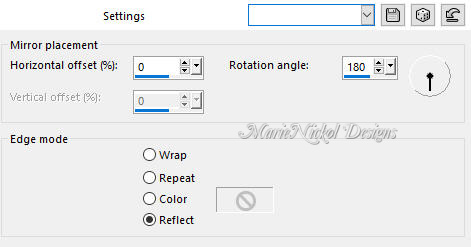
Step 20
Activate the bottom layer - Raster 1
Open the misted tube again- 953bb7361
Edit - Copy
Edit - Paste As New Layer on your working image
Position the tube at your own discretion
Your layers:
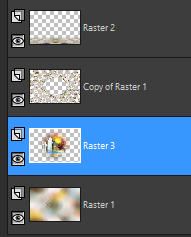
Step 21
Activate the top layer - Raster 2
Optional:
Open the character tube - 200b8a8ce48e5c2c20085f41dd37a90f-removebg-preview
Edit - Copy
Edit - Paste - Paste As New Layer on your working image
Image - Resize 90% Resize all layers not checked
Position the tube a little bit to the left as shown on the final result above or at your own discretion
Open the deco tube - KamilTube-768
Remove the watermark
Edit - Copy
Edit - Paste - Paste As New Layer on your working image
Image - Resize 85% Resize all layers not checked
Position the tube to the right as shown on the final result above or at your own discretion
(Note: You may use your own character tube and deco tube to your own liking)
Step 22
Edit - Copy Special - Copy Merged
Step 23
Image - Add Borders - 1 px - Symmetric checked - color 2  #322924
Image - Add Borders - 2 px - Symmetric checked - color 3  #f4e7e1
Image - Add Borders - 1 px - Symmetric checked - color 2  #322924
Step 24
Selections - Select All
Image - Add Borders - 20 px - Symmetric checked - color 1  #ffffff
Selections - Invert
Edit - Paste Into Selection (the image copied at Step 22)
Step 25
Effects - Art Media Effects - Brush Strokes
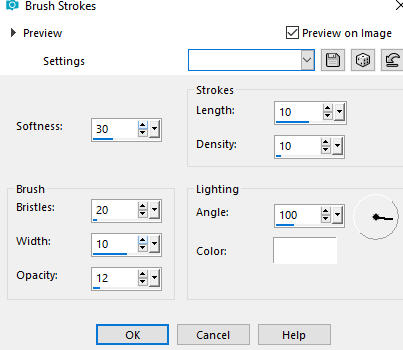
Selections - Select None
Step 26
Image - Add Borders - 1 px - Symmetric checked - color 2  #322924
Image - Add Borders - 2 px - Symmetric checked - color 3  #f4e7e1
Image - Add Borders - 1 px - Symmetric checked - color 2  #322924
Step 27
Selections - Select All
Image - Add Borders - 20 px - Symmetric checked - color 1  #ffffff
Effects - 3D Effects - Drop Shadow (0/0/100/30) color 4  #000000 - Shadow on new layer not checked
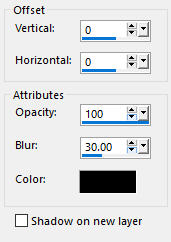
Selections - Select None
Step 28
Layers - New Raster Layer
Add your name or watermark
Layers - Merge - Merge All (Flatten)
Optional: Image - Resize - 900 pixels width (the height will adapt)
File - Export - Save as JPG file
~~~~~~~
My version with my own tubes made and AI generated
