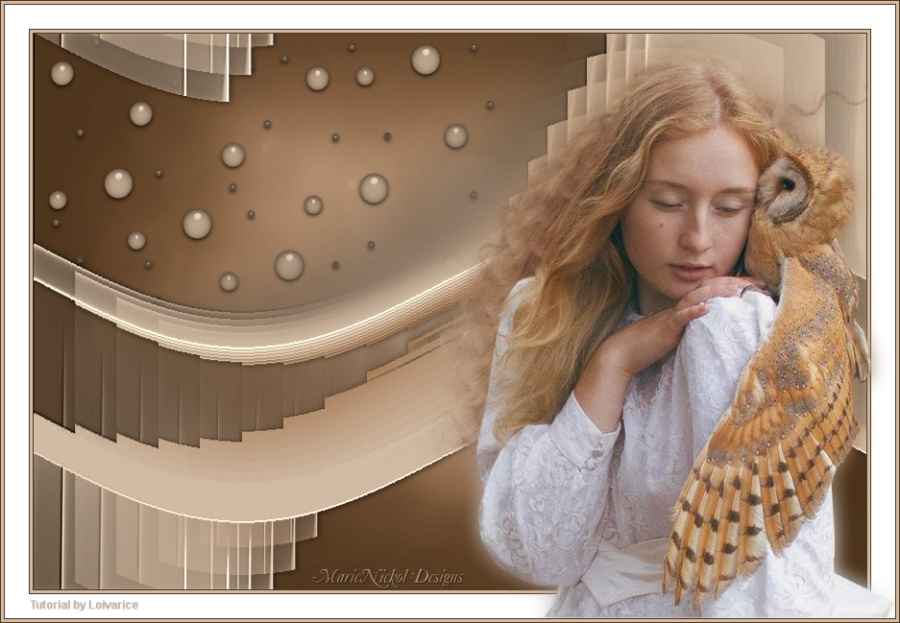
Original tutorial by Loiva
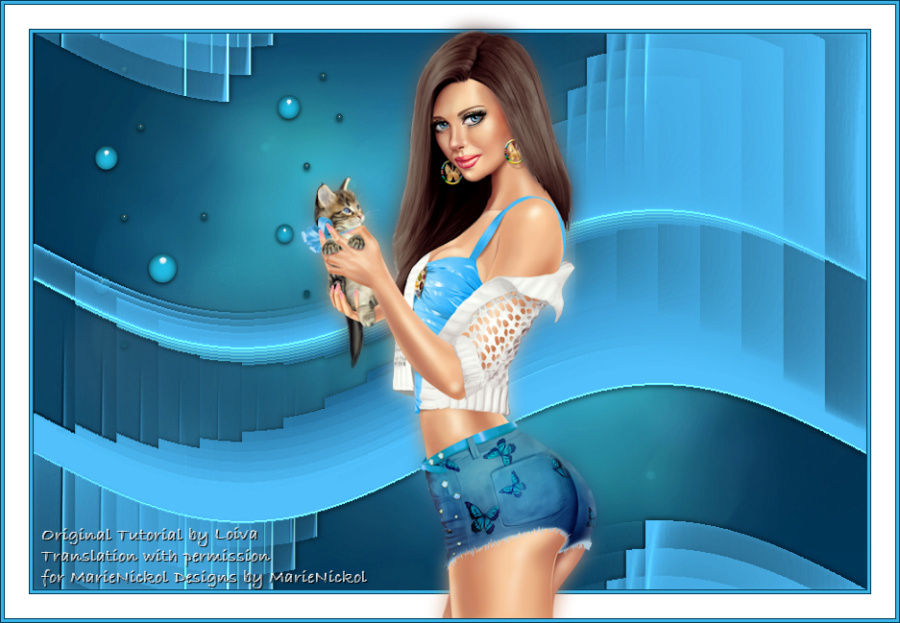
Thank you Loiva for the permission to translate your tutorial.
Translated by Marie Nickol.
You will find the original tutorial here:

This tutorial is a personal creation by Loiva.
Any resemblance with another one would only be pure coincidence.
Thank you for the respect of Loiva’s work and the tubers work.
These translations are mine and are intended for personal use only and it is forbidden to copy part or all of it.
You can use this tutorial for PSP lessons but please put the link back to it.
Do not hesitate to let Loiva or me know if you have any problem with the present tutorial.

Materials used:
Disclaimer: Modifying or renaming files or removing watermarks from the tubes of the original tubers provided in the materials and sharing them as your own or using them for sale online or otherwise is prohibited.
1 background texture
1 character tube
1 deco tube
1 mask
Plugins used:
Mura's Meister - Copies - Here
Filters Unlimited 2.0 -Filters Unlimited 2.0 - &Bkgdesigner sf10II - Murus Wave - Here
User Defined Filter - Emboss 3 - Here
Materials

This translation is written with PSP 2018 Ultimate, if you work with other versions some things might be different but the result will be the same.
Note: In the latest versions of PSP the command Image-Mirror has become Image - Mirror - Mirror Horizontal
and Image-Flip has become Image - Mirror - Mirror Vertical
Preparations
Duplicate all the tubes and work with the copies to preserve the originals.
If you don't have the plugins install them into your Plugins folder for PSP
Note: If you don't have the preset Emboss 3, you can download it above and place it into your Presets folder of PSP
Note: From your own tube choose two colors - one for Foreground color (lighter) and one for Background color (dark)
When
working with your own colors, adjust the Blend Mode/Opacity at your own discretion
Loiva chose the following colors:
Material Properties - Foreground: Set your Foreground color  #39b3e6
Materials Properties: Set your Background color to color  #013a55
The Tutorial
Step 1
Open the texture - Animation7 in your PSP program
Window - Duplicate (Shift + D)
Close the original and work on the copy
Step 2
Layers - New Raster Layer
Flood fill tool /Fill in the Layer with the Foregound Color you have chosen from your tube
Step 3
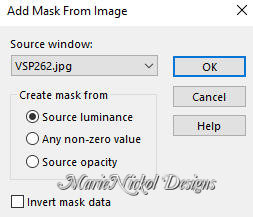
Open mask - VSP262
Layers - New Mask Layer - From Image (Invert mask data not checked)
Layers - Merge - Merge Group
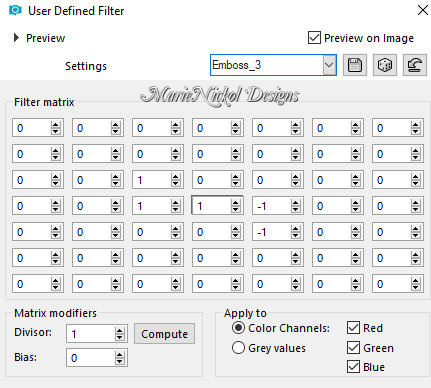
Effects - User Defined Filter - Emboss 3
Step 4
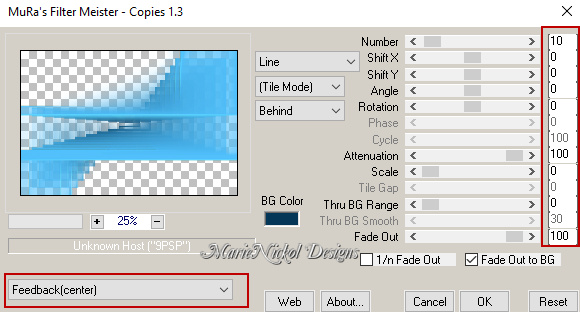
Effects - Plugins - Mura's Meister - Copies (default settings)
Step 5
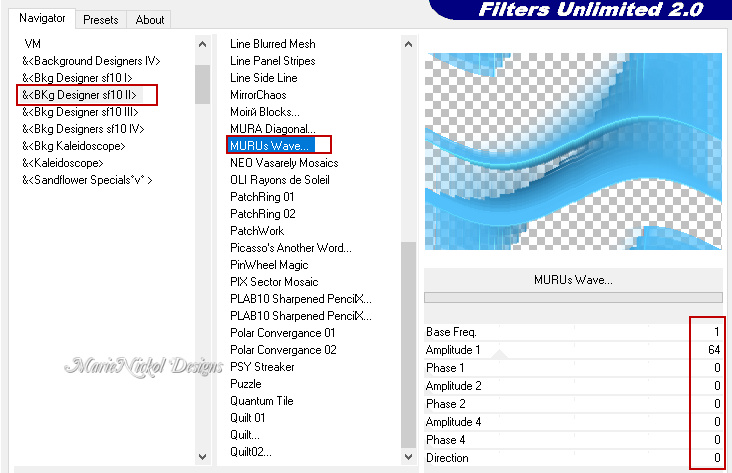
Effects - Plugins -<I.C.NET Software> - Filters Unlimited 2.0 - &Bkgdesigner sf10II - Murus Wave (default settings)
Step 6
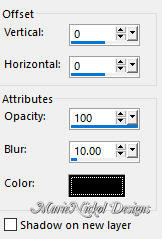
Effects - 3D Effects - Drop Shadow (0/0/100/10) color black #000000 - Shadow on new layer not checked
Step 7
Open deco tube - dropsabisal_camerontags
Edit - Copy
Edit - Paste - Paste As New Layer on your working image
Position the tube to your own liking or decorate to your own preference.
You may colorize to match your own colors.
Step 8
Layers - Merge - Merge Visible
Step 9
Image - Add Borders - 1px - Symmetric checked - dark color  #013a55
Image - Add Borders - 3px - Symmetric checked - light color  #39b3e6 (*the color you chose for your mask in step 2)
Image - Add Borders - 1px - Symmetric checked - dark color  #013a55
Image - Add Borders - 25px - Symmetric checked - color white #ffffff
Step 10
Open your character tube
Edit - Copy
Edit - Paste - Paste As New Layer on your working image
Resize if necessary and position it to your own liking
Layers - Duplicate
Adjust - Blur - Gaussian Blur (Radius 10)

Layers - Arrange - Move down
Step 11
Image - Add Borders - 1px - Symmetric checked - dark color  #013a55
Image - Add Borders - 3px - Symmetric checked - light color  #39b3e6 (*the color you chose for your mask in step 2)
Image - Add Borders - 1px - Symmetric checked - dark color  #013a55
Step 12
Layers - New Raster Layer
Add your name or watermark
Layers - Merge - Merge All (Flatten)
Image - Resize - 900 pixels width (the height will adapt)
File - Export - Save as JPG file
~~~~~~~
My version with a tube by Yoka
