Original tutorial by Loiva
Thank you Loiva for the permission to translate your tutorial.
Translated by Marie Nickol.
You will find the original tutorial here:

This tutorial is a personal creation by Loiva.
Any resemblance with another one would only be pure coincidence.
Thank you for the respect of Loiva’s work and the tubers work.
These translations are mine and are intended for personal use only and it is forbidden to copy part or all of it.
You can use this tutorial for PSP lessons but please put the link back to it.
Do not hesitate to let Loiva or me know if you have any problem with the present tutorial.

Materials used:
Disclaimer: Modifying or renaming files or removing watermarks from the tubes of the original tubers provided in the materials and sharing them as your own or using them for sale online or otherwise is prohibited.
1 alpha selections
1 character tube by Hebe
1 deco tube by Maryse
Plugins used:
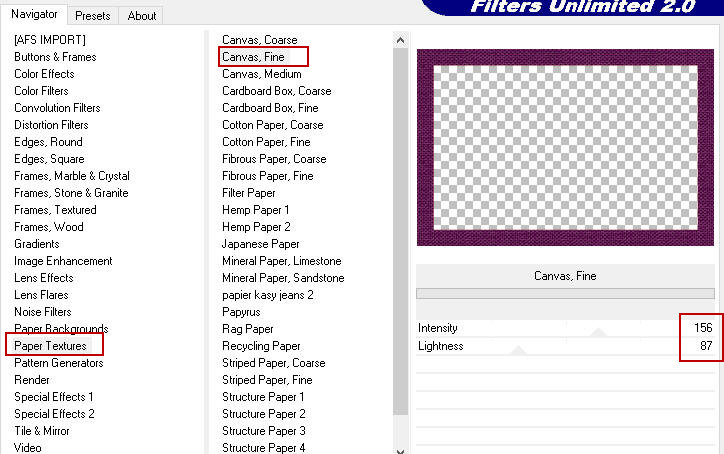
Filters Unlimited 2.0 - Paper Textures - Canvas Fine
MuRa's Meister - Perspective Tiling
You can find my plugins page - Here
Materials
This translation is written with PSP 2020, if you work with other versions some things might be different but the result will be the same.
Note: In the latest versions of PSP the command
Image-Mirror has become Image - Mirror - Mirror Horizontal
and Image-Flip has become Image - Mirror - Mirror Vertical
Preparations
Duplicate all the tubes and work with the copies to preserve the originals.
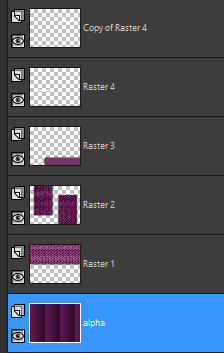
When you open the alpha_cative.pspimage file you will see a blank canvas.
It is not empty: it contains all the selections needed, saved to Alpha Channels.
If you don't have the plugins install them into your Plugins folder for PSP
The Tutorial
Step 1
Open the alpha_cative.pspimage file
Window - Duplicate
Close the original
Work on the copy
Rename this layer - alpha
Loiva chose the following colors:
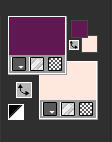
Materials Properties: Set your Foreground color to dark color 
Materials Properties - Set your Background color to light color 
Step 2
Flood fill tool / Fill in the layer with the dark color
Effects - Texture Effects - Blinds
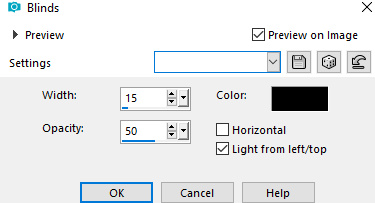
Effects - Edge Effects - Enhance
Step 3
Layers - New Raster Layer
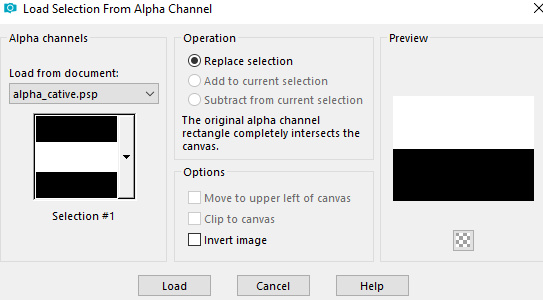
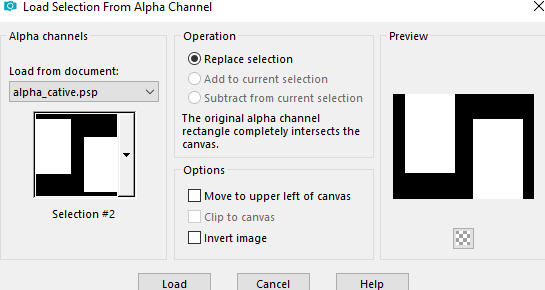
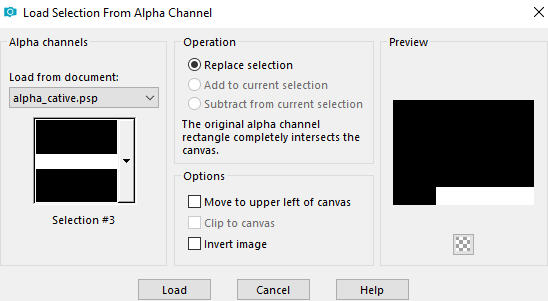
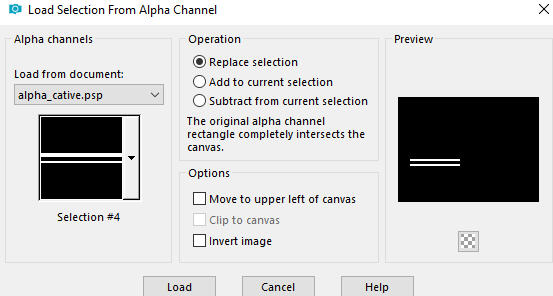
Selections - Load/Save Selection - Load Selection From Alpha Channel
Load Selection #1
Flood fill tool / Fill in the layer with the dark color
Step 4
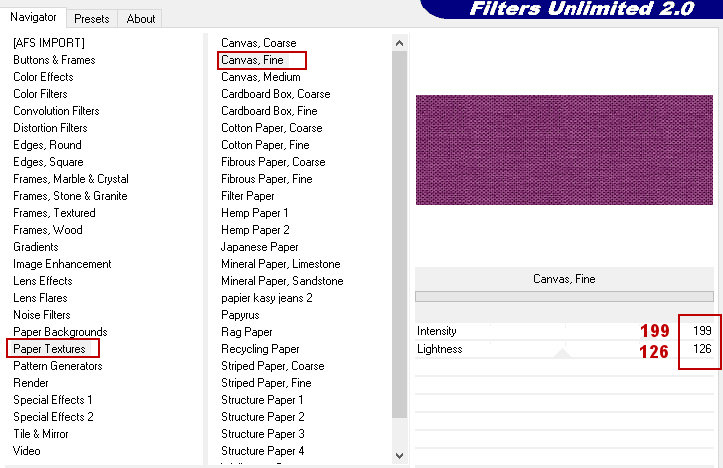
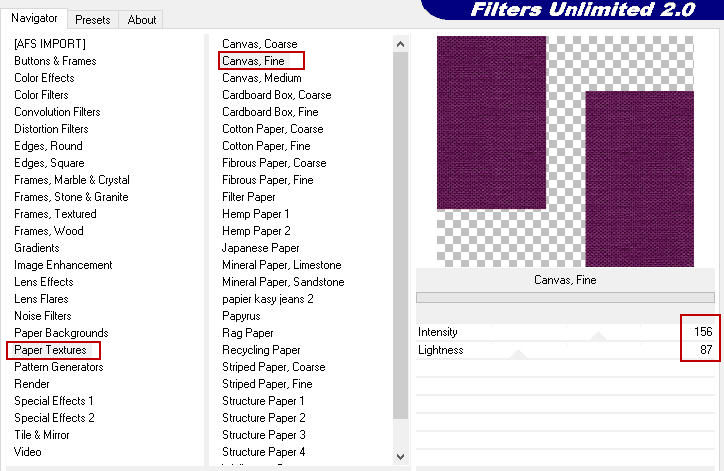
Effects - Plugins - <I.C.NET Software> - Filters Unlimited 2.0 - Paper Textures - Canvas Fine
Step 5
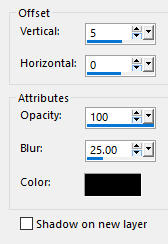
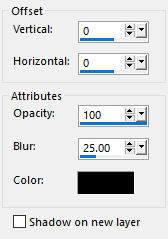
Effects - 3D Effects - Drop Shadow (5/0/100/25) color black #000000 - Shadow on new layer not checked
Selections - Select None
Step 6
Layers - New Raster Layer
Selections - Load/Save Selection - Load Selection From Alpha Channel
Load Selection #2
Flood fill tool / Fill in the layer with the dark color
Step 7
Effects - Plugins - <I.C.NET Software> - Filters Unlimited 2.0 - Paper Textures - Canvas Fine (default settings)
Step 8
Effects - 3D Effects - Drop Shadow (0/0/100/25) color black #000000 - Shadow on new layer not checked
Edit - Repeat Drop Shadow
Selections - Select None
Step 9
Layers - New Raster Layer
Selections - Load/Save Selection - Load Selection From Alpha Channel
Load Selection #3
Flood fill tool / Fill in the layer with the dark color
Step 10
Effects - Plugins - <I.C.NET Software> - Filters Unlimited 2.0 - Paper Textures - Canvas Fine
Step 11
Effects - 3D Effects - Drop Shadow (0/0/100/25) color black #000000 - Shadow on new layer not checked
Edit - Repeat Drop Shadow
Selections - Select None
Step 12
Layers - New Raster Layer
Selections - Load/Save Selection - Load Selection From Alpha Channel
Load Selection #4
Flood fill tool / Fill in the layer with the light color
Step 13
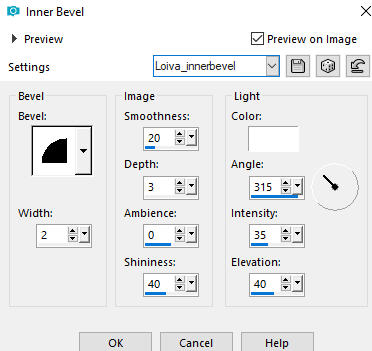
Effects - 3D Effects - Inner Bevel
Selections - Select None
Step 14
Layers - Duplicate
Image - Mirror - Mirror Horizontal (older versions - Image - Mirror)
Activate the Pick Tool (K) 
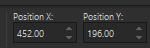
Enter these values for positions X and Y on the Toolbar
X: 452.00 Y: 196.00
Press M on your keyboard to release the Pick Tool
Step 15
Edit - Copy Special - Copy Merged
Edit - Paste As New Image
We continue to work on this image
Minimize the first one for now
Step 16
Image - Add Borders - 2px - Symmetric checked - color black #000000
Step 17
Selections - Select All
Image - Add Borders - 25px - Symmetric checked - dark color
Step 18
Selections - Invert
Effects - Texture Effects - Blinds
Selections - Select None
Step 19
Image - Add Borders - 2px - Symmetric checked - color black #000000
Step 20
Selections - Select All
Image - Add Borders - 50px - Symmetric checked - dark color
Step 21
Selections - Invert
Effects - Plugins - <I.C.NET Software> - Filters Unlimited 2.0 - Paper Textures - Canvas Fine (default settings)
Step 22
Maximize your first working image
Activate the bottom layer - alpha
Step 23
Edit - Copy
Edit - Paste - Paste As New Layer on your second working image (the framed one)
Do not move it - it is properly prositioned
Step 24
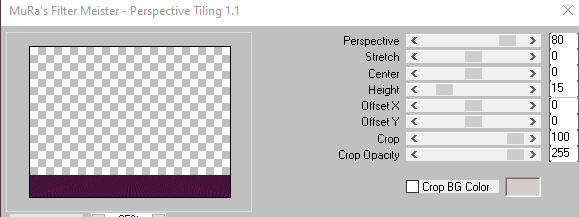
Effects - Plugins - MuRa's Meister - Perspective Tiling
Step 25
Activate the Magic Wand Tool  (Tolerance 0 and Feather 0)
Click on the upper empty space of the layer with the Magic Wand to select it
Step 26
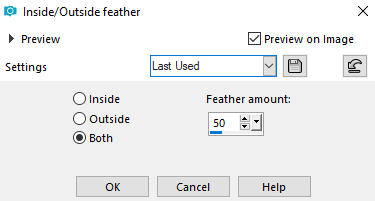
Selections - Modify - Inside/Outside Feather
Step 27
Press Delete 5 times with the Delete key on your keyboard
Selections - Select None
Step 28
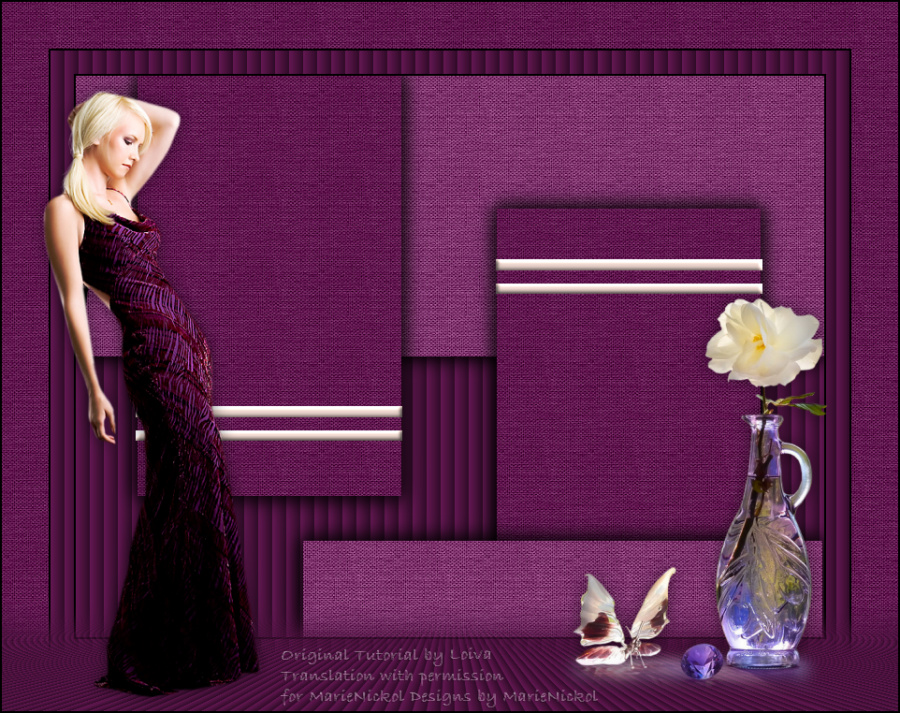
Open tube - woman391_ByHebe
Edit - Copy
Edit - Paste - Paste As New Layer on your working image
Rezise, position, and apply drop shadow according to liking
Step 29
Open tube - MR_White Flower in Purple Vase
Edit - Copy
Edit - Paste - Paste As New Layer on your working image
Rezise, position, and apply drop shadow according to liking
Step 30
Image - Add Borders - 2px - Symmetric checked - color black #000000
Step 31
Layers - New Raster Layer
Add your name or watermark
Layers - Merge - Merge All (Flatten)
Image - Resize - 900 pixels width (the height will adapt)
File - Export - Save as JPG file
~~~~~~~
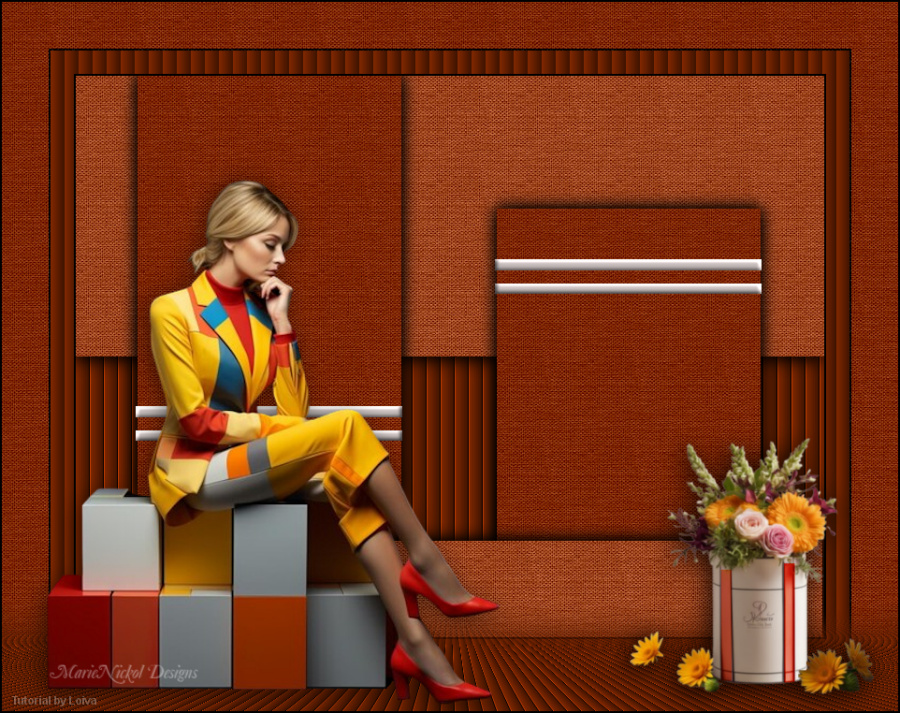
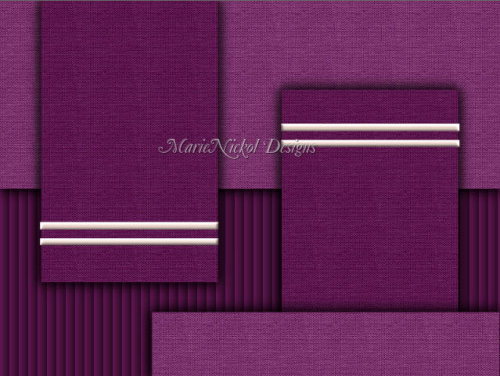
My version with my own tubes