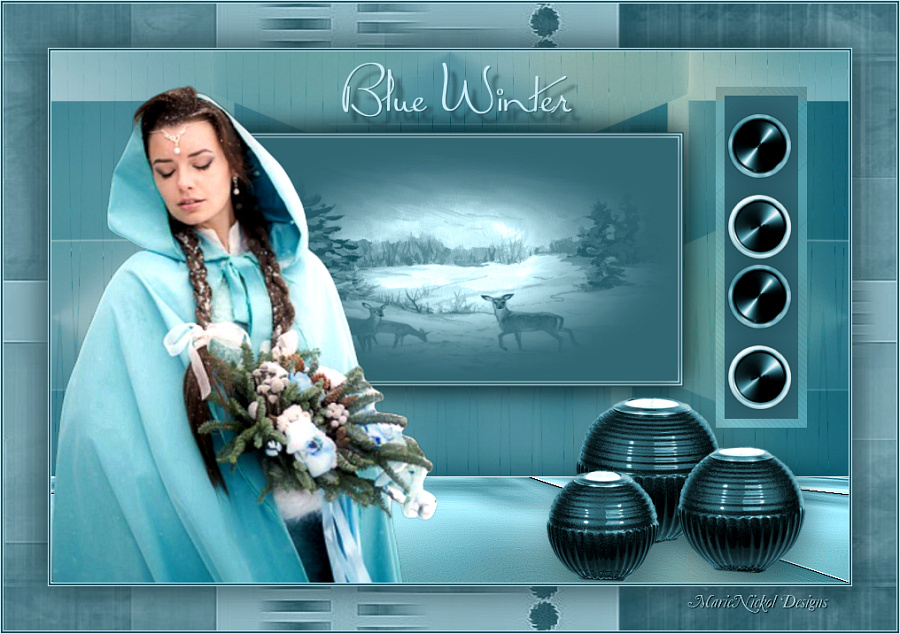
Original tutorial by SvC-Design
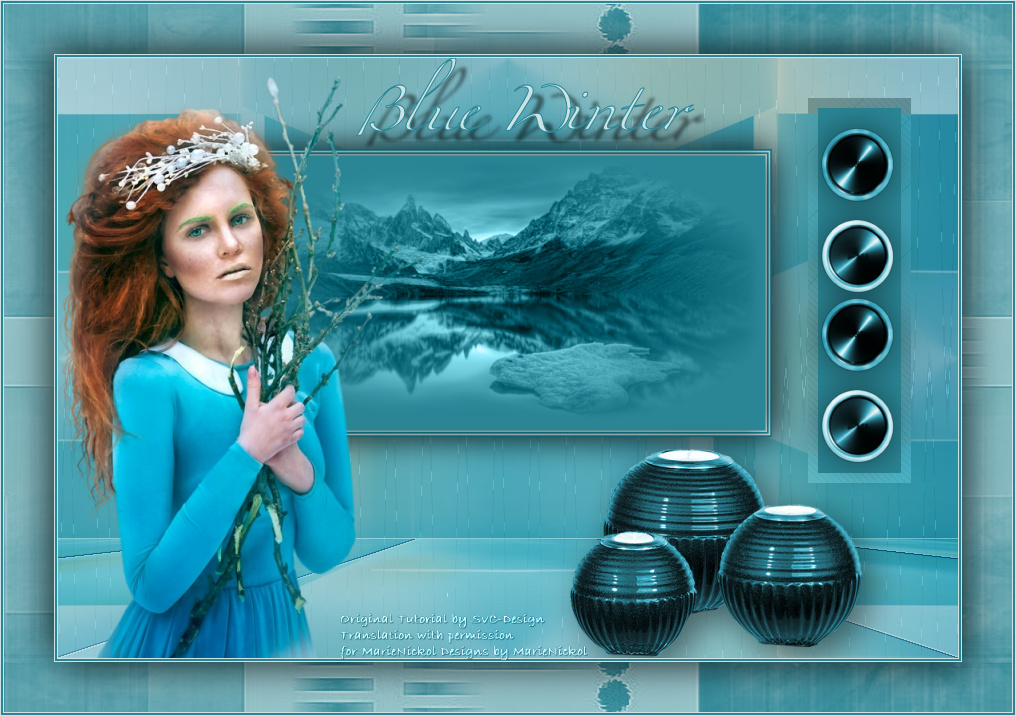
Thank you Sylviane for the permission to translate your tutorials.
Translated by Marie Nickol
You will find the original tutorial here:

This tutorial is a personal creation.
Any resemblance with another one would only be pure coincidence.
Thank you for the respect of SvC-Design’s work and the tubers work.
These translations are mine and are intended for personal use only and it is forbidden to copy part or all of it.
If you want to use this tutorial for PSP lessons, please put the link back to it.
Do not hesitate to let SvC-Design or me know if you have any problem with the present tutorial.

Materials used:
Disclaimer: Modifying or renaming files or removing watermarks from the tubes of the original tubers provided in the materials and sharing them as your own or using them for sale online or otherwise is prohibited.
1 tube by Libellule graphisme
1 tube deco by Guismo
1 tube deco by Ana Ridzi
1 misted tube by K@rine Dreams
1 Christmas scenery background image
2 masks
1 Selections
Plugins used:
Mura's Meister / Perstective Tilling
L en K landsiteofwonders / L en K's Paris
Materials

This translation is written with PSP 2018 Ultimate, if you work with other versions some things might be different but the result will be the same.
Note: In the latest versions of PSP the command Image-Mirror has become Image - Mirror - Mirror Horizontal and
Image-Flip has become Image - Mirror - Mirror Vertical
Preparations
Duplicate all the tubes and work with the copies to preserve the originals.
Place the Selection into your Selections folder of PSP
Place the masks into your Masks folder of PSP
Colours used:

Note: When
working with your own colors, adjust the Blend Mode/Opacity at your own discretion
The Lesson
Step 1
Open a new Transparent image 900 x 600 pixels
Selections - Select All
Open the background image - Christmas-Passage-Painting_lg1.jpg (don't close it, you will need it again)
Edit - Copy
Edit - Paste - Paste into Selection
Selections - Select None
Step 2
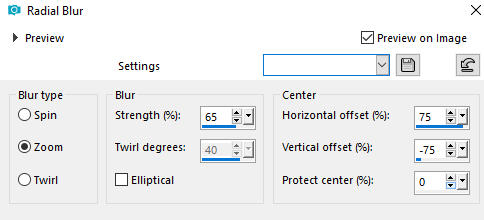
Adjust - Blur - Radial Blur
Step 3
Effects - Image Effects - Seamless Tiling - Default settings
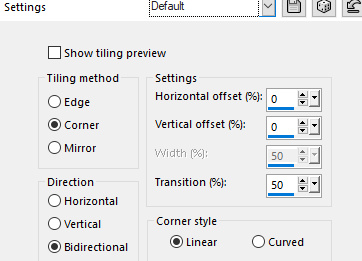
Adjust - Blur - Gaussian Blur

Step 4
Layers - New Raster Layer
Fill in the Layer with Color 1  #2a8295
Layers - Load/Save Mask - Load Mask From Disk
Look for and load mask circulart
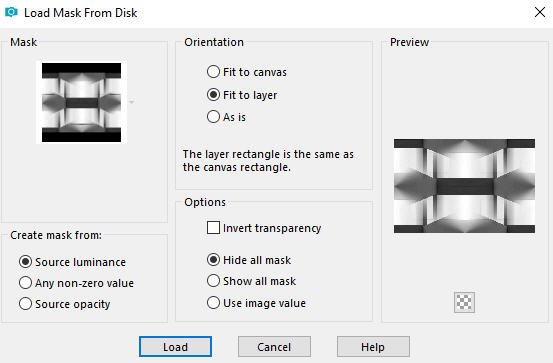
Layers - Merge - Merge Group
Step 5
Selections - Select All
Layers - New Raster Layer
Open the image Christmas-Passage-Painting_lg1.jpg again
Edit - Copy
Edit - Paste into Selection on your working image
In your Layer Properties change the Blend mode of this layer to Soft Llight
Adjust - Blur - Gaussian Blur

Selections - Select None
Step 6
Selections - Select All
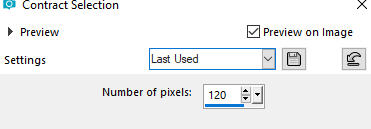
Selections - Modify - Contract - 120 pixels
Layers - New Raster Layer
Fill in the Layer with Color 1  #2a8295
Selections - Modify - Contract - 2 pixels
Fill in the Layer with Color 2  #cde3e3
Selections - Modify - Contract - 2 pixels
Fill in the Layer with Color 1  #2a8295
Selections - Modify - Contract - 2 pixels
Fill in the Layer with Color 2  #cde3e3
Selections - Modify - Contract - 2 pixels
Fill in the Layer with Color 1  #2a8295
Step 7
Open the misted tube k@rine_ dreams _Misted_Winter_2089_Novembre_2011 (or your own misted tube)
Edit - copy
On your working image:
Layers - New Raster Layer
Edit - Paste into Selection
Change the blend mode of this layer to Luminance (Legacy)
Note: Depending on your misted image you may change the blend mode to what suits you best.
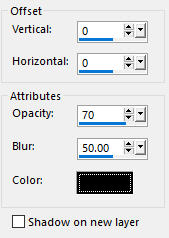
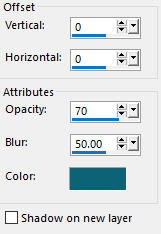
Effects - 3D Effects - Drop Shadow - Shadow on new layer not checked
Selections - Select None
Layers - Merge - Merge Down
Image - Resize - 80% - Resize All Layers - Not Checked
Effects - 3D Effects - Drop Shadow - Shadow on new layer not checked (the same drop shadow as above)

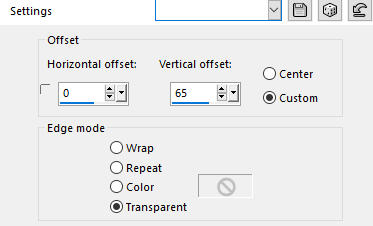
Effects - Image Effects - Offset
Step 8
Activate the layer below - Raster 2
Your layers look like this:
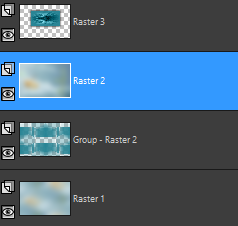
Selections - Load/Save Selection - Load Selection From Disk - load selectie1
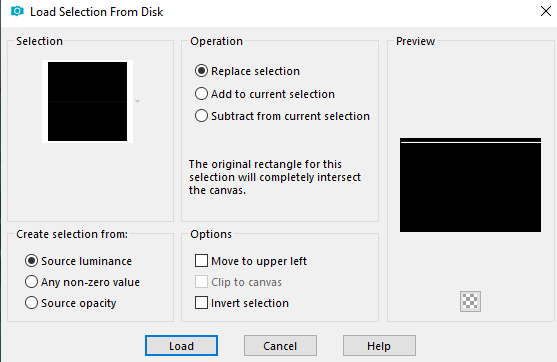
Selections - Promote Selection to Layer
Selection - select none
Effects - 3D Effects - Drop Shadow - Shadow on new layer not checked (the same drop shadow as above)

Effects - Distortion Effects - Wave
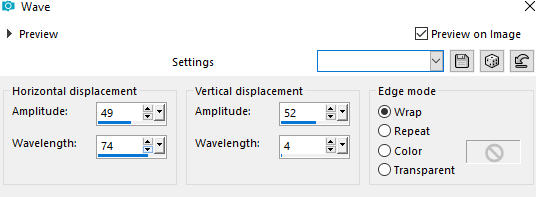
Change the blend mode of this layer (the Promoted Selection) to Soft Light
Step 9
Activate Raster 2 layer
Layers - Duplicate
Effects - Plugins -Mura's Meister - Perspective Tiling
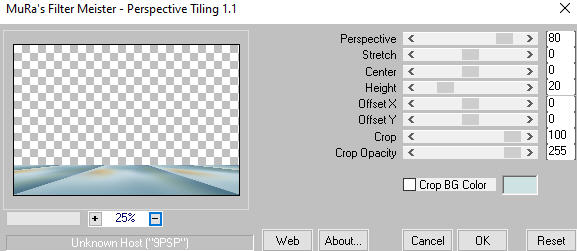
Layers - Arrange - Move Up
Change the blend mode of this layer to Luminance (Legacy)
Effects - Edge Effects - Enhance more
Effects - 3D Effects - Drop Shadow - Shadow on new layer not checked - Color dark  #0a6575
Step 10
Activate the top layer
Open lady tube libellulegraphisme_rousse_aux_branchages
Remove the watermark from the tube
Edit - copy
Edit - Paste - Paste As New Layer on your working image
Image - Resize 80% - Resize all layers not checked (2 times)
Image - Mirror - Mirror Horizontal
Move the tube to the left side as shown on the final result
Step 11
Activate Raster 2 layer again
Activate the Selection Tool (S)  - Custom selection

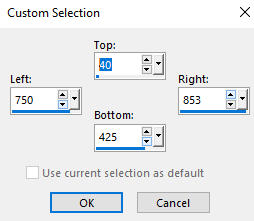
Selections - Promote Selection to Layer
Layers - Arrange - Bring to Top
Change the blend mode of this layer to Luminance (Legacy)
Effects - Plugins - L en K landsiteofwonders – L en K's Paris

Selections - Modify - Contract - 10 px
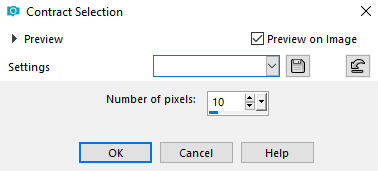
Layers - New Raster Layer
Fill in the layer with Color 1  #2a8595
Selections - Select None
Step 12
Open tube deco calguisdecor19012012
Edit - Copy
Edit - Paste as New Layer on your working image
Adjust - Hue and Saturation - Colorize
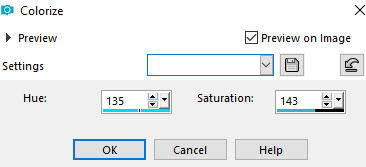
Image - Resize 50% Resize all layers not checked
Image - Resize 60% Resize all layers not checked
Image - Resize 85% Resize all layers not checked
Effects - Image Effects - Offset
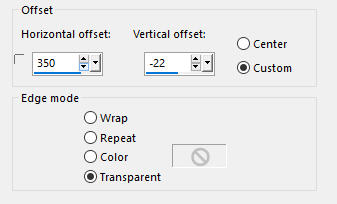
Layers - Duplicate
Effects - Image Effects - Offset
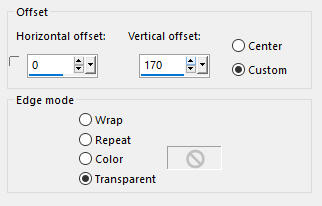
Layers - Merge - Merge Down
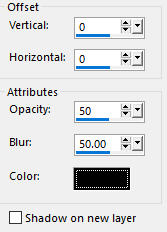
Effects - 3D Effects - Drop Shadow - Shadow on new layer not checked - color black
Step 13
Open tube deco AR914-deco
Adjust - Hue and Saturation - Colorize

Edit - Copy
Edit - Paste as New Layer on your working image
Image - Resize 80% Resize all layers not checked
Move the tube to the bottom right side as shown on the final result
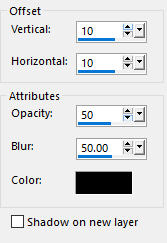
Effects - 3D Effects - Drop Shadow - Shadow on new layer not checked - color black
Step 14
Activate the Text Tool (T)
With a font of your choice type the text Blue Winter (or whatever you prefer)
Sylviane used font Miama for the tutorial - Size: 48 - it is not provided in the materials

Layers - Convert to Raster Layer
Effects - 3D Effects - Drop Shadow - Shadow on new layer not checked - Default Settings
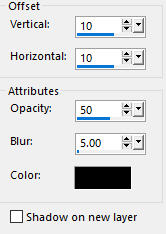
Step 15
Image - Add Borders - Symmetric checked - 1 px Color 2  #cde3e3
Image - Add Borders - Symmetric checked - 2 px Color 1  #2a8595
Image - Add Borders - Symmetric checked - 1 px Color 2  #cde3e3
Selections - Select All
Image - Add Borders - Symmetric checked - 50 px - Color 1 #2a8595
Selections - Invert
Layers - New Raster Layer
Fill in the selection with the light color 2  #cde3e3
Layers - Load/Save Mask - Load Mask From Disk
Look for and load mask kaart
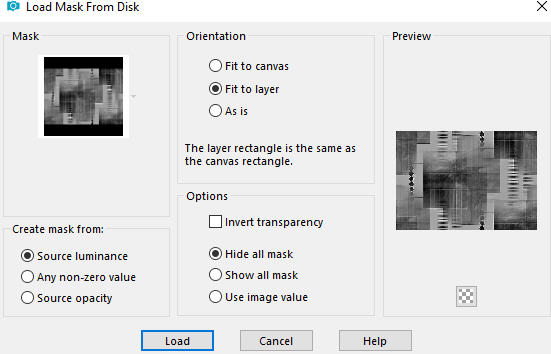
Layers - Merge - Merge Group
Selections - Invert
Effects - 3D Effects - Drop Shadow - Shadow on new layer not checked color black
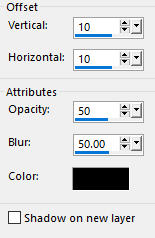
Repeat the Drop Shadow with minus 10
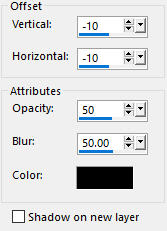
Selections - Select None
Step 16
Image - Add Borders - Symmetric checked - 1 px Color 2  #cde3e3
Image - Add Borders - Symmetric checked - 2 px Color 1  #2a8595
Image - Add Borders - Symmetric checked - 1 px Color 2  #cde3e3
Step 17
Add your name or watermark
Layers - Merge All (Flatten)
Step 18
Resize if you wish, and save it as JPG file.
~~~~~~~
My version with a tube by Sylvie Erwan and my own misted image
