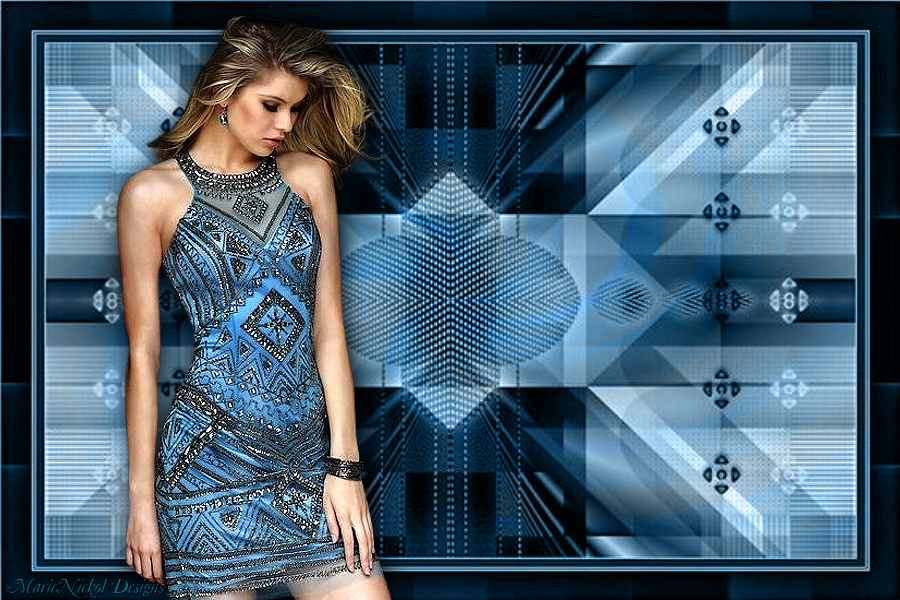
Original tutorial by Loiva
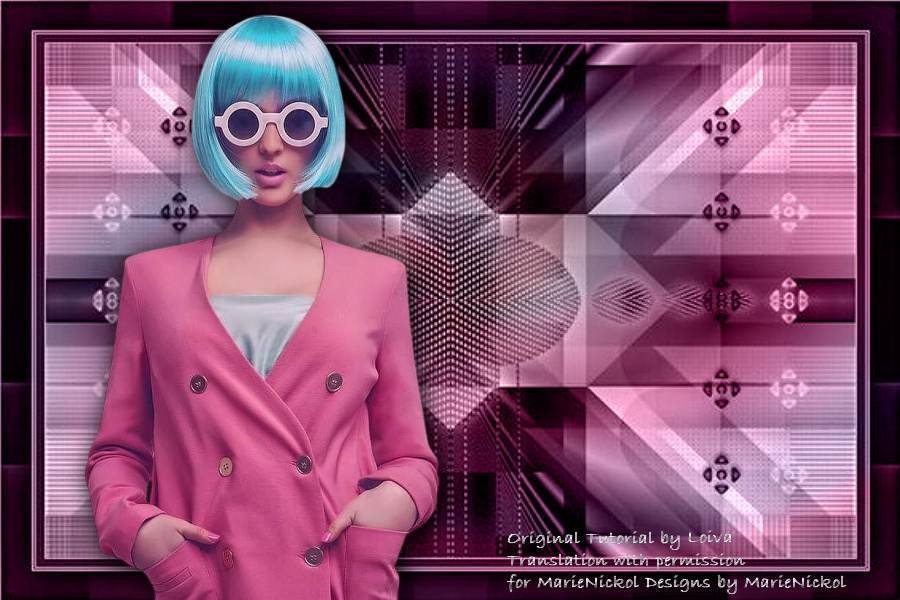
Thank you Loiva for the permission to translate your tutorial.
Translated by Marie Nickol.
You will find the original tutorial here:

This tutorial is a personal creation by Loiva.
Any resemblance with another one would only be pure coincidence.
Thank you for the respect of Loiva’s work and the tubers work.
These translations are mine and are intended for personal use only and it is forbidden to copy part or all of it.
You can use this tutorial for PSP lessons but please put the link back to it.
Do not hesitate to let Loiva or me know if you have any problem with the present tutorial.

Materials used:
Disclaimer: Modifying or renaming files or removing watermarks from the tubes of the original tubers provided in the materials
and sharing them as your own or using them for sale online or otherwise is prohibited.
1 character tube by VM
1 mask
Plugins used:
Alien Skin Eye Candy 5 - Impact - Perspective shadow
You can find my plugins page - Here
Materials

This translation is written with PSP 2020
If you work with other versions some things might be different, but the result will be the same.
Note: In the latest versions of PSP the command
Image-Mirror has become Image - Mirror - Mirror Horizontal
and Image-Flip has become Image - Mirror - Mirror Vertical
Preparations
Duplicate the tube and work with the copies to preserve the originals.
If you don't have the plugins install them into your Plugins folder for PSP
The Tutorial
Colors used
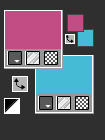
Materials Properties: Set your Foreground color 1  #c64a84
Materials Properties - Set your Backgroundcolor to color 2  #42bdd6
Note: When working with own colors - choose two colors from your tube
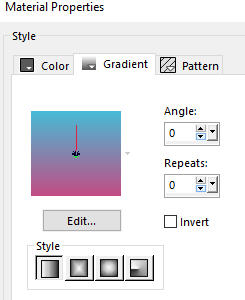
Materials Properties: Set your Foreground Color to foreground-background Linear gradient (Corel_06_029)
with the following settings:
Step 1
File - New - Open a new Transparent image 900 x 600 pixels
Flood fill tool / Fill in the layer with the Linear gradient prepated above
Step 2
Selections - Select All
Open tube - 941-vmtubes
Edit - Copy
Edit - Paste - Paste into Selection the tube on your working image
Selections - Select None
Step 3
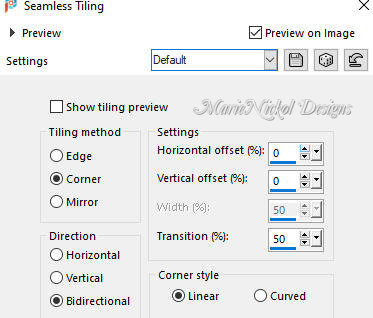
Effects - Image Effects - Seamless Tiling (default settings)
Step 4
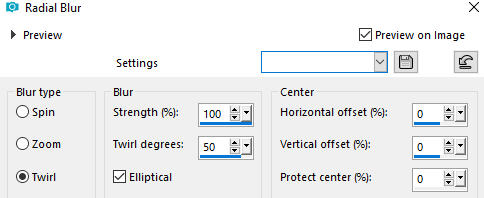
Adjust - Blur - Radial Blur
Step 5
Layers - New Raster Layer
Selections - Select All
Open mask - 50505cf6dc4854695b3bff026d6ab569
Edit - Copy
Edit - Paste - Paste into Selection on your working image
Selections - Select None
Step 6
In your Layer Properties - set the Blend mode to Luminance (Legacy)
(Note: you may adapt the choice of blend mode depending on your own choice of colors)
Step 7
Adjust - Sharpness- Sharpen
Step 8
Open tube - 941-vmtubes - again
Edit - Copy
Edit - Paste - Paste As New Layer on your working image
Image - Resize - 73% - Resize All Layers - Not Checked
Position the tube on the left as shown on the final result above
Step 9
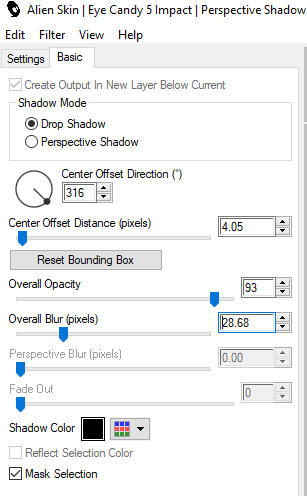
Effects - Plugins - Alien Skin Eye Candy 5 - Impact - Perspective shadow
Apply these settings in the Basic Tab:
Step 10
Layers - New Raster Layer
Add your name or watermark
Layers - Merge - Merge All (Flatten)
File - Export - Save as JPG file
~~~~~~~
My version with my own tube
