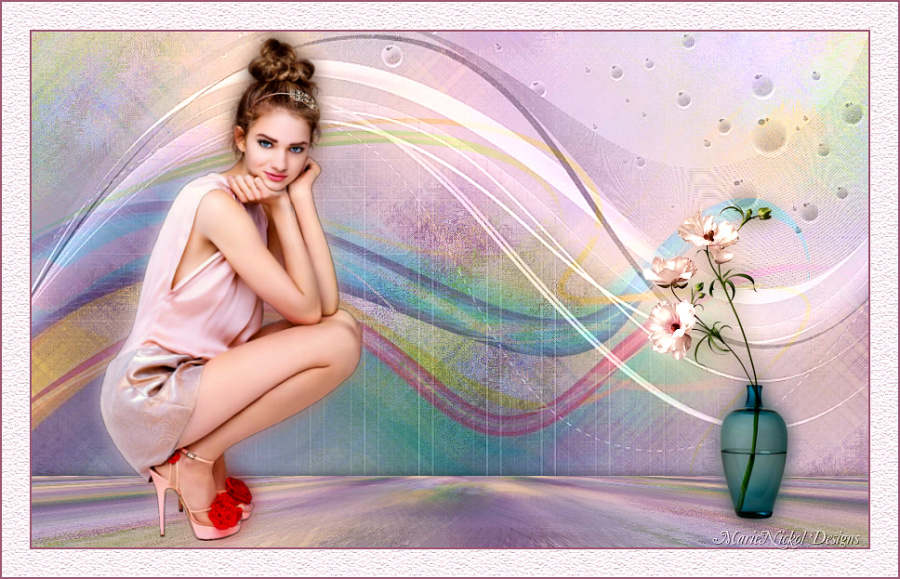
Original tutorial by Loiva
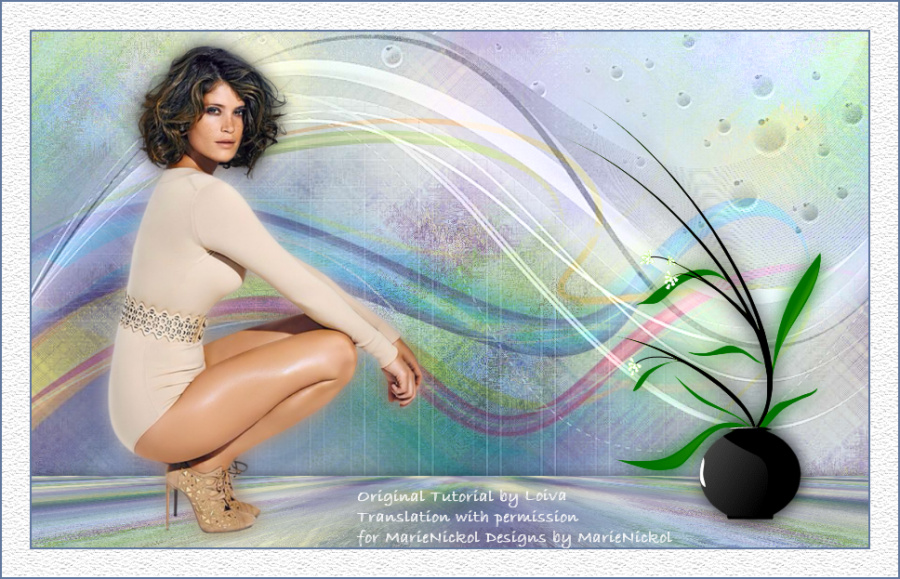
Thank you Loiva for the permission to translate your tutorial.
Translated by Marie Nickol.
You will find the original tutorial here:

This tutorial is a personal creation by Loiva.
Any resemblance with another one would only be pure coincidence.
Thank you for the respect of Loiva’s work and the tubers work.
These translations are mine and are intended for personal use only and it is forbidden to copy part or all of it.
You can use this tutorial for PSP lessons but please put the link back to it.
Do not hesitate to let Loiva or me know if you have any problem with the present tutorial.

Materials used:
Disclaimer: Modifying or renaming files or removing watermarks from the tubes of the original tubers provided in the materials and sharing them as your own or using them for sale online or otherwise is prohibited.
1 character tube by LB
1 deco tube by Nicole
1 texture
1 background image
1 mask
Plugins used:
MuRa's Meister - Perspective Tiling - Here
Texture - Texturizer - Here
Materials

This translation is written with PSP 2020, if you work with other versions some things might be different but the result will be the same.
Note: In the latest versions of PSP the command
Image-Mirror has become Image - Mirror - Mirror Horizontal
and Image-Flip has become Image - Mirror - Mirror Vertical
Preparations
Duplicate all the tubes and work with the copies to preserve the originals.
If you don't have the plugins install them into your Plugins folder for PSP
The Tutorial
Step 1
Open the texture - Texture-dell in your PSP program
Window - Duplicate (Shift + D)
Close the original and work on the copy
Step 2
Layers - New Raster Layer
Flood fill tool /Fill in the Layer with color white - #ffffff
Open mask - 114387098_g__9_
Layers - New Mask Layer - From Image - Invert mask data not checked
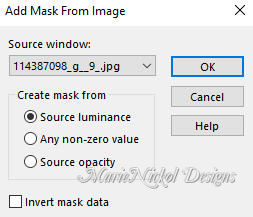
Layers - Merge - Merge Group
Step 3
Adjust - Sharpness- Sharpen
Step 4
Image - Flip
In your Layer Properties - set the Blend mode to Luminance (Legacy)
Step 5
Open image - Abstract-Lines
Edit - Copy
Edit - Paste - Paste As New Layer on your working image
Activate the Pick Tool (K) 
Enter these values for positions X and Y on the Toolbar
X: 0.00 Y: 0.00

Press M on your keyboard to release the Pick Tool
Step 6
Layers - Arrange - Move Down
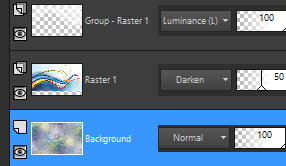
In your Layer Properties - set the Blend mode to Darken and the Opacity to 50%
Your layers look like this:
Step 7
Activate the bottom layer- Background (the texture layer)
Layers - Duplicate
Layers - Arrange - Bring to Top
Step 8
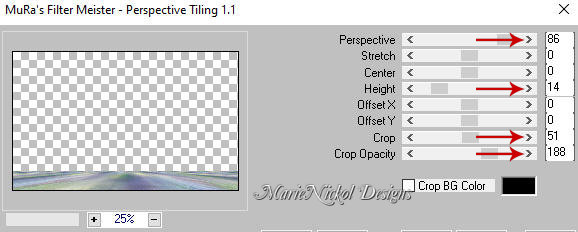
Effects - Plugins - MuRa's Meister - Perspective Tiling
Step 9
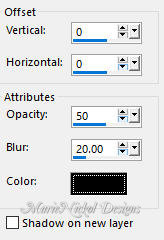
Effects - 3D Effects - Drop Shadow (0/0/50/20) color black #000000 - Shadow on new layer not checked
Step 10
Open the character tube - 2301 - woman - LB TUBES
Edit - Copy
Edit - Paste - Paste As New Layer on your working image
Resize if necessary and position it to your own liking
Layers - Duplicate
Step 11
Activate the layer underneath (the original tube)
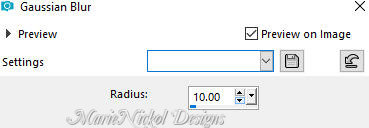
Adjust - Blur - Gaussian Blur (Radius 10)
Step 12
Activate the top layer
Open the deco tube - nicole-vase2-2012
Edit - Copy
Edit - Paste - Paste As New Layer on your working image
Position it to your own liking
Step 13
Layers - Duplicate
Activate the layer underneath (the original tube)
Adjust - Blur - Gaussian Blur (Radius 10)

Step 14
Image - Add Borders - 2 px - Symmetric checked - choose a dark color from your tube
Step 15
Selections - Select All
Image - Add Borders - 30 px - Symmetric checked - color white #ffffff
Selections - Invert
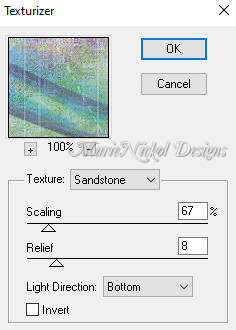
Effects - Plugins - Texture - Texturizer
Step 16
Image - Add Borders - 2 px - Symmetric checked - dark color
Step 17
Layers - New Raster Layer
Add your name or watermark
Layers - Merge - Merge All (Flatten)
Image - Resize - 900 pixels width (the height will adapt)
File - Export - Save as JPG file
~~~~~~~
My version with a woman tube by Tocha and a deco vase tube by Vera Mendes
