
Original tutorial by Jolcsi
Thank you Jolcsi for the permission to translate your tutorial.
Translated by Marie Nickol.
You will find the original tutorial here:
This tutorial is a personal creation by Jolsci.
Any resemblance with another one would only be pure coincidence.
Thank you for the respect of Jolcsi’s work and the tubers work.
These translations are mine and are intended for personal use only and it is forbidden to copy part or all of it.
You can use this tutorial for PSP lessons but please put the link back to it.
Do not hesitate to let Jolcsi or me know if you have any problem with the present tutorial.

Materials used:
Disclaimer: Modifying or renaming files or removing watermarks from the tubes of the original tubers provided in the materials and sharing them as your own or using them for sale online or otherwise is prohibited.
1 character tube by Jolcsi
1 misted tube by Jolcsi
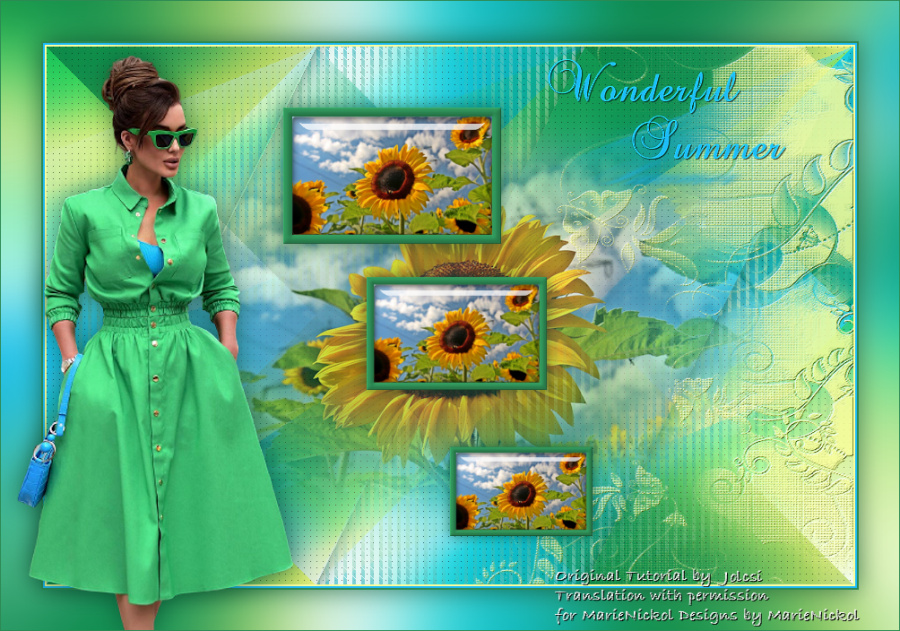
1 image scenery
2 selections
1 mask
1 text tube by Jolcsi
1 font
Plugins used:
Mehdi - Wavy Lab 1.1
Mehdi - Sorting Tiles
Filters Unlimited 2.0 - Deformation - Send Me An Angle
Filters Unlimited 2.0 - Transparency - Eliminate Black
Alien Skin/Eye Candy5 - Impact -Glass
AP 01 (Innovations) - Lines - SilverLining
Mura's Meister - Copies
Mura's Seamless - Emboss at Alpha
You can find my plugins page - Here
Materials

The original tutorial is written on PSP 2020.
This translation is written with PSP 2020.
If you work with other versions some things might be different but the result will be the same.
Note: In the latest versions of PSP the command
Image-Mirror has become Image - Mirror - Mirror Horizontal
and Image-Flip has become Image - Mirror - Mirror Vertical
Preparations
Duplicate all the tubes and work with the copies to preserve the originals.
Place the selections into your Selections folder of PSP.
Adjust the Blend Mode and Opacity to your own liking.
Install the font to your Windows Fonts or -
If you use a font viewer software open it with your software - the font will be available in your PSP
If using other colors, you may need to colorize some of the elements.
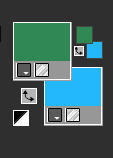
Colors used:

Material Properties - Foreground: Set your Foreground color to color 1  #2d8a54
Material Properties - Background: Set your Background color to color 2  #1dbbf9
The Tutorial
Step 1
File - New - Open a new Transparent image 900 x 600 pixels
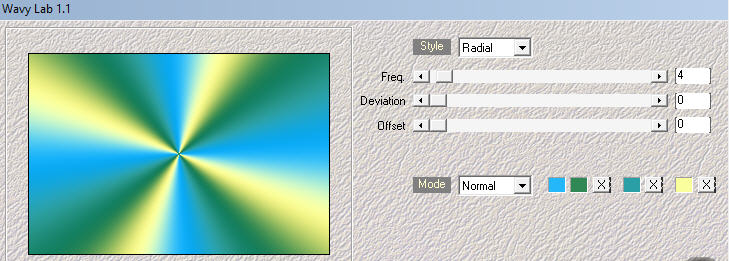
Effects - Plugins - Mehdi - Wavy Lab 1.1
Adjust - Blur - Gaussian Blur (Radius 40)

Effects - Plugins - Mehdi - Sorting Tiles
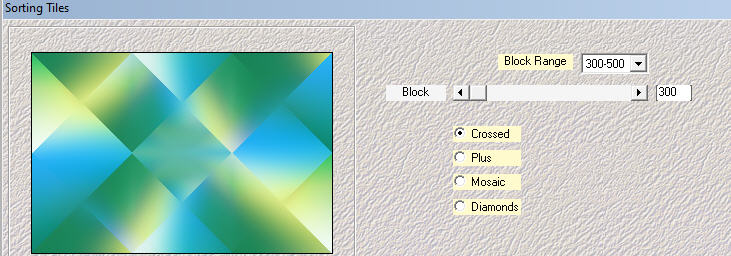
Effects - Edge Effects - Enhance
Layers - Duplicate
Step 2
Effects - Plugins - <I.C.NET Software> - Filters Unlimited 2.0 - Deformation - Send Me An Angle
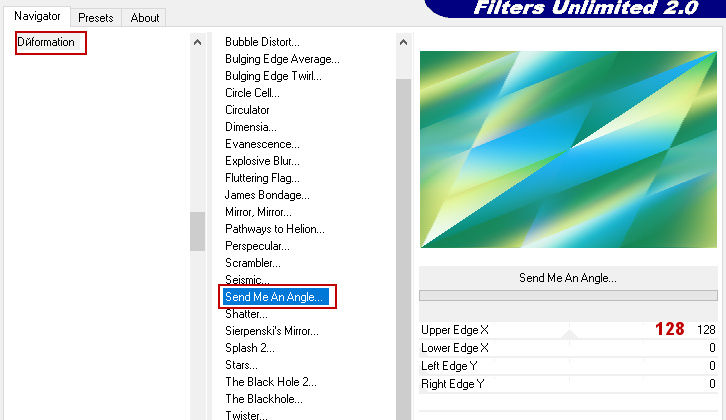
In your Layer Properties - set the Blend mode to Hard Light and the Opacity to 50%
Step 3
Selections - Load/Save Selection - Load Selection From Disk
Look for and load the selection - 2753
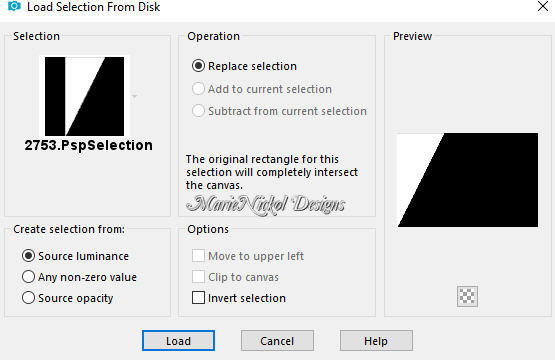
Selections - Promote Selection to Layer
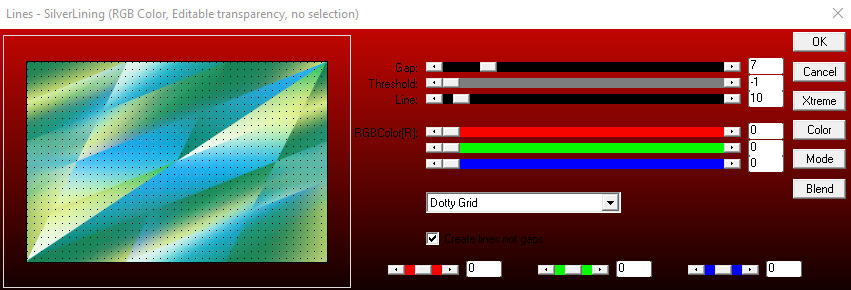
Effects - Plugins - AP 01 (Innovations) - Lines - SilverLining
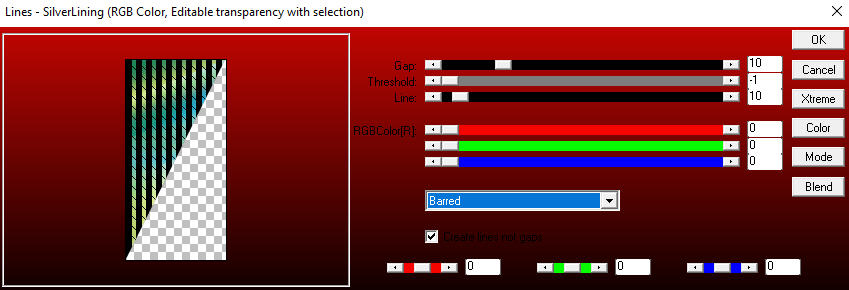
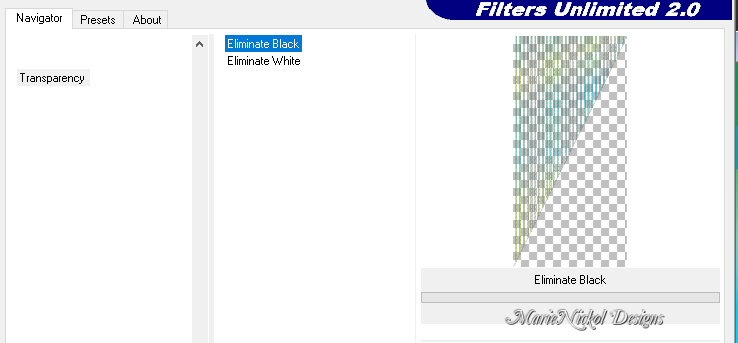
Effects - Plugins - <I.C.NET Software> - Filters Unlimited 2.0 - Transparency - Eliminate Black
Selections - Invert
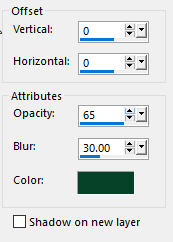
Effects - 3D Effects - Drop Shadow (0/0/65/30) color 4  #054328 - Shadow on new layer not checked
Selections - Select None
Layers - Duplicate
Image - Mirror - Mirror Horizontal
Mirror - Mirror Vertical
Layers - Merge - Merge Down
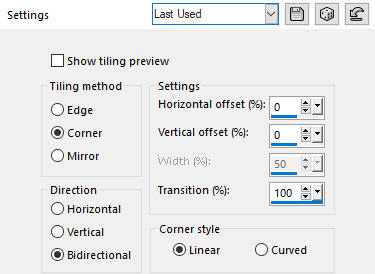
Effects - Image Effects - Seamless Tiling
Step 4
Activate the layer underneath - Copy of Raster 1
Effects - Plugins - AP 01 (Innovations) - Lines - SilverLining
Activate the top layer - Promoted Selection
Step 5
Layers - New Raster Layer
Selections - Load/Save Selection - Load Selection From Disk
Look for and load the selection - 2753a
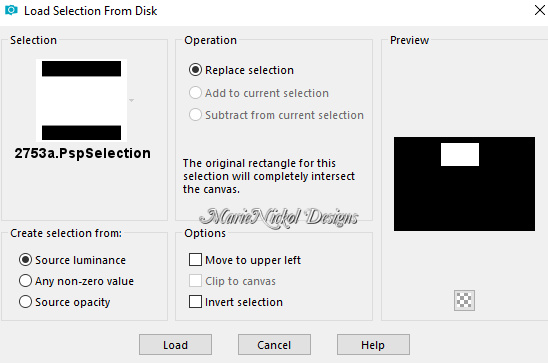
Flood fill tool / Fill in the layer with your foreground color 1  #2d8a54
Selections - Modify - Contract

Press the Delete key on your keyboard
Step 6
Open the image - napraforgó
Layers - New Raster Layer
Edit - Copy
Edit - Paste - Paste into Selection on your working image
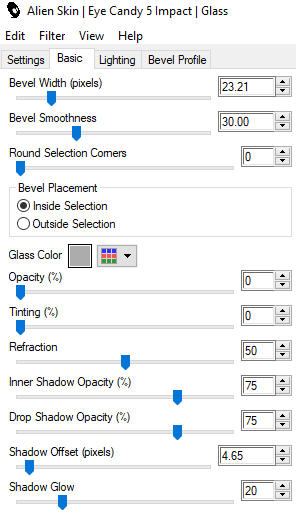
Effects - Plugins - Alien Skin - Eye Candy 5 - Impact - Glass
Use these settings in the Basic Tab:
Selections - Select None
Layers - Arrange - Move Down
Step 7
Activate the top layer - Raster 2
Activate the Magic Wand Tool  (Tolerance 0 and Feather 0)
Select the border frame
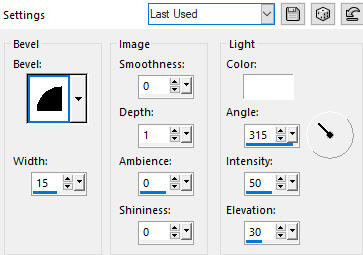
Effects - 3D Effects - Inner Bevel
Selections - Select None
Layers - Merge - Merge Down
Effects - 3D Effects - Drop Shadow (0/0/65/30) color 4  #054328 - Shadow on new layer not checked

Step 8
Effects - Plugins - MuRa's Meister - Copies
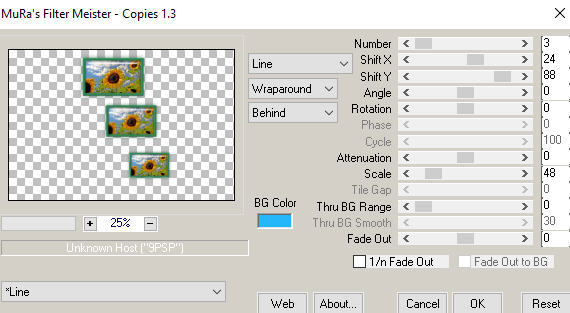
Activate the Pick Tool (K) 
Enter these values for positions X and Y on the Toolbar
X: 242.00 Y: 46.00

Press M on your keyboard to release the Pick Tool
Step 9
Activate the second layer from the bottom - Copy of Raster 1
Open tube - napraforgó2
Remove the watermark
Edit - Copy
Edit - Paste - Paste As New Layer on your working image
Do not move it - it is in the right place
In your Layer Properties - set the Opacity of this layer to 80%
Step 10
Activate the upper layer - Promoted Selection
Layers - New Raster Layer
Flood fill tool / Fill in the layer with your foreground color 3  #fafe9c
Open mask - 0055 maszk
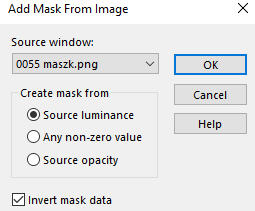
Layers - New Mask Layer - From Image - Invert mask data checked
Layers - Duplicate - 2 times
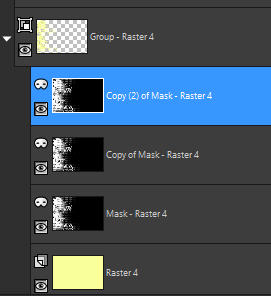
Layers - Merge - Merge Group
Step 11
Image - Mirror - Mirror Horizontal
Effects - Plugins - Mura's Seamless - Emboss at Alpha (default settings)

In your Layer Properties - set the Opacity of this layer to 85%
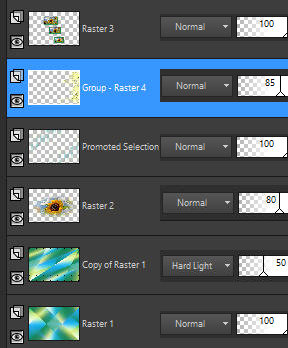
Your layers look like this:
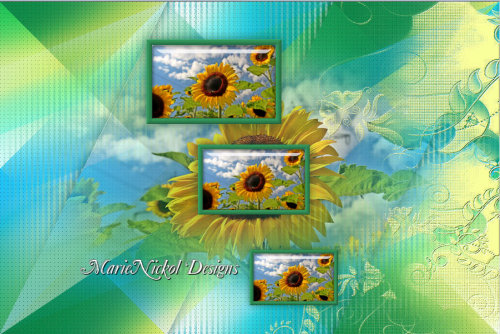
Your image looks like this:
Step 12
Activate the top layer - Raster 3
Open tube - text
Note: In case you want to write your own text - the font BaroqueScript is provided in the materials
Jolcsi used size 30 pixels
Edit - Copy
Edit - Paste - Paste As New Layer on your working image
Activate the Pick Tool (K) 
Enter these values for positions X and Y on the Toolbar
X: 559.00 Y: 14.00

Press M on your keyboard to release the Pick Tool
Activate the second layer from the bottom - Copy of Raster 1
Layers - Merge - Merge Down
Edit - Copy
Step 13
Image - Add Borders - 2px - Symmetric checked - color 3  #fafe9c
Image - Add Borders - 2px - Symmetric checked - color 2  #1dbbf9
Image - Add Borders - 2px - Symmetric checked - color 1  #2d8a54
Selections - Select All
Image - Add Borders - 45px - Symmetric checked - color 1  #2d8a54
Selections - Invert
Edit - Paste - Paste into Selection
Adjust - Blur - Gaussian Blur (Radius 40)

Selections - Invert
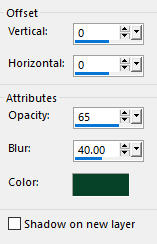
Effects - 3D Effects - Drop Shadow (0/0/65/40) color 4  #054328 - Shadow on new layer not checked
Selections - Select None
Step 14
Open tube - Jolcsi223
Remove the watermark
Edit - Copy
Edit - Paste - Paste As New Layer on your working image
Image - Resize - 120% - Resize All Layers - Not Checked
Adjust - Sharpness - Sharpen
Position as shown on the final result above
Apply drop shadow to your own liking
Step 15
Image - Add Borders - 1px - Symmetric checked - color 1  #2d8a54
Layers - New Raster Layer
Add your name or watermark
Layers - Merge - Merge All (Flatten)
Image - Resize - 950 pixels width (the height will adapt)
File - Export - Save as JPG file
~~~~~~~
I hope you enjoyed this lesson.
If you do this tutorial please email your version to me
my email address -
~~~~~~~
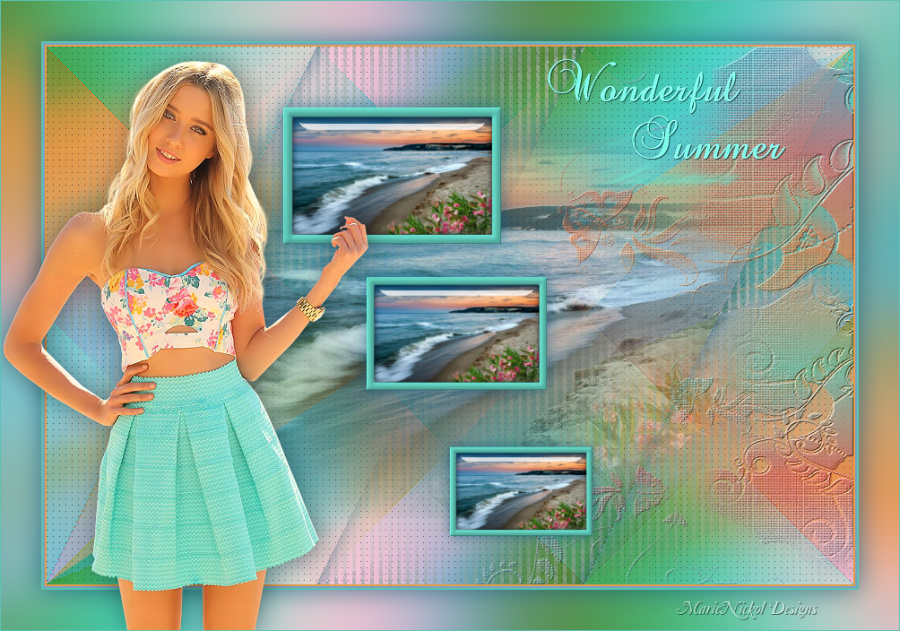
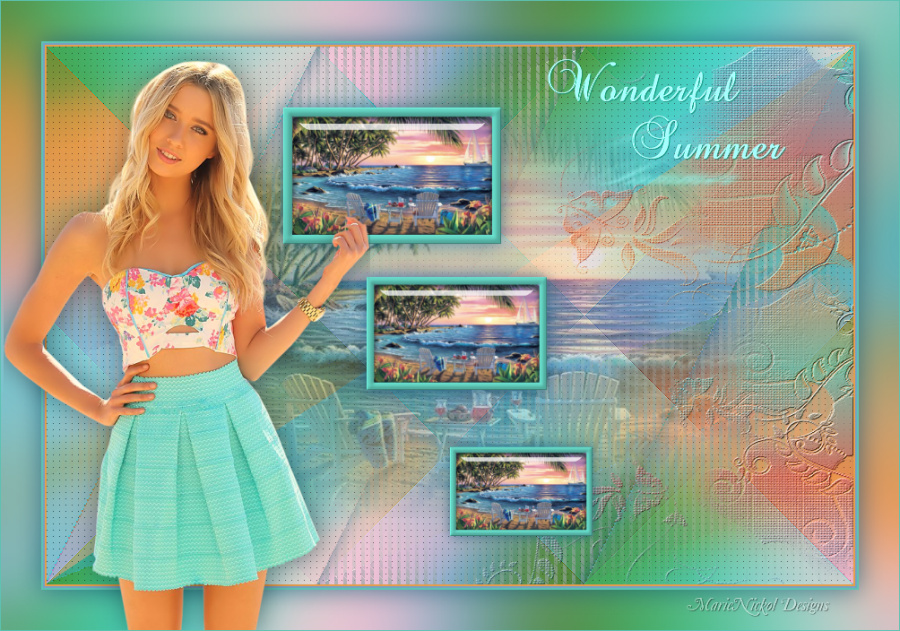
My versions with woman tube by KAD
~~~~~~~
Your Versions
