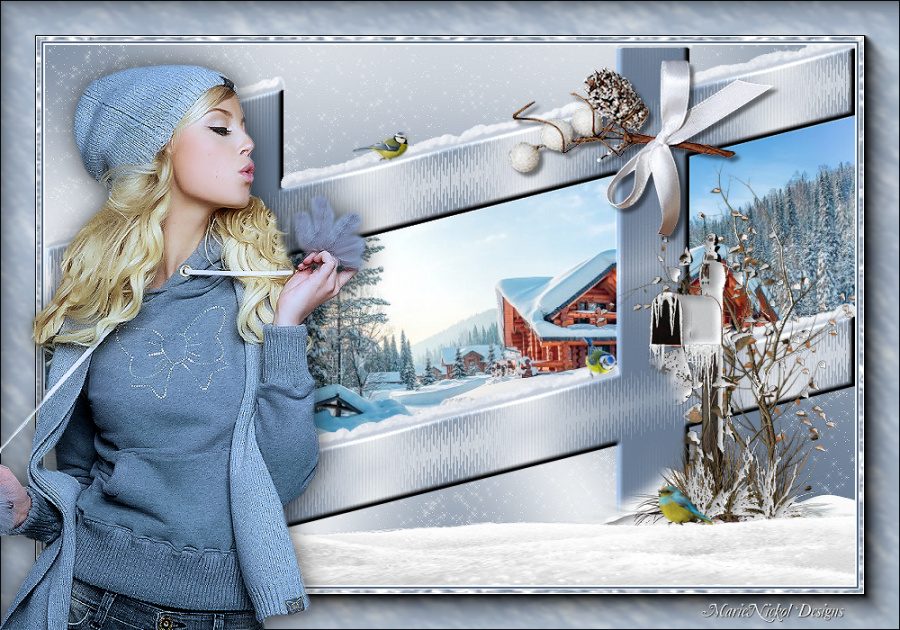
Original tutorial by Jolcsi
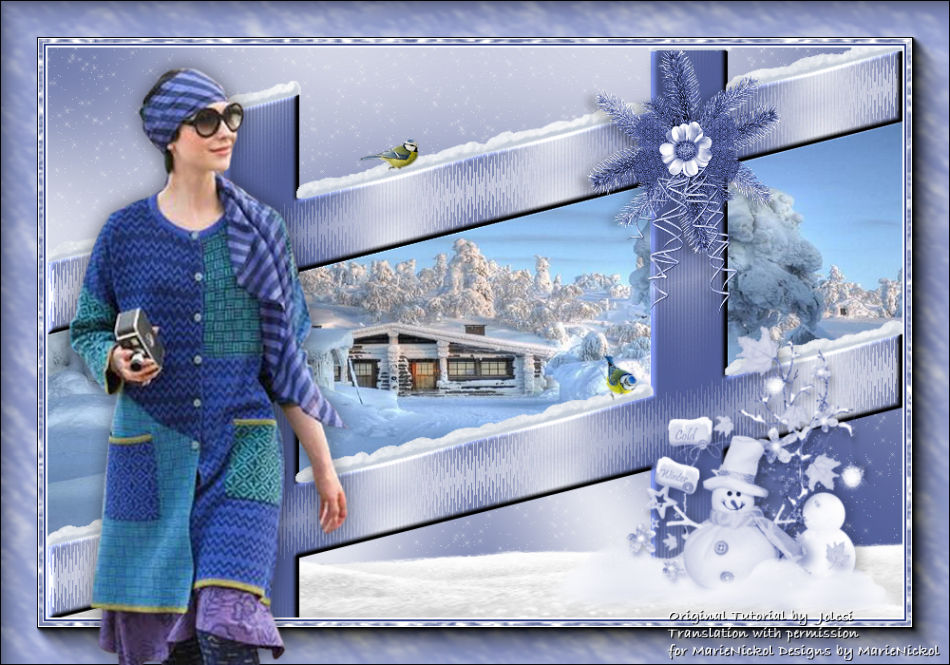
Thank you Jolcsi for the permission to translate your tutorial.
Translated by Marie Nickol.
You will find the original tutorial here:
This tutorial is a personal creation by Jolsci.
Any resemblance with another one would only be pure coincidence.
Thank you for the respect of Jolcsi’s work and the tubers work.
These translations are mine and are intended for personal use only and it is forbidden to copy part or all of it.
You can use this tutorial for PSP lessons but please put the link back to it.
Do not hesitate to let Jolcsi or me know if you have any problem with the present tutorial.

Materials used:
Disclaimer: Modifying or renaming files or removing watermarks from the tubes of the original tubers provided in the materials and sharing them as your own or using them for sale online or otherwise is prohibited.
1 character tube by Solcsi
1 background image
1 mask
4 deco tubes
Plugins used:
Filters Unlimited 2.0 - Mura's Seamless - Shift at Zigzag
Filters Unlimited 2.0 - Simple -Zoom Out and Flip
Alien Skin/Eye Candy 5:Nature - Snow Drift
Alien Skin Xenofex2 - Constellation
AAA Frames - Foto Frame
Note: Plugins - Mura's Seamless and Simple can be used alone and can also be imported into Filters Unlimited 2.0
Materials

The original tutorial is written on PSP X2.
This translation is written with PSP 2018 Ultimate.
If you work with other versions some things might be different but the result will be the same.
Note: In the latest versions of PSP the command Image-Mirror has become Image - Mirror - Mirror Horizontal
and Image-Flip has become Image - Mirror - Mirror Vertical
Preparations
Duplicate all the tubes and work with the copies to preserve the originals.
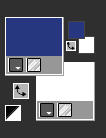
Colors used:

Material Properties - Foreground: Set your Foreground color to color #273880
Material Properties - Background: Set your Background color to color #ffffff
The Tutorial
Step 1
File - New - Open a new Transparent image 900 x 600 pixels
Materials Properties: Set your Foreground Color to foreground-background Sunburst gradient (Corel_06_029) with the following settings
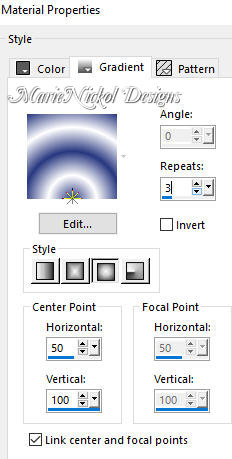
Flood fill tool / Fill in the layer with the gradient prepared above
Adjust - Blur - Radial Blur

Effects - Edge Effects - Enhance More
Layers - Duplicate
Step 2
Effects - Plugins - Filters Unlimited 2.0 - Mura's Seamless - Shift at Zigzag
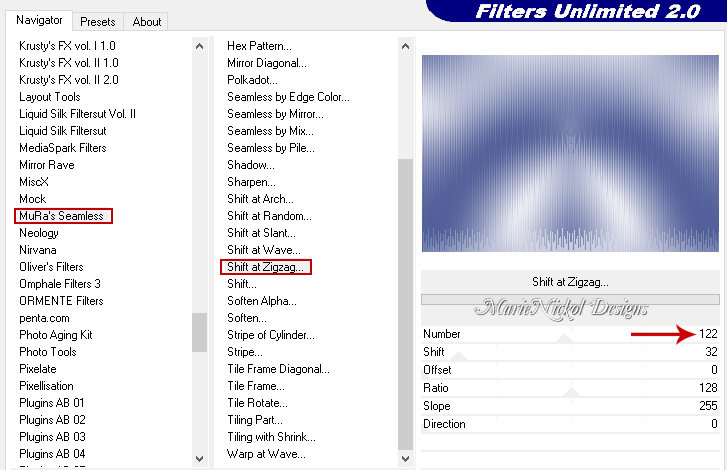
Image - Rotate Right
Effects - Reflection Effects - Rotating Mirror
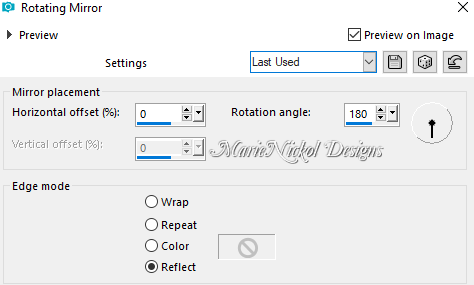
Image - Rotate Left
Step 3
Selections - Select All
Selections - Modify - Contract (Number of pixels 80)
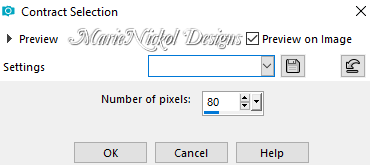
Press Delete on your keyboard
Selections - Select None
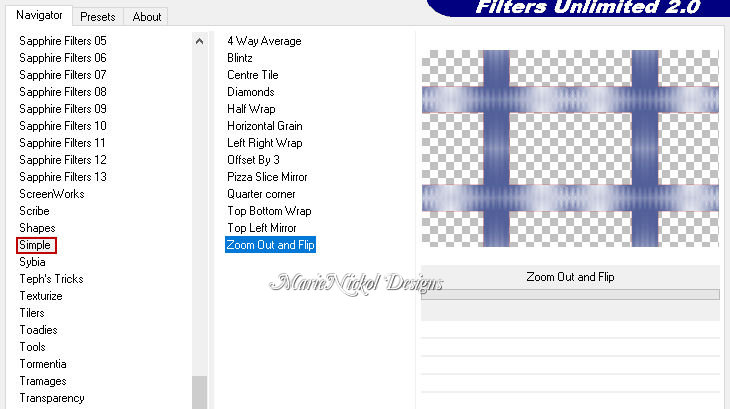
Effects - Plugins - Filters Unlimited 2.0 - Simple - Zoom Out and Flip
Step 4
Activate the Magic Wand Tool  (Tolerance 0 and Feather 0)
Select the empty spaces of the fence
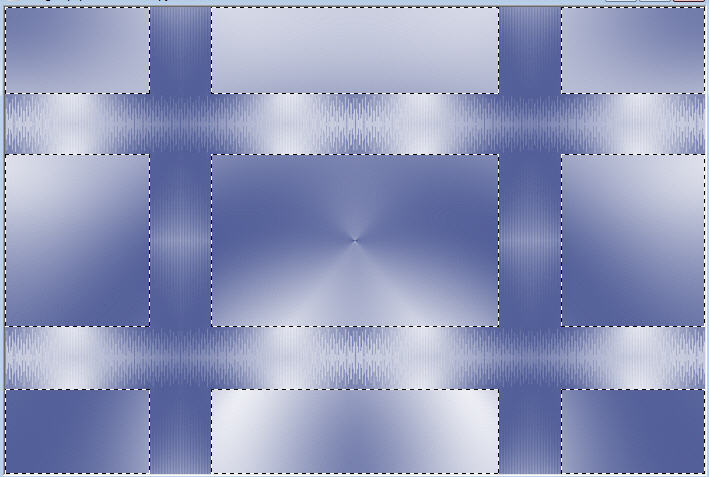
Selections - Invert
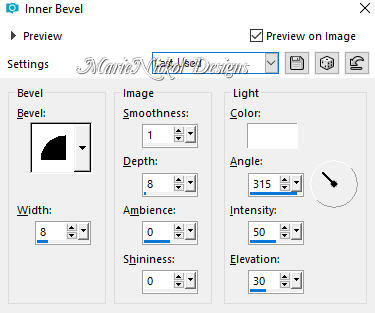
Effects - 3D Effects - Inner Bevel
Selections - Select None
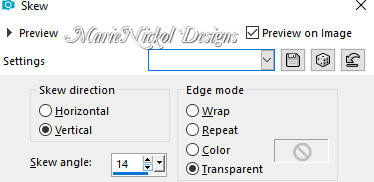
Effects - Geometric Effects - Skew
Step 5
Activate the Magic Wand Tool  (Tolerance 0 and Feather 0)
Select the inner empty spaces of the fence
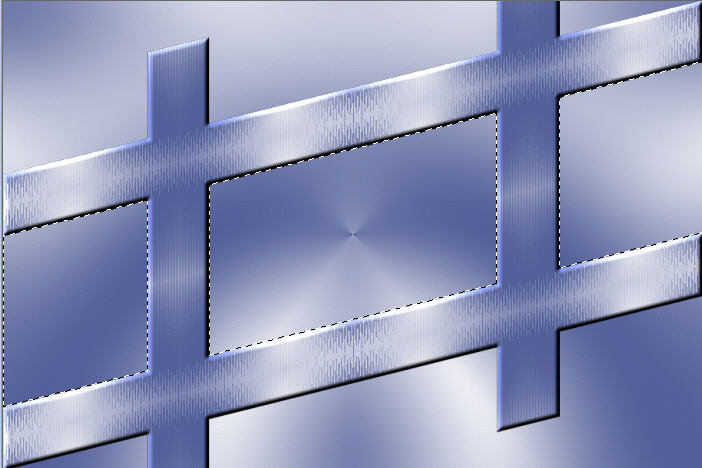
Activate the layer beneath - layer Raster 1
Layers - New Raster Layer
Open image - tájkép.jpg
Edit - Copy
Edit - Paste - Paste into Selection on your working image
Adjust - Sharpness - Sharpen
Selections - Select None
Step 6
Activate the top layer - layer Copy of Raster 1
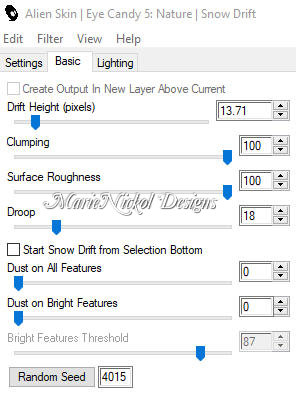
Effects - Plugins - Alien Skin Eye Candy 5: Nature - Snow Drift
Use these settings in the Basic Tab:
Step 7
Activate layer Raster 1
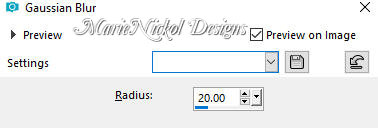
Adjust - Blur - Gaussian Blur (Radius 20)
Effects - Edge Effects - Enhance
Effects - Plugins - Alien Skin Xenofex 2 - Constellation
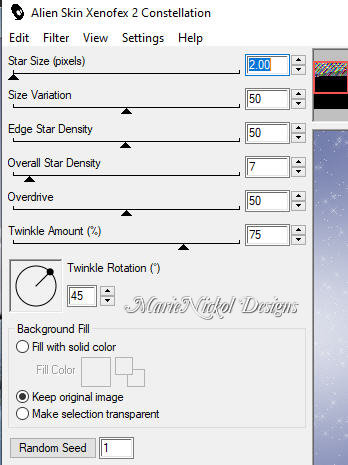
Adjust - Sharpness - Sharpen
Step 8
Open tube - hó (the snow image)
Edit - Copy
Edit - Paste - Paste As New Layer on your working image
Activate the Pick Tool (K) 
Enter these values for positions X and Y on the Toolbar
X: -10.00 Y: 520.00

Press M on your keyboard to release the Pick Tool
Step 9
Activate the top layer - Copy of Raster 1
Open tube - jol_cinege (the little birds)
Edit - Copy
Edit - Paste - Paste As New Layer on your working image
Activate the Pick Tool (K) 
Enter these values for positions X and Y on the Toolbar
X: 328.00 Y: 96.00

Press M on your keyboard to release the Pick Tool
Step 10
Open tube - hóember (the snowman deco)
Edit - Copy
Edit - Paste - Paste As New Layer on your working image
Activate the Pick Tool (K) 
Enter these values for positions X and Y on the Toolbar
X: 514.00 Y: 289.00

Press M on your keyboard to release the Pick Tool
Colorize the image:
Adjust - Hue And Saturation - Colorize
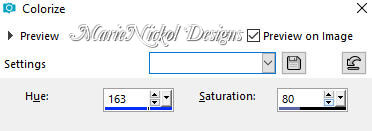
Adjust - Sharpness - Sharpen
Step 11
Open tube - bee-silverxmas-el120 (the Christmas deco)
Edit - Copy
Edit - Paste - Paste As New Layer on your working image
Image - Resize - 35% - Resize All Layers - Not Checked
Colorize the image:
Adjust - Hue And Saturation - Colorize

Effects - 3D Effects - Drop Shadow (3/-11/25/10/) color black #000000 - Shadow on new layer not checked
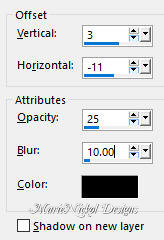
Activate the Pick Tool (K) 
Enter these values for positions X and Y on the Toolbar
X: 552.00 Y: -2.00

Press M on your keyboard to release the Pick Tool
Adjust - Sharpness- Sharpen
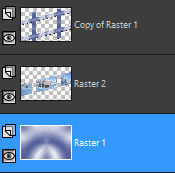
Your layers look like this:
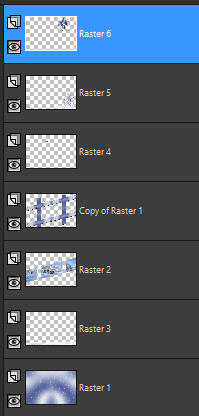
Your image looks like this:
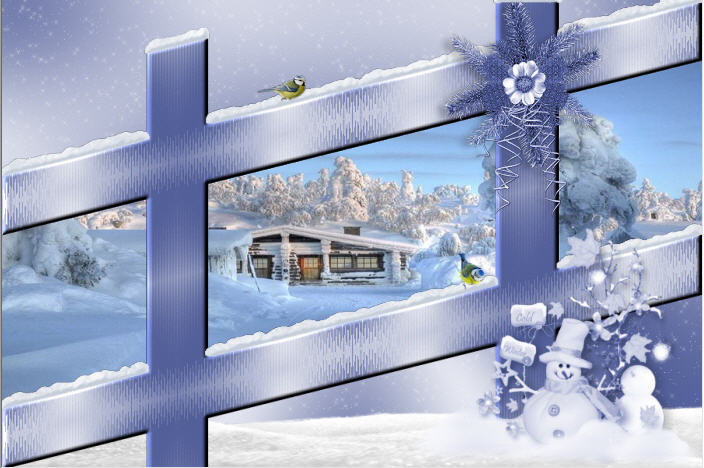
Step 12
Image - Add Borders - 2px - Symmetric checked - color 2  #ffffff
Image - Add Borders - 2px - Symmetric checked - color 1  #273880
Image - Add Borders - 1px - Symmetric checked - color 2  #ffffff
Selections - Select All
Step 13
Image - Add Borders - 45px - Symmetric checked - color 2  #ffffff
Selections - Invert
Layers - New Raster Layer
Flood fill tool /Fill in the Layer with the color 1  #273880
Open mask - maszk
Layers - New Mask Layer - From Image (Invert mask data not checked)
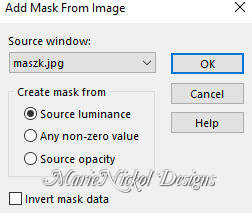
Effects - Edge Effects - Enhance
Layers - Merge - Merge Group
Selections - Select None
Layers - Merge - Merge Down
Effects - Plugins - AAA Frames - Foto Frame
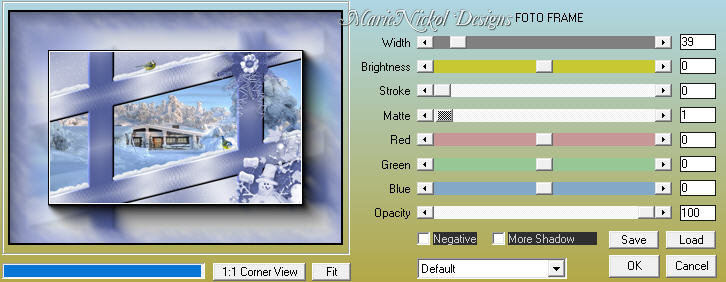
Step 14
Open tube - Jolcsi934
Remove the watermark
Edit - Copy
Edit - Paste - Paste As New Layer on your working image
Image - Resize - 110% - Resize All Layers - Not Checked
Position the tube to left as shown on the final result.
Apply Drop Shadow to your own preference.
Adjust - Sharpness - Sharpen
Step 15
Layers - New Raster Layer
Add your name or watermark
Layers - Merge - Merge All (Flatten)
Image - Resize - 950 pixels width (the height will adapt)
File - Export - Save as JPG file
~~~~~~~
My version with a tube by Sylvie Erwan
