
Original tutorial by Jolcsi
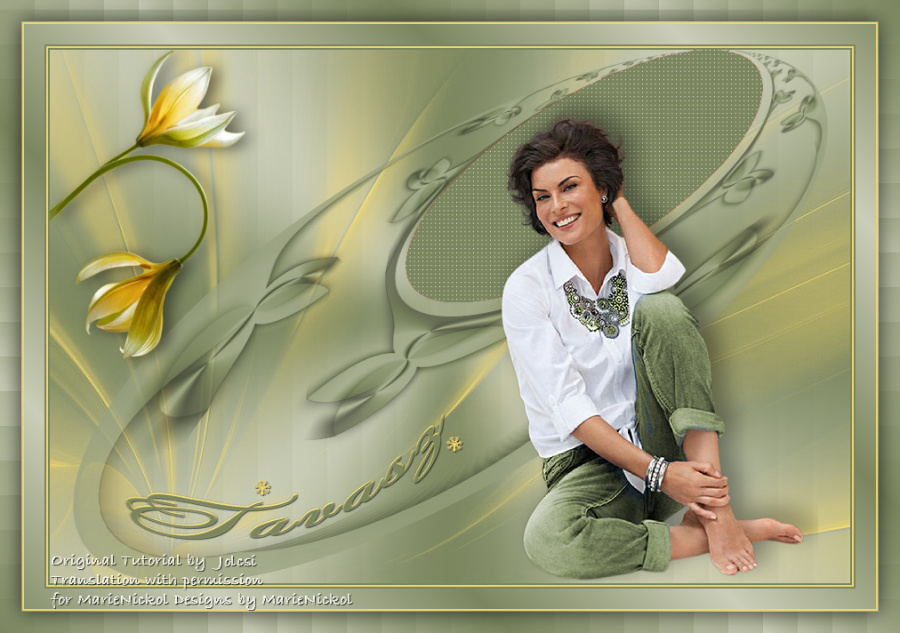
Thank you Jolcsi for the permission to translate your tutorial.
Translated by Marie Nickol.
You will find the original tutorial here:

This tutorial is a personal creation by Jolsci.
Any resemblance with another one would only be pure coincidence.
Thank you for the respect of Jolcsi’s work and the tubers work.
These translations are mine and are intended for personal use only and it is forbidden to copy part or all of it.
You can use this tutorial for PSP lessons but please put the link back to it.
Do not hesitate to let Jolcsi or me know if you have any problem with the present tutorial.

Materials used:
Disclaimer: Modifying or renaming files or removing watermarks from the tubes of the original tubers provided in the materials and sharing them as your own or using them for sale online or otherwise is prohibited.
1 character tube by Jolcsi
2 deco tubes by Jolcsi
1 mask
1 text tube
Plugins used:
Mehdi - Wavy Lab 1.1
Flaming Pear - Flexify 2
AP 01 (Innovations) - Lines - SilverLining
You can find my plugins - Here
Materials

The original tutorial is written on PSP 2020.
This translation is written with PSP 2020 Ultimate.
If you work with other versions some things might be different but the result will be the same.
Note: In the latest versions of PSP the command Image-Mirror has become Image - Mirror - Mirror Horizontal
and Image-Flip has become Image - Mirror - Mirror Vertical
Note: I use a script for the old commands of Image-Mirror and Image-Flip
and I work with the old Material Properties - in PSP 2018, 2019, 2020
under File - Preferences - General Program Preferences - check Use classic Material Properties
Preparations
Duplicate all the tubes and work with the copies to preserve the originals.
Colors used:

Material Properties - Foreground: Set your Foreground color to color 1  #7b865f
Material Properties - Background: Set your Background color to color 2  #cbceb8
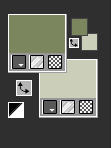
When working with your own colors, adjust the Blend Mode/Opacity at your own discretion
The Tutorial
Step 1
File - New - Open a new Transparent image 900 x 600 pixels
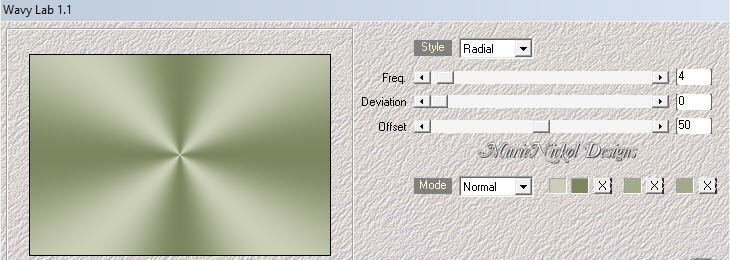
Effects - Plugins - Mehdi - Wavy Lab 1.1
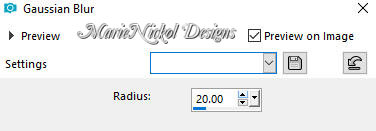
Adjust - Blur - Gaussian Blur (Radius 20)
Layers – Duplicate
Effects - Texture Effects - Blinds
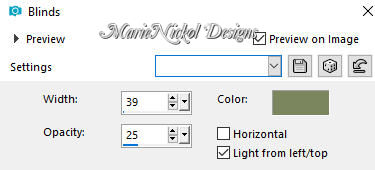
In your Layer Properties - set the Opacity of this layer on 30
Step 2
Open tube - jolcsi_dekor
Edit – Copy
Edit - Paste - Paste As New Layer on your working image
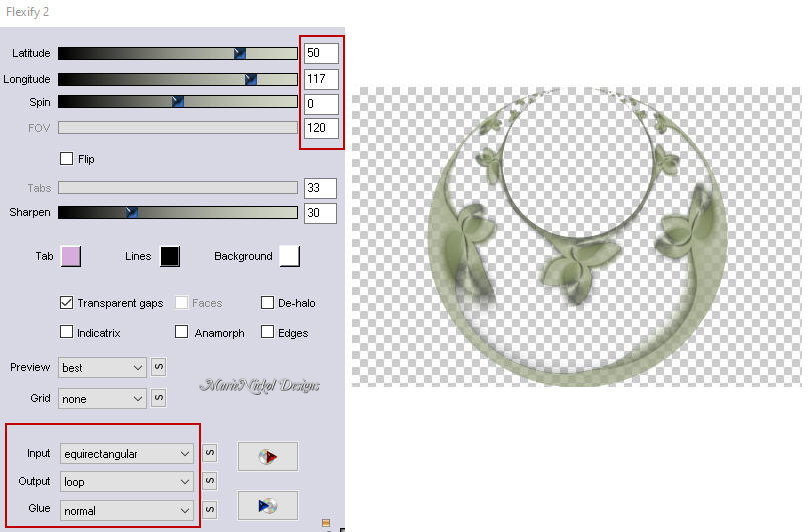
Effects - Plugins - Flaming Pear - Flexify 2
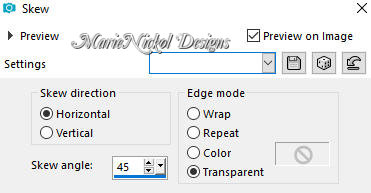
Effects - Geometric Effects - Skew
Step 3
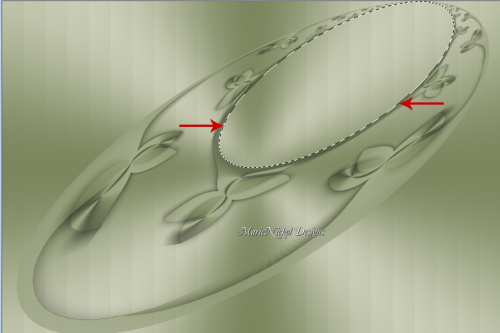
Activate the Magic Wand Tool (Tolerance 0 and Feather 0)
Select inside the ellipse as shown on the example below:
Layers - New Raster Layer
Flood fill tool /Fill in the Selection with the Foregound Color - color 1  #7b865f
Effects - Plugins - AP 01 (Innovations) - Lines - SilverLining

Selections - Select None
Image - Resize - 95% - Resize All Layers - Not Checked
Activate the Pick Tool (K) 
Enter these values for positions X and Y on the Toolbar
X: 400 Y: 0.00
Step 4
Activate the second layer from the bottom - Copy of Raster 1
Materials Properties: Set your Background color to color 3  #eed570
Layers - New Raster Layer
Flood fill tool /Fill in the Layer with the Background Color - color 3  #eed570
Open mask – mask
Layers - New Mask Layer - From Image (Invert mask data not checked)
Layers-Load / Save Mask-Load Mask From Disk
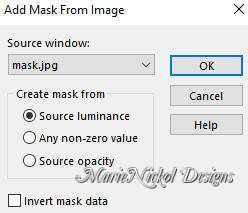
Layers - Merge - Merge Group
Image - Mirror - Mirror Horizontal
Adjust - Sharpness- Sharpen
Step 5
Activate the top layer - Raster 3
Open the text tube - text
Edit - Copy
Edit - Paste - Paste As New Layer on your working image
Activate the Pick Tool (K) 
Enter these values for positions X and Y on the Toolbar
X: 83.00 Y: 408.00

Press M on your keyboard to release the Pick Tool
Step 6
Open tube - jolcsi_virág
Remove the watermark
Edit – Copy
Edit - Paste - Paste As New Layer on your working image
Image - Resize - 60% - Resize All Layers - Not Checked
Activate the Pick Tool (K) 
Enter these values for positions X and Y on the Toolbar
X: 0.00 Y: 0.00

Press M on your keyboard to release the Pick Tool
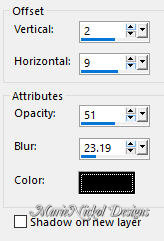
Effects - 3D Effects - Drop Shadow (2/9/51/23.19) color black - Shadow on new layer not checked
Step 7
Open the character tube - jolcsi106
Remove the watermark
Edit – Copy
Edit - Paste - Paste As New Layer on your working image
Position it as shown on the final result
Step 8
Image - Add Borders - 2px - Symmetric checked - color 1  #7b865f
Image - Add Borders - 2px - Symmetric checked - color 3  #eed570
Image - Add Borders - 2px - Symmetric checked - color 1  #7b865f
Selections - Select All
Image - Add Borders - 50px - Symmetric checked - color 1  #7b865
Selections – Invert
Materials Properties: Set your Foreground Color to foreground-background Linear gradient (Corel_06_029) with the following settings - color 1 and color 2
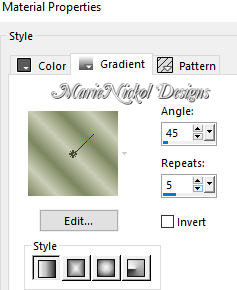
Flood fill tool / Fill in the Selection with the gradient
Step 9
Selections - Select All
Selections - Modify - Contract
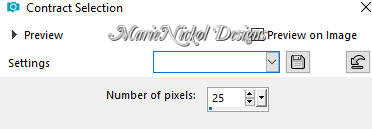
Selections - Modify - Select Selections Borders
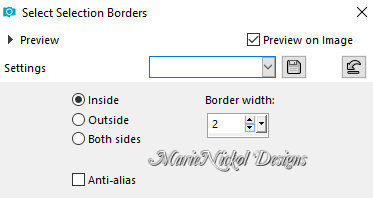
Flood fill tool / Fill in the Selection with color 3  #eed570
Selections - Select All
Selections - Modify - Contract
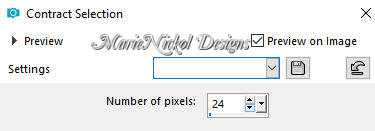
Selections - Invert
Effects - Texture Effects - Blinds (the same settings as in Step 1 - settings are still in memory)

Repear Effects - Texture Effects - Blinds (but Horizontal clicked)
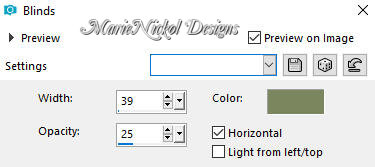
Adjust - Sharpness- Sharpen
Selections - Invert
Effects - 3D Effects - Drop Shadow (0/0/70/35) color black - Shadow on new layer not checked
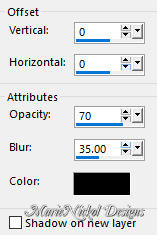
Selections - Select None
Step 10
Layers - New Raster Layer
Add Jolcsi's watermark provided in the materials
Add your name or watermark
Layers - Merge - Merge All (Flatten)
Image - Resize - 950 pixels width (the height will adapt)
File - Export - Save as JPG file
~~~~~~~
I hope you enjoyed this lesson.
If you do this tutorial please email your version to me
my email address -
~~~~~~~
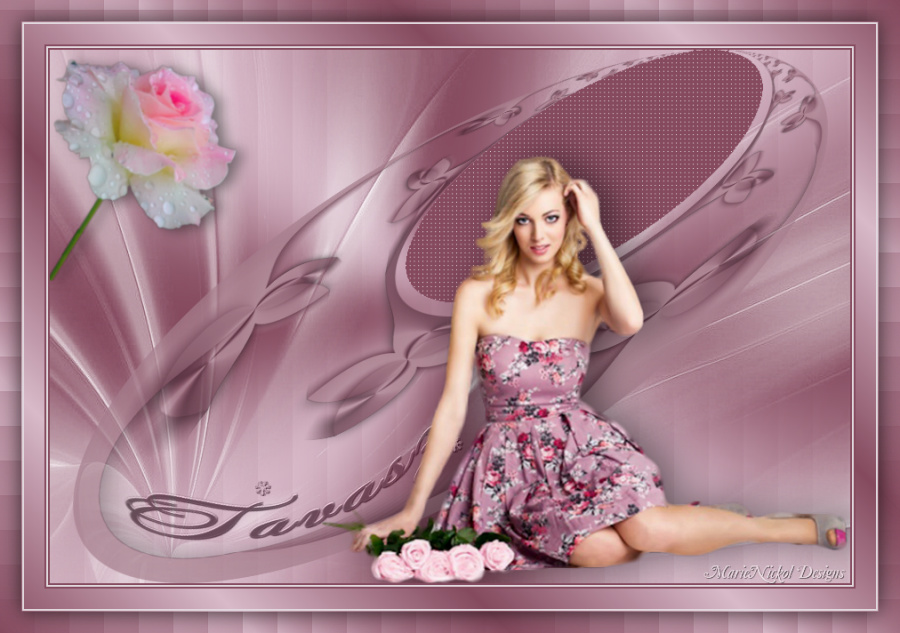
My version with a woman tube by Franie Margot and flower tube by Judy
~~~~~~~
Your Versions
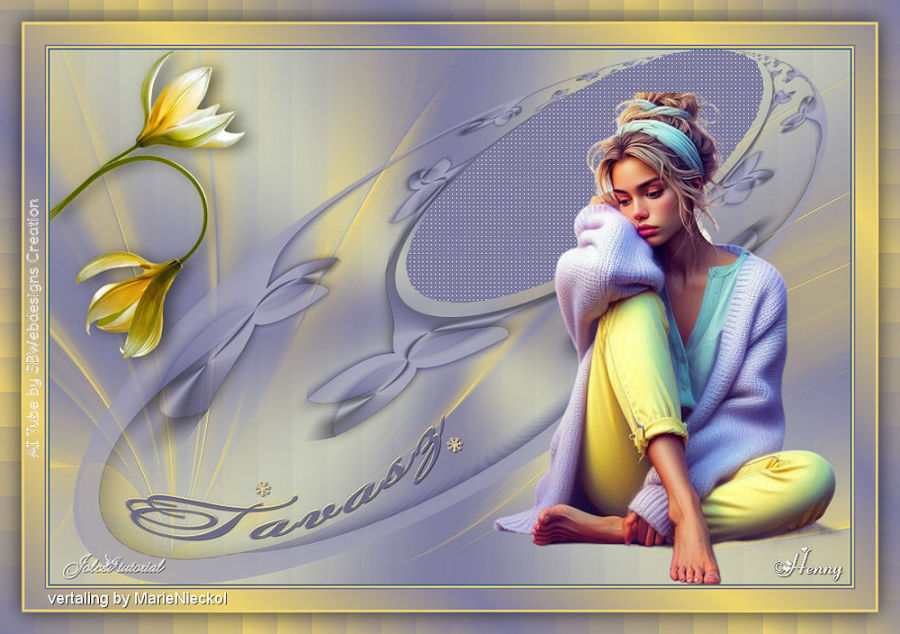
Thank you so much Henny for your beautiful version
~~~~~~~
