
Original tutorial by Jolcsi
Thank you Jolcsi for the permission to translate your tutorial.
Translated by Marie Nickol.
You will find the original tutorial here:
This tutorial is a personal creation by Jolsci.
Any resemblance with another one would only be pure coincidence.
Thank you for the respect of Jolcsi’s work and the tubers work.
These translations are mine and are intended for personal use only and it is forbidden to copy part or all of it.
You can use this tutorial for PSP lessons but please put the link back to it.
Do not hesitate to let Jolcsi or me know if you have any problem with the present tutorial.

Materials used:
Disclaimer: Modifying or renaming files or removing watermarks from the tubes of the original tubers provided in the materials and sharing them as your own or using them for sale online or otherwise is prohibited.
1 character tube by Jolcsi
2 deco tubes by Jolcsi
1 apha selections image
1 font
Plugins used:
Carolaine and Sensibility - CS-HLines
Alien Skin/Eye Candy5 - Impact - Glass and Perspective Shadow
You can find my plugins - Here
Materials

The original tutorial is written on PSP 2020.
This translation is written with PSP 2020 Ultimate.
If you work with other versions some things might be different but the result will be the same.
Note: In the latest versions of PSP the command Image-Mirror has become Image - Mirror - Mirror Horizontal
and Image-Flip has become Image - Mirror - Mirror Vertical
Note: I use a script for the old commands of Image-Mirror and Image-Flip
and I work with the old Material Properties - in PSP 2018, 2019, 2020
under File - Preferences - General Program Preferences - check Use classic Material Properties
Preparations
Duplicate all the tubes and work with the copies to preserve the originals.
Install the font to your Windows Fonts or -
If you use a font viewer software open it with your software - the font will be available in your PSP
When you open the Selections From Alpha Channel.pspimage file you will see a blank canvas.
It is not empty - it contains all the selections needed, saved to Alpha Channels.
Colors used:

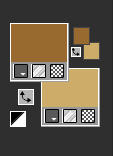
Material Properties - Foreground: Set your Foreground color to color 1  #9b6831
Material Properties - Background: Set your Background color to color 2  #cfab69
Materials Properties: Set your Foreground Color to foreground-background Sunburst gradient (Corel_06_029) with the following settings
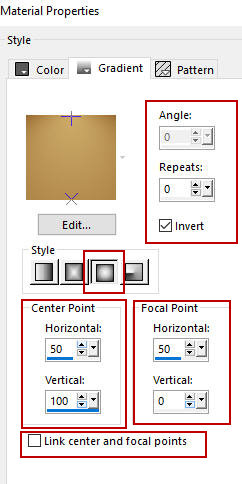
When working with your own colors, adjust the Blend Mode/Opacity at your own discretion
The Tutorial
Step 1
Open the Selections From Alpha Channel.pspimage file
Window - Duplicate
Close the original and work on the copy
Step 2
Flood fill tool / Fill in the layer with the Sunburst gradient prepared above
Layers - New Raster Layer
Selections - Select All
Open deco tube - jolcsidekor
Edit - Copy
Edit - Paste - Paste into Selection on your working image
Selections - Select None
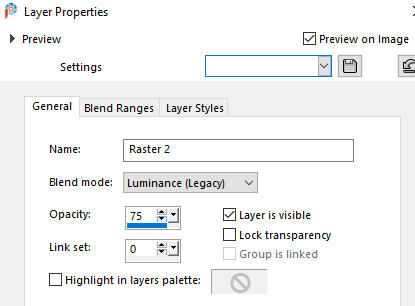
In your Layer Properties - set the Blend mode to Luminance (Legacy) and the Opacity to 75
(or colorized it with your light color)
Step 3
Layers - New Raster Layer
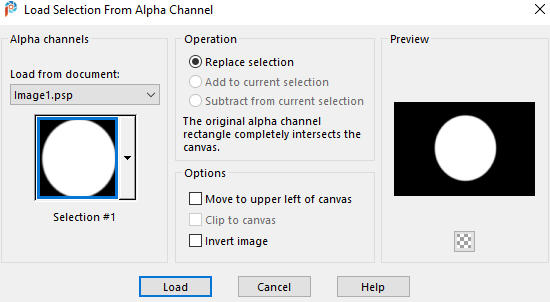
Selections - Load/Save Selection - Load Selection From Alpha Channel
Load - Selection 1
Materials Properties: Set your Backgroundcolor to color 3  #55391b
Flood fill tool / Fill in the Selection with your Background color
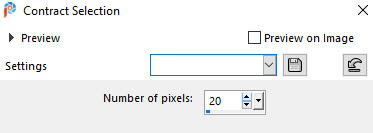
Selections - Modify - Contract - numberof pixels 20
Edit - Cut
Selections - Select None
Step 4
Activate the bottom layer - Raster 1
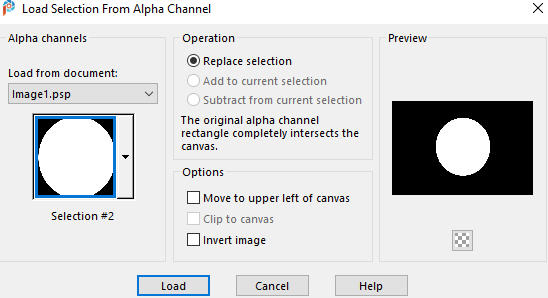
Selections - Load/Save Selection - Load Selection From Alpha Channel
Load - Selection 2
Selections - Promote Selection to Layer
Layers - New Raster Layer
Open deco tube - jolcsidekor2
Edit - Copy
Edit - Paste - Paste into Selection on your working image
In your Layer Properties - set the Blend mode to Screen
(or colorized it with your light color)
Selections - Select None
Step 5
Layers - Duplicate
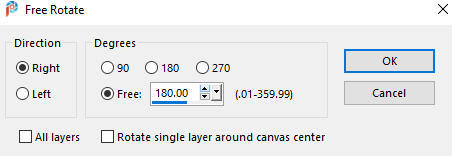
Image - Free Rotate - All layers not checked
Activate the Pick Tool (K) 
Enter these values for positions X and Y on the Toolbar
X: 264.00 Y: 98.00

Press M on your keyboard to release the Pick Tool
Layers - Merge - Merge Down
Activate the Pick Tool (K) 
Enter these values for positions X and Y on the Toolbar
X: 271.00 Y: 103.00

Press M on your keyboard to release the Pick Tool
Layers - Merge - Merge Down
Step 6
Activate the bottom layer - Raster 1
Selections - Load/Save Selection - Load Selection From Alpha Channel
Load - Selection 3
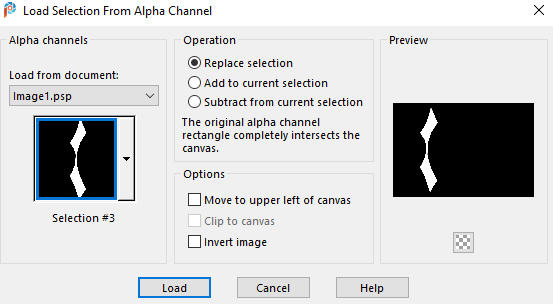
Selections - Promote Selection to Layer
Effects - Plugins - Carolaine and Sensibility - CS-HLines
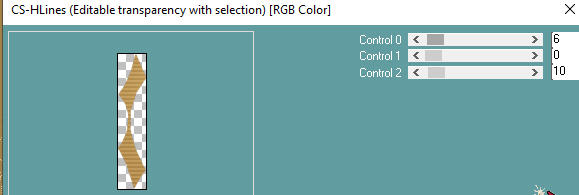
Selections - Select None
Layers - Duplicate
Image - Mirror
Layers - Merge - Merge Down
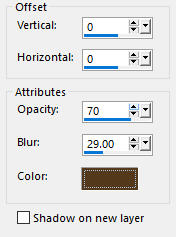
Effects - 3D Effects - Drop Shadow (0/0/70/29) color 3  #55391b - Shadow on new layer not checked
Step 7
Layers - Duplicate
Effects - Distortion Effects - Wave
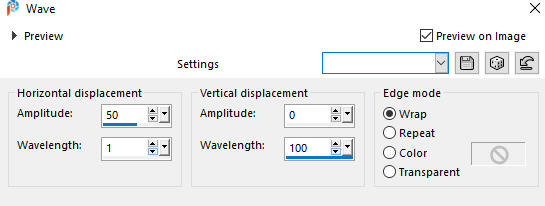
Layers - Arrange - Move Down
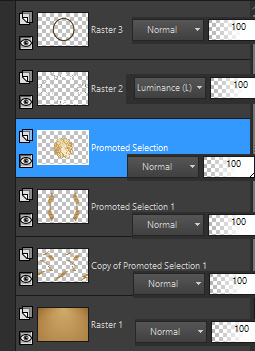
Your layers look like this:
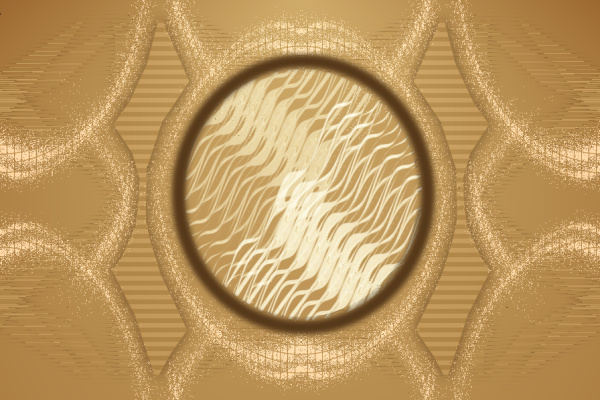
Your image looks like this:
Step 8
Activate the third layer from the top - the Promoted Selection
Selections - Load/Save Selection - Load Selection From Alpha Channel
Load - Selection 4
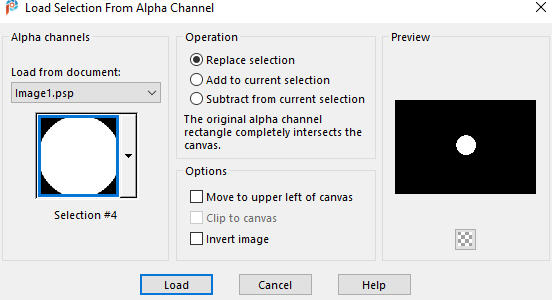
Selections - Promote Selection to Layer
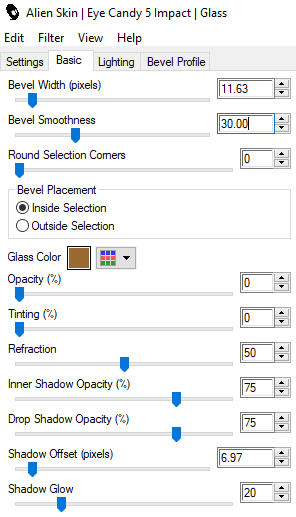
Effects - Plugins - Alien Skin - Eye Candy 5 - Impact - Glass
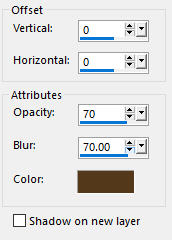
Effects - 3D Effects - Drop Shadow (0/0/70/70) color 3  #55391b - Shadow on new layer not checked
Selections - Select None
Step 9
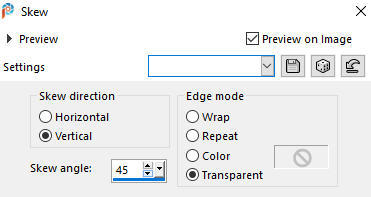
Effects - Geometric Effects - Skew
Layers - Duplicate
Image - Free Rotate

Layers - Merge - Merge Down
Step 10
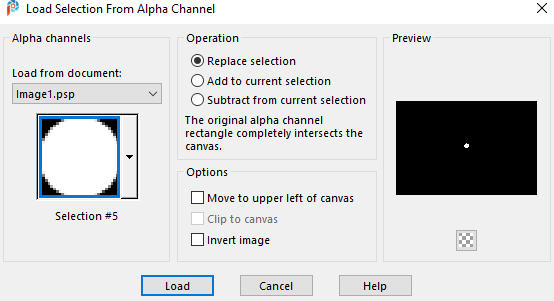
Selections - Load/Save Selection - Load Selection From Alpha Channel
Load - Selection 5
Layers - New Raster Layer
Flood fill tool / Fill in the Selection with your background color - Color 3  #55391b
Effects - Plugins - Alien Skin - Eye Candy 5 - Impact - Glass (the same settings as in Step 8 - settings are still in memory)
Selections - Select None
Layers - Merge - Merge Visible
Step 11
Open the character tube - Jolcsi949
Remove the watermark
Edit - Copy
Edit - Paste - Paste As New Layer on your working image
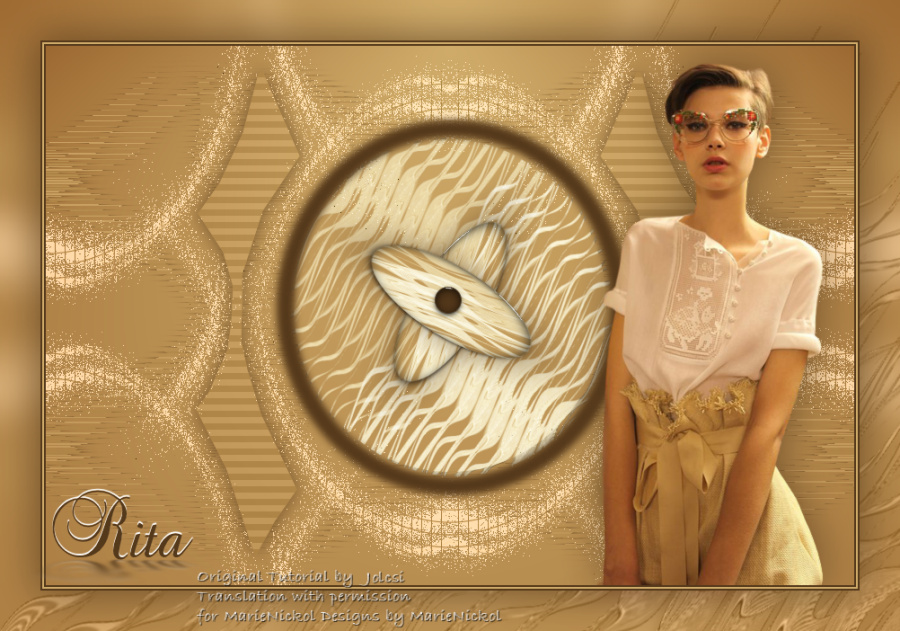
Position it as shown on the final result
Apply drop shadow to your own liking
Activate the bottom merged layer
Edit - Copy
Step 12
Image - Add Borders - 2px - Symmetric checked - color 3  #55391b
Image - Add Borders - 2px - Symmetric checked - color 2  #cfab69
Image - Add Borders - 2px - Symmetric checked - color 3  #55391b
Selections - Select All
Image - Add Borders - 45px - Symmetric checked - color 2  #cfab69
Selections - Invert
Edit - Paste - Paste into Selection
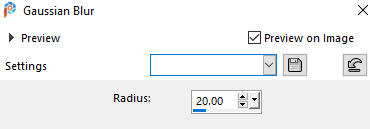
Adjust - Blur - Gaussian Blur (Radius 20)
Step 13
Layers - New Raster Layer
Open deco tube - jolcsidekor2
Edit - Copy
Edit - Paste - Paste into Selection on your working image
In your Layer Properties - set the Blend mode to Luminance (Legacy)
(or colorized it with your light color)
Layers - Merge - Merge Down
Selections - Invert
Effects - 3D Effects - Drop Shadow (0/0/70/70) color 3  #55391b (or black) - Shadow on new layer not checked

Selections - Select None
Step 14
Activate the Text Tool (T) 
Set your font to Baroque Script - size 48 pixels - stroke width 0.0 - (font provided in the materials)
Set your background color to Color 3  #55391b

Type the word "Rita" on your keyboard
Layers - Convert to Raster Layer
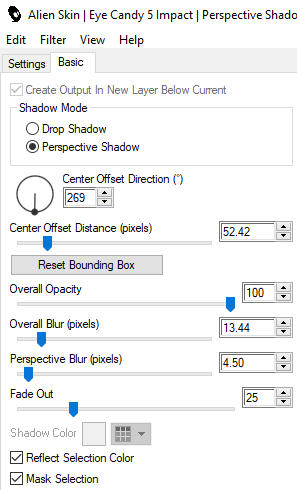
Effects - Plugins - Eye Candy 5 - Impact - Perspective Shadow
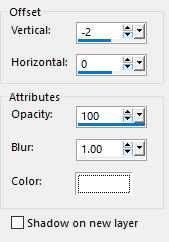
Effects - 3D Effects - Drop Shadow (-2/0/100/1) color white #ffffff - Shadow on new layer not checked
Position it as shown on the final result or to your own liking
Step 15
Layers - New Raster Layer
Add Jolcsi's watermark provided in the materials
Add your name or watermark
Layers - Merge - Merge All (Flatten)
Image - Resize - 950 pixels width (the height will adapt)
File - Export - Save as JPG file
~~~~~~~
I hope you enjoyed this lesson.
If you do this tutorial please email your version to me
my email address -
~~~~~~~
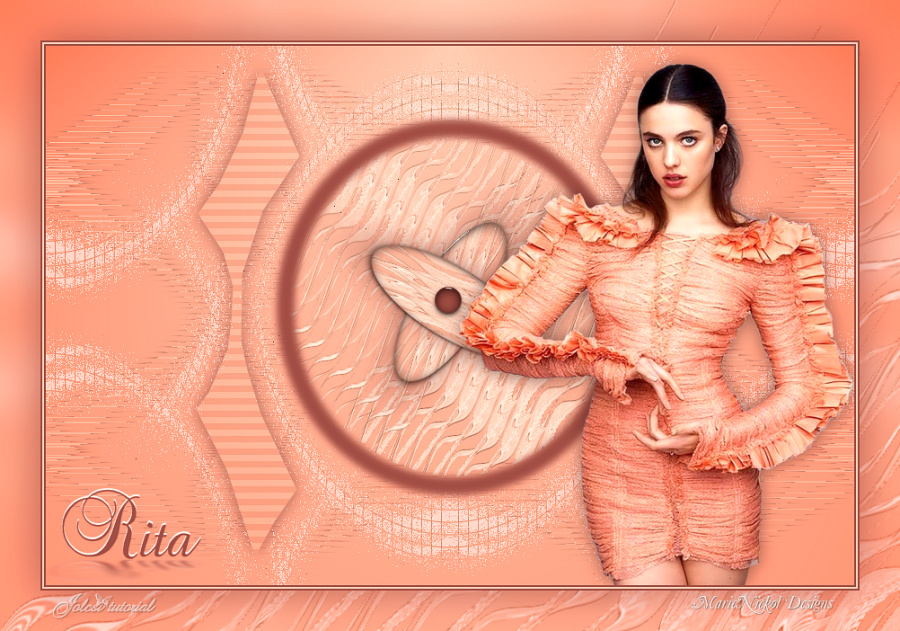
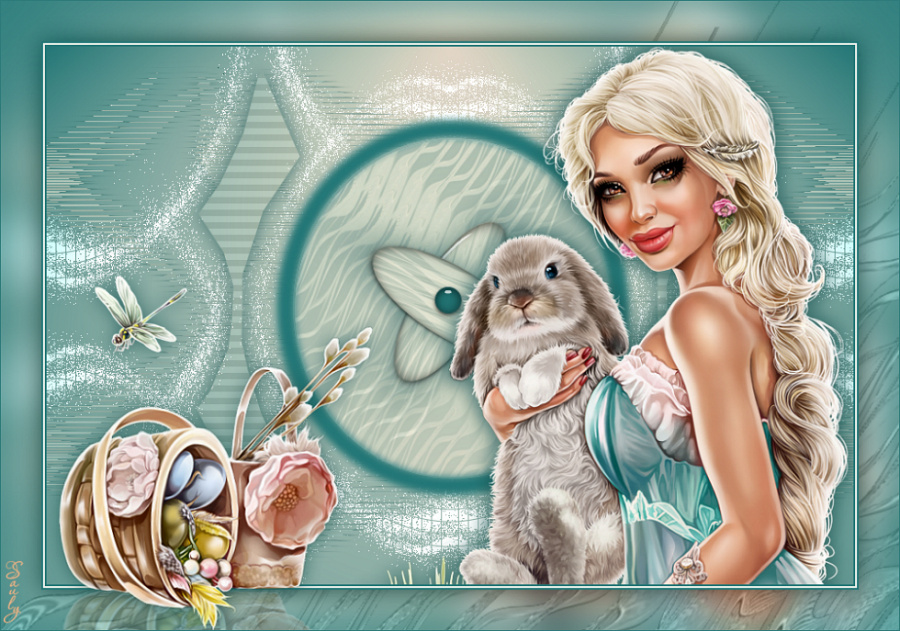
My version with a woman tube by Lana
~~~~~~~
Your Versions
Sauly Design
~~~~~~~
