
Original tutorial by Jolcsi
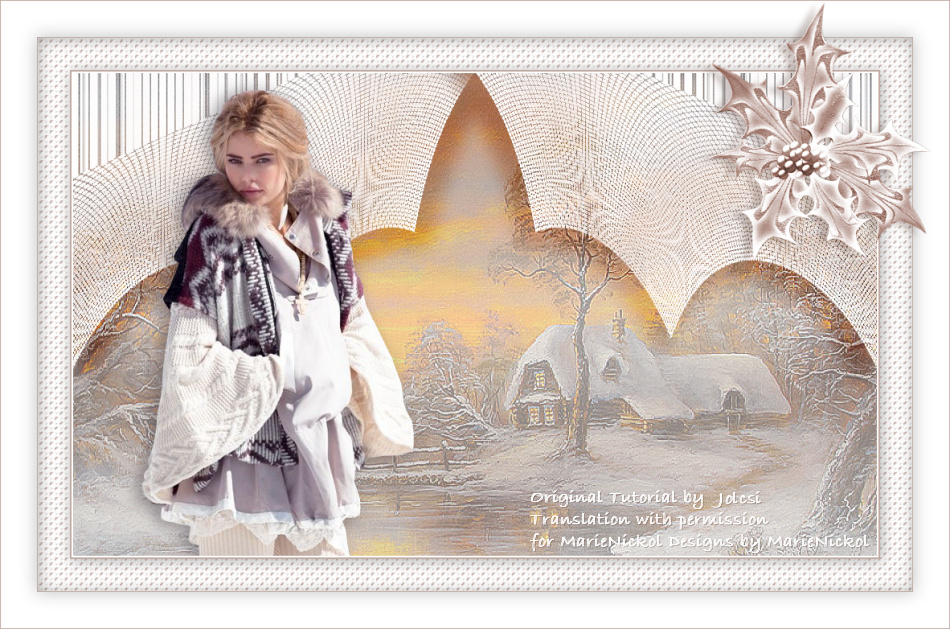
Thank you Jolcsi for the permission to translate your tutorial.
Translated by Marie Nickol.
You will find the original tutorial here:

This tutorial is a personal creation by Jolsci.
Any resemblance with another one would only be pure coincidence.
Thank you for the respect of Jolcsi’s work and the tubers work.
These translations are mine and are intended for personal use only and it is forbidden to copy part or all of it.
You can use this tutorial for PSP lessons but please put the link back to it.
Do not hesitate to let Jolcsi or me know if you have any problem with the present tutorial.

Materials used:
Disclaimer: Modifying or renaming files or removing watermarks from the tubes of the original tubers provided in the materials and sharing them as your own or using them for sale online or otherwise is prohibited.
1 character tube by Jolcsi
1 background image
1 texture
1 deco tube
Plugins used:
Filters Unlimited 2.0 - ScreenWorks - Grid Layout
Mura's Meister - Pole Transform
Note: Plugin - ScreenWorks can be used alone and it can also be imported into Filters Unlimited 2.0
Materials

The original tutorial is written on PSP 2020.
This translation is written with PSP 2018 Ultimate.
If you work with other versions some things might be different but the result will be the same.
Note: In the latest versions of PSP the command Image-Mirror has become Image - Mirror - Mirror Horizontal
and Image-Flip has become Image - Mirror - Mirror Vertical
Preparations
Duplicate all the tubes and work with the copies to preserve the originals.
Place the texture into your Textures folder of PSP
Colors used:

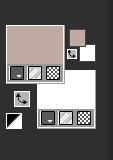
Material Properties - Foreground: Set your Foreground color to color 1  #c0aaa2
Material Properties - Background: Set your Background color to color 2  #ffffff
The Tutorial
Step 1
File - New - Open a new Transparent image 1000 x 600 pixels
Materials Properties: Set your Foreground Color to foreground-background Linear style gradient (Corel_06_029) with the following settings
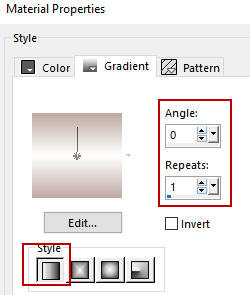
Flood fill tool / Fill in the layer with the gradient prepared above
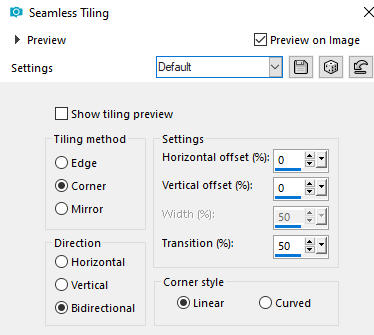
Effects - Image Effects - Seamless Tiling (default settings)
Adjust - Blur - Gaussian Blur (Radius 20)
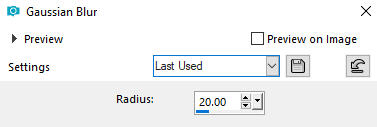
Layers - Duplicate
Step 2
Effects - Plugins - <I.C.NET Software> - Filters Unlimited 2.0 - ScreenWorks - Grid Layout
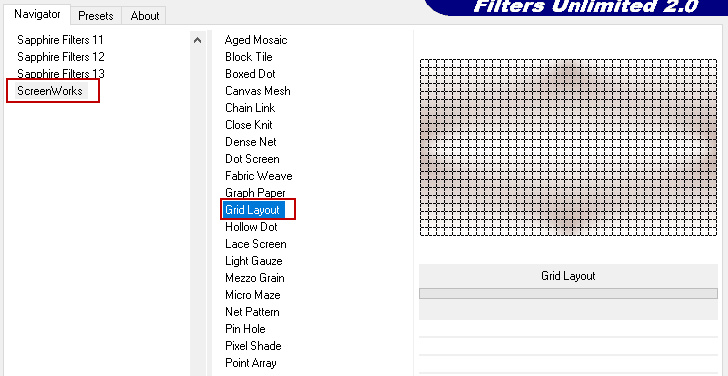
Effects - Edge Effects - Enhance
Effects - Plugins - Mura's Meister - Pole Transform
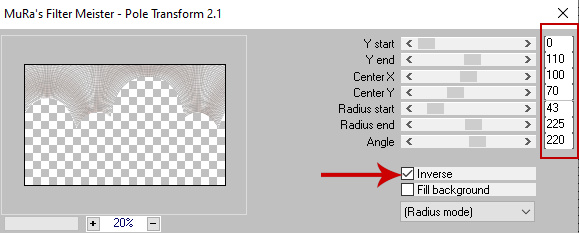
Effects - Geometric Effects - Skew
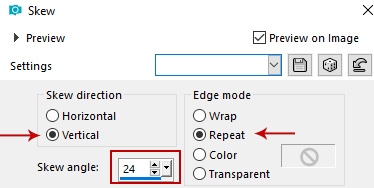
Activate the Selection Tool S 
Select the part with the Selection Tool as shown below
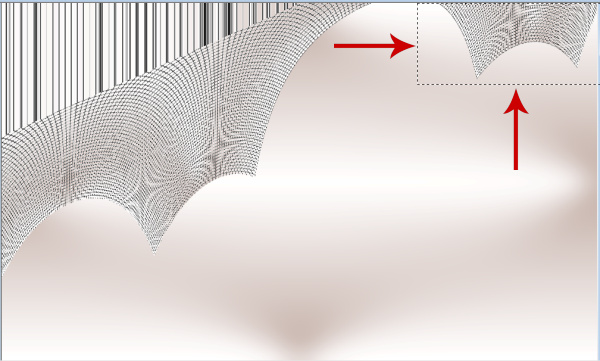
Press Delete on your keyboard
Selections - Select None
Step 3
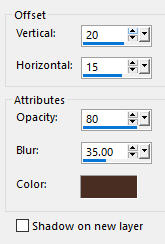
Effects - 3D Effects - Drop Shadow (20/15/80/35/) color 3  #4a2e23 - Shadow on new layer not checked
Layers - Duplicate
Image - Mirror - Mirror Horizontal
(older versions of PSP - Image - Mirror)
Layers - Merge - Merge Down
In your Layer Properties - set the Blend mode to Overlay
Activate the Pick Tool (K) 
Enter these values for positions X and Y on the Toolbar
X: 0 Y: -95

Step 4
Activate layer Raster 1
Layers - New Raster Layer
Selections - Select All
Open image tájkép.jpg
Edit - Copy
Edit - Paste - Paste into Selection on your working image
In your Layer Properties - set the Opacity to 43
Adjust - Sharpness- Sharpen
Selections - Select None
Step 5
Activate the top layer Copy of Raster 1
Open tube Jolcsi339
Remove the watermark from the tube
Edit - Copy
Edit - Paste - Paste As New Layer on your working image
Position the tube to the left as shown on the final result above
Apply a Drop Shadow of your own choice
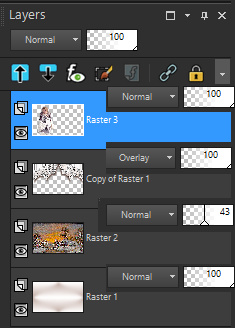
Your layers look like this:
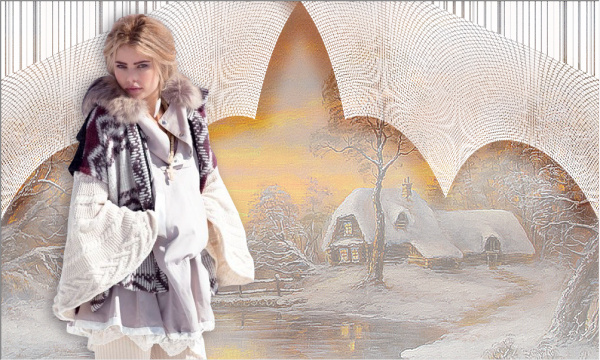
Your image looks like this:
Layers - Merge - Merge Visible
Step 6
Image - Add Borders - 2px - Symmetric checked - color 2  #ffffff
Image - Add Borders - 2px - Symmetric checked - color 1  #c0aaa2
Selections - Select All
Image - Add Borders - 40px - Symmetric checked - color 2  #ffffff
Selections - Invert
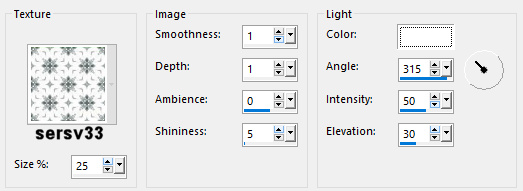
Effects - Texture Effects - Texture
On the Drop down menu choose the texture sersv33 provided in the materials
Use the following settings
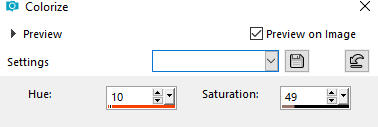
Colorize
Adjust - Hue and Saturation - Colorize
Adjust - Sharpness - Sharpen
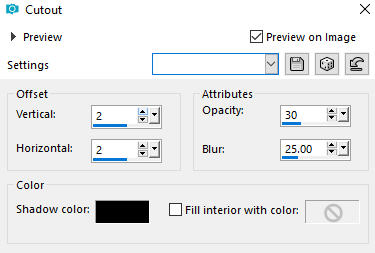
Effects - 3D Effects - Cutout
Selections - Select None
Step 7
Image - Add Borders - 1px - Symmetric checked - color 1  #c0aaa2
Selections - Select All
Image - Add Borders - 45px - Symmetric checked - color 2  #ffffff
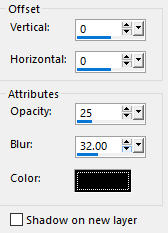
Effects - 3D Effects - Drop Shadow (0/0/25/32/) color black #000000 - Shadow on new layer not checked
Selections - Select None
Step 8
Open tube dekor
Edit - Copy
Edit - Paste - Paste As New Layer on your working image
Activate the Pick Tool (K) 
Enter these values for positions X and Y on the Toolbar
X: 880.00 Y: 1.00

Effects - 3D Effects - Drop Shadow (3/-11/25/10/) color 3  #4a2e23 Shadow on new layer not checked
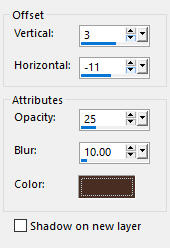
Adjust - Sharpness - Sharpen
Image - Add Borders - 1px - Symmetric checked - color 1  #c0aaa2
Step 9
Layers - New Raster Layer
Add your name or watermark
Layers - Merge - Merge All (Flatten)
Image - Resize - 950 pixels width (the height will adapt)
File - Export - Save as JPG file
~~~~~~~
I hope you enjoyed this lesson.
If you do this tutorial please email your version to me or to Jolcsi
my email address - 
Jolcsi email address - 
~~~~~~~
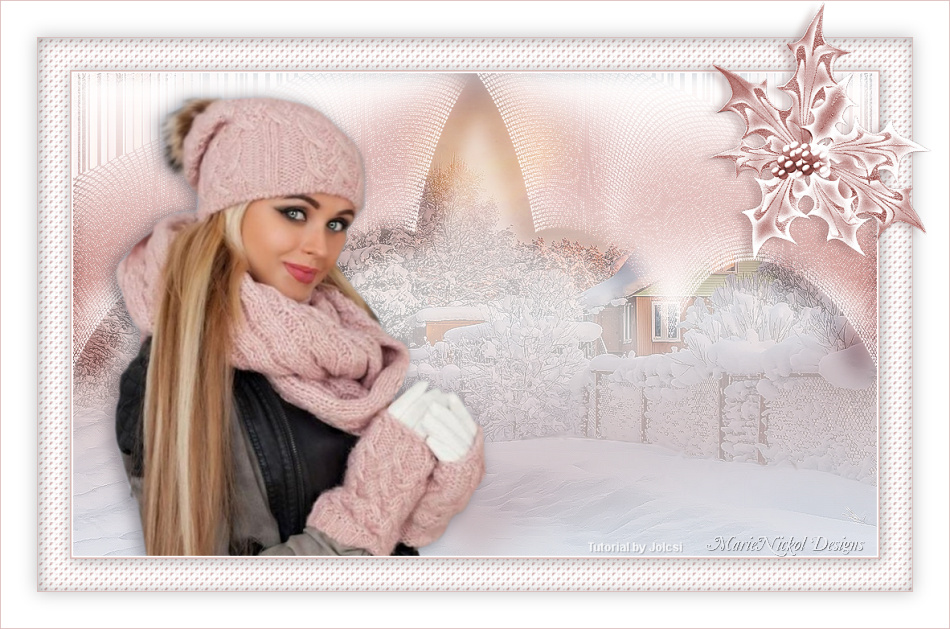
My version with tubes woman by Lana and landscape from the net
~~~~~~~
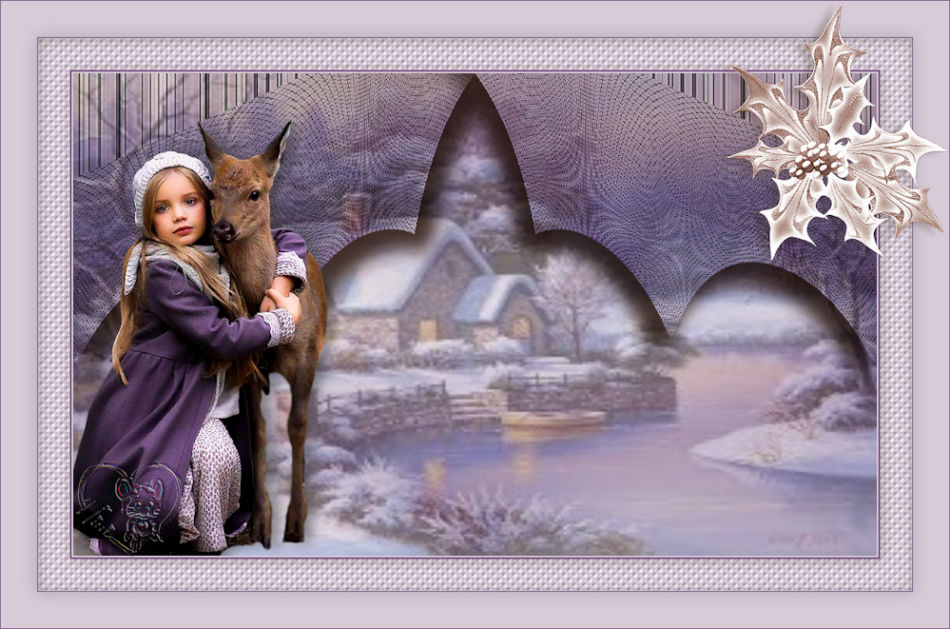
Your Versions
Nini74
~~~~~~~