
Original tutorial by Jolcsi
Thank you Jolcsi for the permission to translate your tutorial.
Translated by Marie Nickol.
You will find the original tutorial here:
This tutorial is a personal creation by Jolsci.
Any resemblance with another one would only be pure coincidence.
Thank you for the respect of Jolcsi’s work and the tubers work.
These translations are mine and are intended for personal use only and it is forbidden to copy part or all of it.
You can use this tutorial for PSP lessons but please put the link back to it.
Do not hesitate to let Jolcsi or me know if you have any problem with the present tutorial.

Materials used:
Disclaimer: Modifying or renaming files or removing watermarks from the tubes of the original tubers provided in the materials and sharing them as your own or using them for sale online or otherwise is prohibited.
1 character tube by Jolcsi
1 deco tube by Jolcsi
1 selection
1 mask by Maria José
Plugins used:
Filters Unlimited 2.0 - Background Designers IV-sf10 - Shades of Shadow
Filters Unlimited 2.0 - penta.com - color dot
Filters Unlimited 2.0 -Transparency - Eliminate White
Filters Unlimited 2.0 - MuRa's Seamless - Emboss at Alpha
Filters Unlimited 2.0 -Tramages - At The Atomic Level
Flaming Pear - Flexify2
User Defined Filter - Emboss 3
Note: Plugins - penta.com, MuRa's Seamless, Tramages can be used alone
and they can also be imported into Filters Unlimited 2.0)
You can find my plugins page - Here
Materials

The original tutorial is written on PSP 2020.
This translation is written with PSP 2020.
If you work with other versions some things might be different but the result will be the same.
Note: In the latest versions of PSP the command Image-Mirror has become Image - Mirror - Mirror Horizontal
and Image-Flip has become Image - Mirror - Mirror Vertical
Preparations
Duplicate all the tubes and work with the copies to preserve the originals.
Place the selection into your Selections folder of PSP.
If using other colors, you may need to colorize some of the elements.
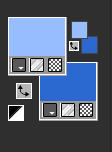
Colors used:

Material Properties - Foreground: Set your Foreground color to color 1  #96beff
Material Properties - Background: Set your Background color to color 2  #296acf
The Tutorial
Step 1
File - New - Open a new Transparent image 900 x 600 pixels
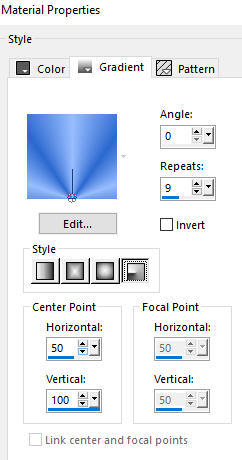
Materials Properties: Set your Foreground Color to foreground-background Radial gradient (Corel_06_029)
with the following settings
Flood fill tool / Fill in the layer with the gradient
Adjust - Blur - Gaussian Blur (Radius 20)
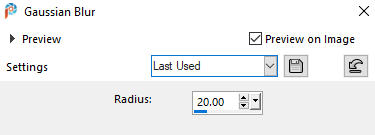
Layers - Duplicate
Image - Mirror - Mirror Vertical
(Older versions of PSP - Image-Flip)
In your Layer Properties - set the Opacity of this layer to 50%
Layers - Merge - Merge Down
Step 2
Effects - Plugins - <I.C.NET Software> - Filters Unlimited 2.0 - &<Background Designers IV> - sf10 Shades Of Shadow (default settings)
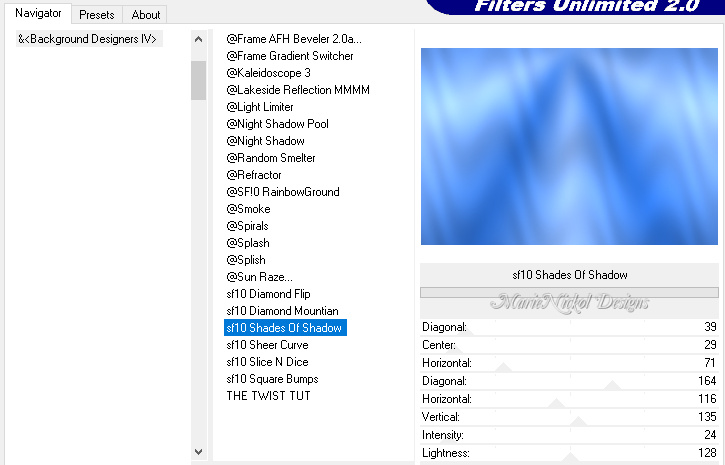
Effects - Plugins - penta.com - color dot (default settings)

Step 3
Layers - New Raster Layer
Selections - Load/Save Selection - Load Selection From Disk
Look for and load the selection - 2779
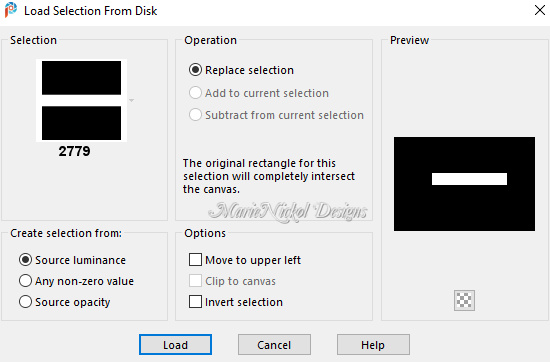
Flood fill tool / Fill in the Selection color 2  #296acf
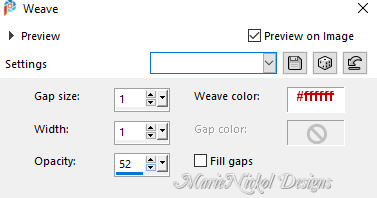
Effects - Texture Effects - Weave
Selections - Select None
Step 4
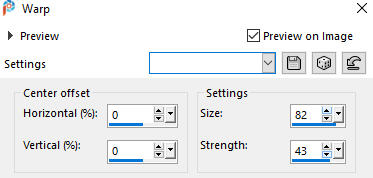
Effects - Distortion Effects - Warp
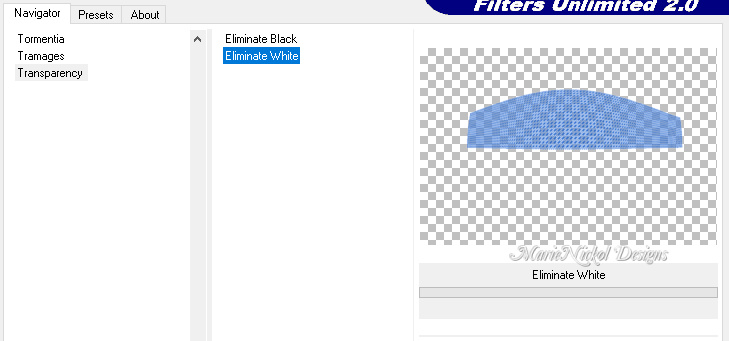
Effects - Plugins - <I.C.NET Software> - Filters Unlimited 2.0 - Transparency - Eliminate White
(Note: I set the background color to white to produce the effect)
Effects - Distortion Effects - Warp (the same settings as above)

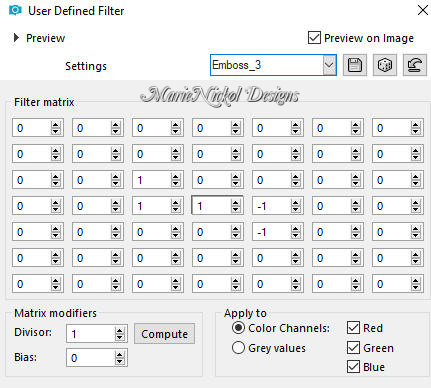
Effects - User Defined Filter - Emboss 3
Step 5
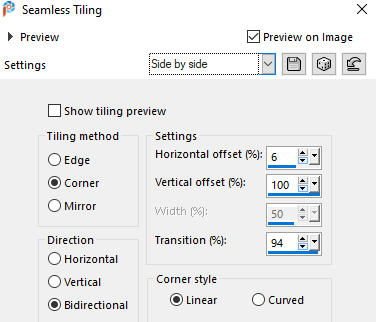
Effects - Image Effects - Seamless Tiling (settings Side by Side)
Activate the Pick Tool (K) 
Enter these values for positions X and Y on the Toolbar
X: 0.00 Y: 284.00

The Pick Tool (K) is still active
View - Rulers
Lower the top of the layer to 400 by pulling down the central knot
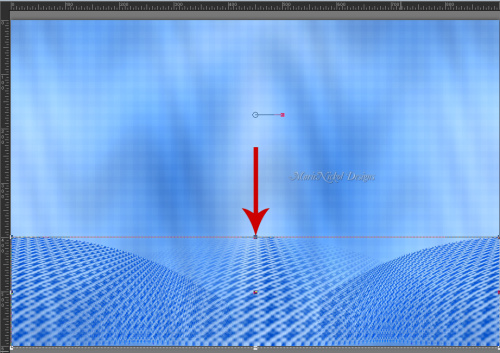
Press M on your keyboard to release the Pick Tool
View - Rulers - unclick Rulers
Step 6
Effects - Plugins - Flaming Pear - Flexify 2
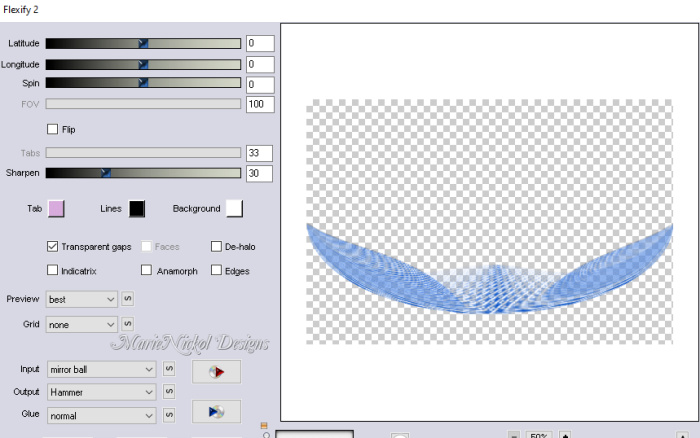
Activate the Pick Tool (K) 
Enter these values for positions X and Y on the Toolbar
X: 0.00 Y: 374.00

Press M on your keyboard to release the Pick Tool
Layers-Duplicate
Image - Mirror - Mirror Vertical
Layers - Merge - Merge Down
Effects - Image Effects - Seamless Tiling (settings Side by Side)

Step 7
Layers - New Raster Layer
Flood fill tool / Fill in the Selection color 2  #296acf
Open mask - lillymask_MariaJosé
Layers - New Mask Layer - From Image (Invert mask data not checked)
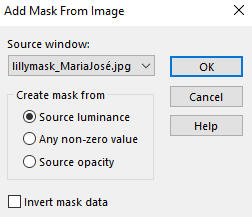
Layers - Merge - Merge Group
Effects - User Defined Filter - Emboss 3

Effects - Plugins - Flaming Pear - Flexify 2
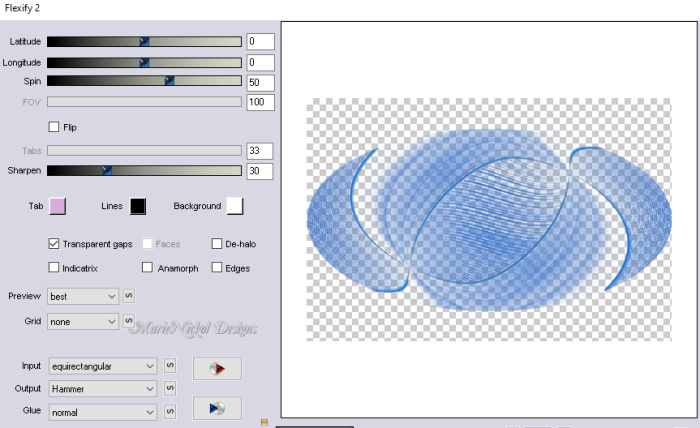
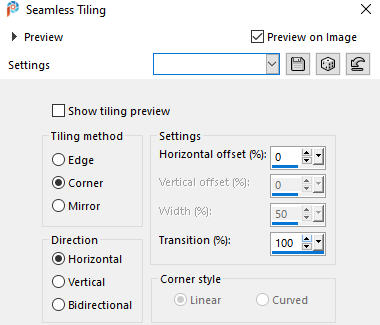
Effects - Image Effects - Seamless Tiling
Effects - Plugins - MuRa's Seamless - Emboss at Alpha (default settings)

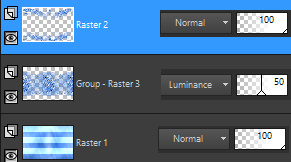
In your Layer Properties - set the Blend mode to Luminance (Legacy) and the Opacity to 50%
Layers - Arrange - Move Down
Activate the top layer - Raster 2
Your layers look like this:
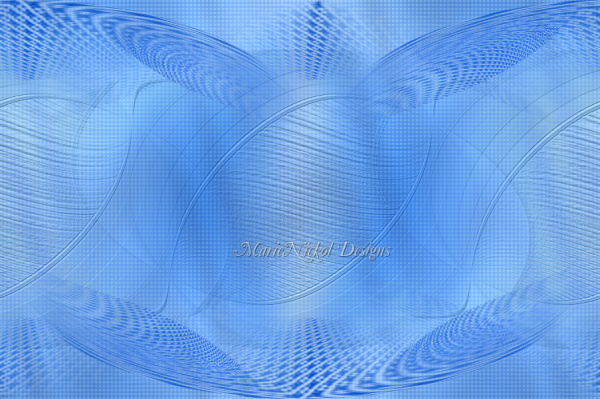
Your image look like this:
Step 8
Open the deco tube - dekor_jolcsi
Remove the watermark
Edit - Copy
Edit - Paste - Paste As New Layer on your working image
Do not move it - it is in the right place
Step 9
Image - Add Borders - 2 px - Symmetric checked - color 2  #296acf
Image - Add Borders - 2 px - Symmetric checked - color 1  #96beff
Image - Add Borders - 2 px - Symmetric checked - color 2  #296acf
Selections - Select All
Edit - Copy
Image - Add Borders - 10 px - Symmetric checked - color 1  #96beff
Selections - Invert
Effects - Plugins - penta.com - color dot (default settings)

Selections - Select None
Image - Add Borders - 1 px - Symmetric checked - color 2  #296acf
Step 10
Selections - Select All
Image - Add Borders - 45 px - Symmetric checked - color 2  #296acf
Selections - Invert
Edit - Paste - Paste into Selection
Adjust - Blur - Gaussian Blur (Radius 20)

Selections - Promote Selection to Layer
Effects - Plugins - Tramages - At The Atomic Level (default settings)

In your Layer Properties - set the Blend mode to Screen
Layers - Merge - Merge Down
Selections - Invert
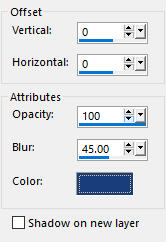
Effects - 3D Effects - Drop Shadow (0/0/100/45) color 3  #183e7a - Shadow on new layer not checked
Selections - Select None
Step 11
Open the character tube - Jolcsi1032
Remove the watermark
Edit - Copy
Edit - Paste - Paste As New Layer on your working image
Image - Resize - 120% - Resize All Layers - Not Checked
Position to the bottom left or to your liking
Apply drop shadow at your own discretion
Image - Add Borders - 1 px - Symmetric checked - color 2  #296acf
Step 12
Layers - New Raster Layer
Add your name or watermark
Layers - Merge - Merge All (Flatten)
Image - Resize - 950 pixels width (the height will adapt)
File - Export - Save as JPG file
~~~~~~~
I hope you enjoyed this lesson.
If you do this tutorial please email your version to me
my email address -
~~~~~~~
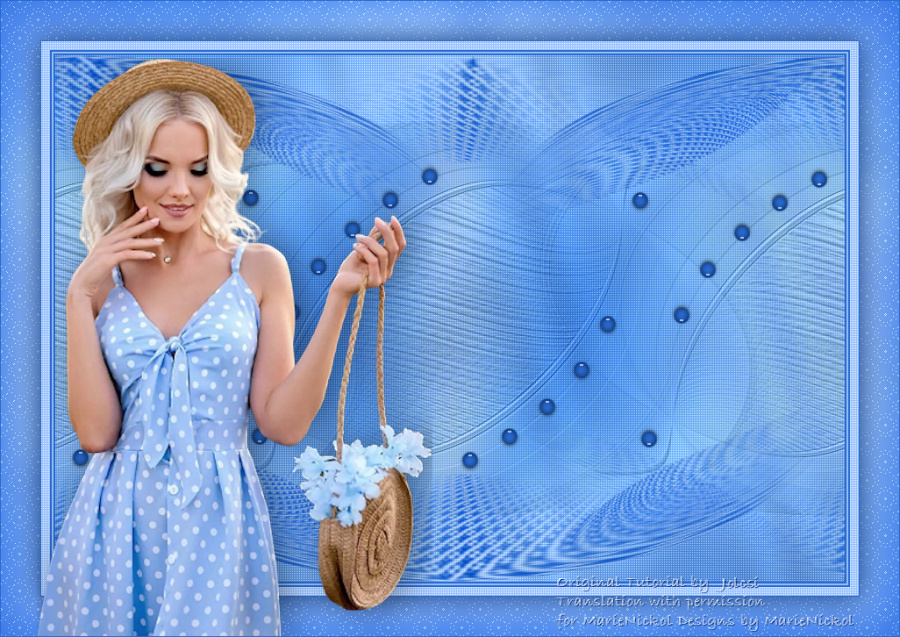
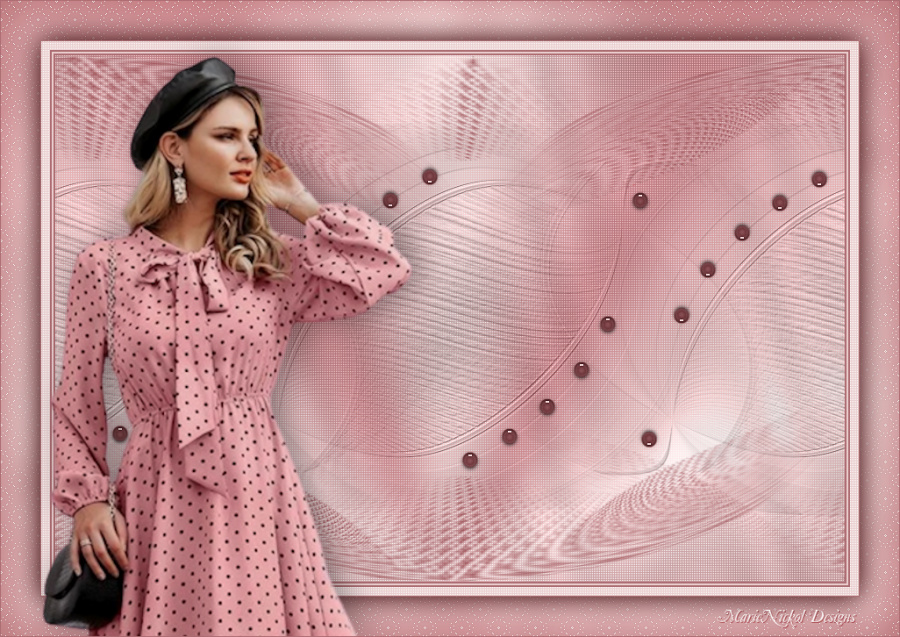
My version with my own tube
~~~~~~~
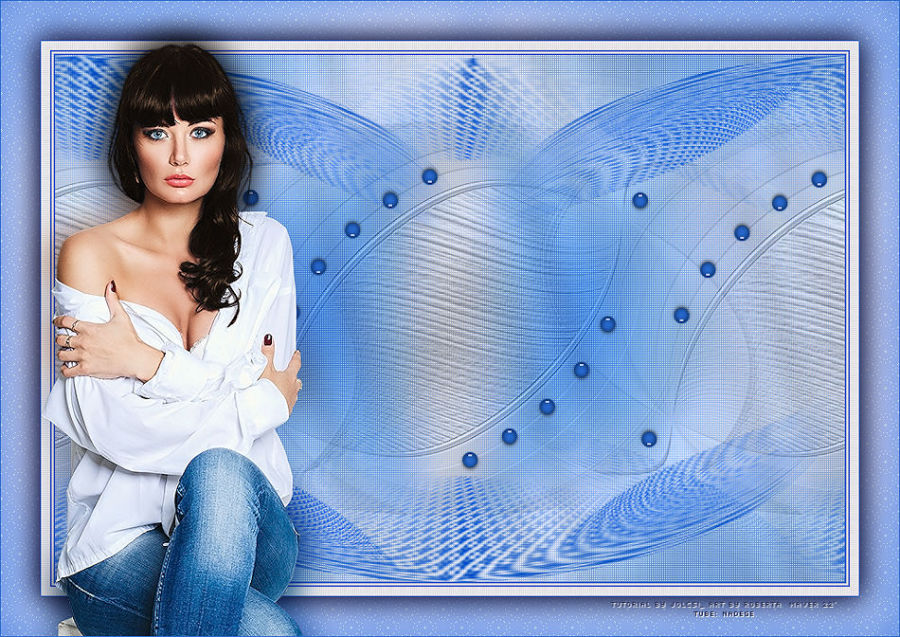
Your Versions
Thank you Roberta Maver for your beautiful version
~~~~~~~~~~
