
Original tutorial by Jolcsi
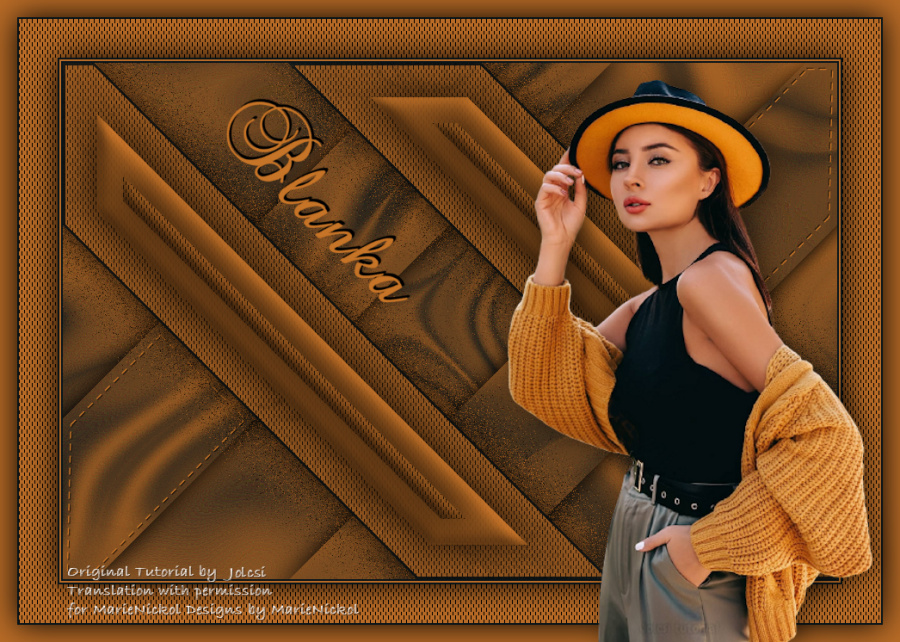
Thank you Jolcsi for the permission to translate your tutorial.
Translated by Marie Nickol.
You will find the original tutorial here:
This tutorial is a personal creation by Jolsci.
Any resemblance with another one would only be pure coincidence.
Thank you for the respect of Jolcsi’s work and the tubers work.
These translations are mine and are intended for personal use only and it is forbidden to copy part or all of it.
You can use this tutorial for PSP lessons but please put the link back to it.
Do not hesitate to let Jolcsi or me know if you have any problem with the present tutorial.

Materials used:
Disclaimer: Modifying or renaming files or removing watermarks from the tubes of the original tubers provided in the materials and sharing them as your own or using them for sale online or otherwise is prohibited.
1 character tube by Jolcsi
1 deco tube by Jolcsi
1 wordart tube by Jolcsi
3 selections
1 font
Plugins used:
Mehdi - Wavy Lab 1.1
Filters Unlimited 2.0 - VM Distortion - Radiator
Filters Unlimited 2.0 - VM Toolbox - Seamless Tile
Filters Unlimited 2.0 - VM Toolbox - Slipthrough
AP 01 (Innovations) - Lines - SilverLining
You can find my plugins page - Here
Materials

The original tutorial is written on PSP 2020.
This translation is written with PSP 2020.
If you work with other versions some things might be different but the result will be the same.
Note: In the latest versions of PSP the command
Image-Mirror has become Image - Mirror - Mirror Horizontal
and Image-Flip has become Image - Mirror - Mirror Vertical
Preparations
Duplicate all the tubes and work with the copies to preserve the originals.
Place the selections into your Selections folder of PSP
Adjust the Blend Mode and Opacity to your own liking.
If using other colors, you may need to colorize some of the elements.
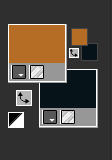
Colors used:

Material Properties - Foreground: Set your Foreground color to color 1  #b86b26
Material Properties - Background: Set your Background color to color 2  #07141a
The Tutorial
Step 1
File - New - Open a new Transparent image 900 x 600 pixels
Effects - Plugins - Mehdi - Wavy Lab 1.1
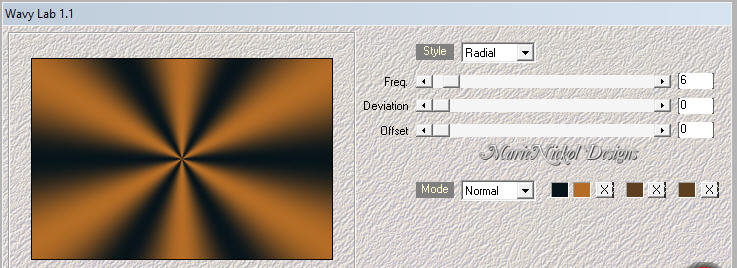
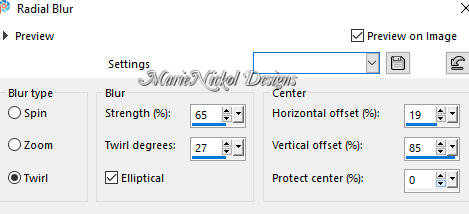
Adjust - Blur - Radial Blur
Layers - Duplicate
Image - Mirror - Mirror Horizontal
Image - Mirror - Mirror Vertical
In your Layer Properties - set the Opacity of this layer to 50%
Layers - Merge - Merge Down
Effects - Edge Effects - Enhance More
Step 2
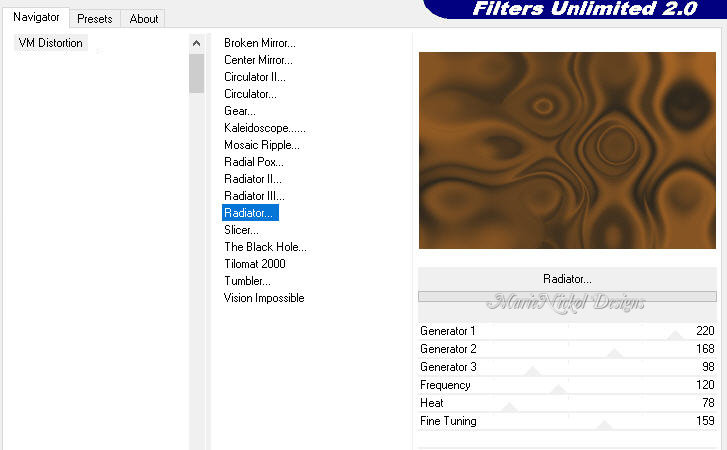
Effects - Plugins - <I.C.NET Software> - Filters Unlimited 2.0 - VM Distortion - Radiator (default settings)
Adjust - Sharpness- Sharpen More
Layers - Duplicate
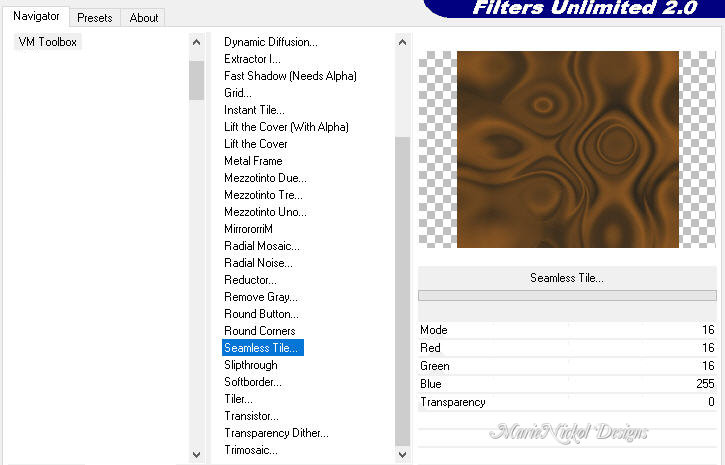
Effects - Plugins - <I.C.NET Software> - Filters Unlimited 2.0 - VM Toolbox - Seamless Tile (default settings)
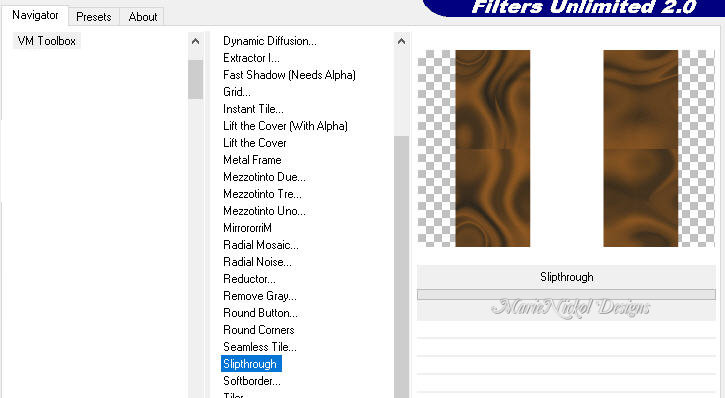
Effects - Plugins - <I.C.NET Software> - Filters Unlimited 2.0 - VM Toolbox - Slipthrough (default settings)
(Note: set your background color to white #ffffff to get the same effect)
Selections - Load/Save Selection - Load Selection From Disk
Look for and load the selection - 2737
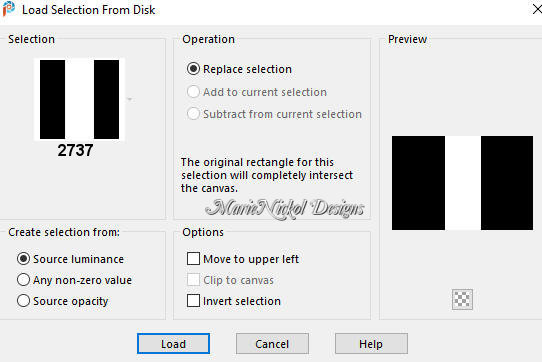
Press the Delete key on your keyboard
Selections - Select None
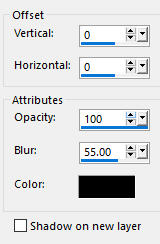
Effects - 3D Effects - Drop Shadow (0/0/100/55.00) color #000000 - Shadow on new layer not checked
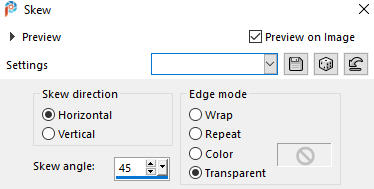
Effects - Geometric Effects - Skew
Step 3
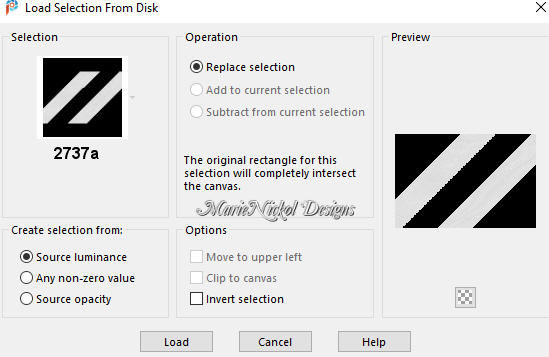
Selections - Load/Save Selection - Load Selection From Disk
Look for and load the selection -2737a
Layers - New Raster Layer
Flood fill tool /Fill in the Layer with the Background Color 2  #07141a
Selections - Modify - Contract
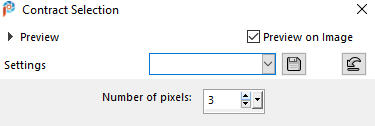
Press the Delete key on your keyboard
Step 4
Layers - New Raster Layer
Flood fill tool / Fill in the layer with the Foreground color 1  #b86b26
Effects - Plugins - AP 01 (Innovations) - Lines - SilverLining
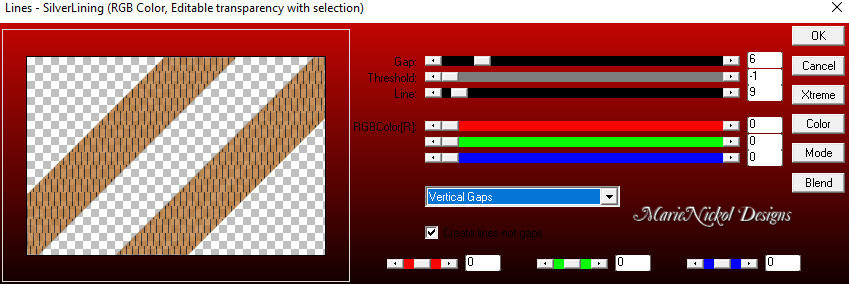
Selections - Modify - Contract
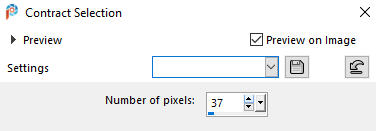
Layers - New Raster Layer
Flood fill tool / Fill in the layer with the Foreground color 1  #b86b26
Effects - 3D Effects - Inner Bevel
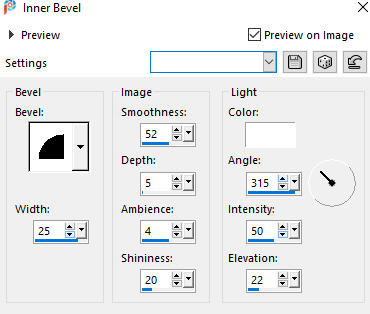
Effects - 3D Effects - Drop Shadow (0/0/100/55.00) color #000000 - Shadow on new layer not checked

Step 5
Selections - Modify - Contract
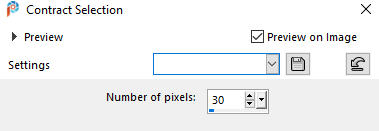
Effects - Plugins - AP 01 (Innovations) - Lines - SilverLining (the same settings as in Step 4)
settings are still in memory

Effects - 3D Effects - Inner Bevel (the same settings as in Step 4)
settings are still in memory

Effects - 3D Effects - Drop Shadow (0/0/100/55.00) color #000000 - Shadow on new layer not checked

Selections - Select None
Layers - Merge - Merge Down - 2 times
Image - Mirror - Mirror Horizontal
Effects - 3D Effects - Drop Shadow (0/0/100/55.00) color #000000 - Shadow on new layer not checked

Step 6
Layers - Duplicate
Effects - Texture Effects - Mosaic - Glass
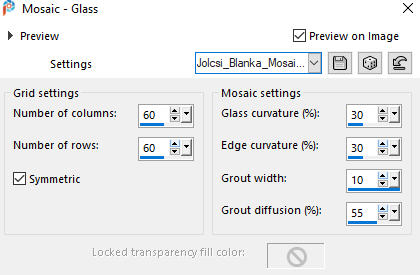
Layers - Arrange - Move Down
Step 7
Activate the second layer from the bottom - Copy of Raster 1
Selections - Load/Save Selection - Load Selection From Disk
Look for and load the selection -2737b
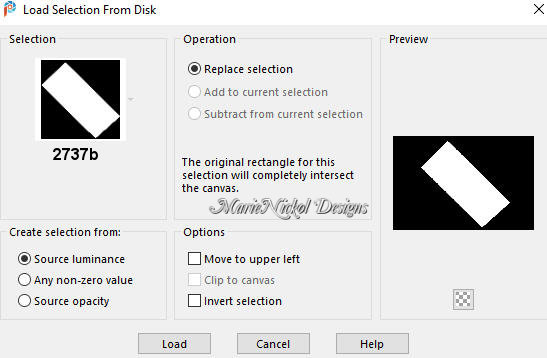
Press the Delete key on your keyboard
Selections - Select None
Layer - Copy of Raster 1 - is still active!
Step 8
Open the deco tube - jolcsi_dekor
Remove the watermark
Edit - Copy
Edit - Paste - Paste As New Layer on your working image
Do not move it - it is in the right place!
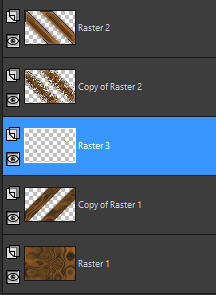
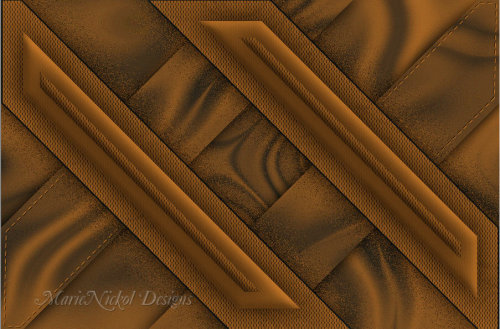
Your layers look like this:
Your image looks like this:
Step 9
Activate the top layer - Raster 2
Open the text tube - text
Edit - Copy
Edit - Paste - Paste As New Layer on your working image
Activate the Pick Tool (K) 
Enter these values for positions X and Y on the Toolbar
X: 190.00 Y: 41.00

***When usign other colors for your image, you will find the font Baroque Script in the materials.
Set the size of the font to 55 pixels
Set the background color to color 1  #b86b26
Type the text - 'Blanka'
Layers - Convert to Raster Layer
Effects - 3D Effects - Drop Shadow (-4/0/100/1.00) color 2  #07141a - Shadow on new layer not checked
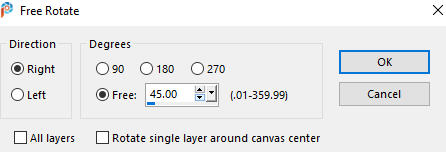
Image - Free Rotate
Position as above - X: 190.00 Y: 41.00
***
Step 10
Image - Add Borders - 2px - Symmetric checked - color 2  #07141a
Image - Add Borders - 2px - Symmetric checked - color 1  #b86b26
Image - Add Borders - 2px - Symmetric checked - color 2  #07141a
Selections - Select All
Image - Add Borders - 45px - Symmetric checked - color 1  #b86b26
Selections - Invert
Effects - Plugins - AP 01 (Innovations) - Lines - SilverLining (the same settings as in Step 4)
settings are still in memory
Selections - Invert
Effects - 3D Effects - Drop Shadow (0/0/100/55.00) color #000000 - Shadow on new layer not checked

Selections - Select None
Image - Add Borders - 2px - Symmetric checked - color 2  #07141a
Selections - Select All
Image - Add Borders - 20px - Symmetric checked - color 1  #b86b26
Effects - 3D Effects - Drop Shadow (0/0/100/55.00) color #000000 - Shadow on new layer not checked

Selections - Select None
Step 11
Open the character tube - Jolcsi986
Remove the watermark
Edit - Copy
Edit - Paste - Paste As New Layer on your working image
Image - Resize - 120% - Resize All Layers - Not Checked
Position the tube as shown on the final example above
Apply drop shadow to your own liking
Step 12
Layers - New Raster Layer
Add your name or watermark
Layers - Merge - Merge All (Flatten)
Image - Resize - 950 pixels width (the height will adapt)
Adjust - Sharpness- Sharpen
File - Export - Save as JPG file
~~~~~~~
I hope you enjoyed this lesson.
If you do this tutorial please email your version to me
my email address -
~~~~~~~
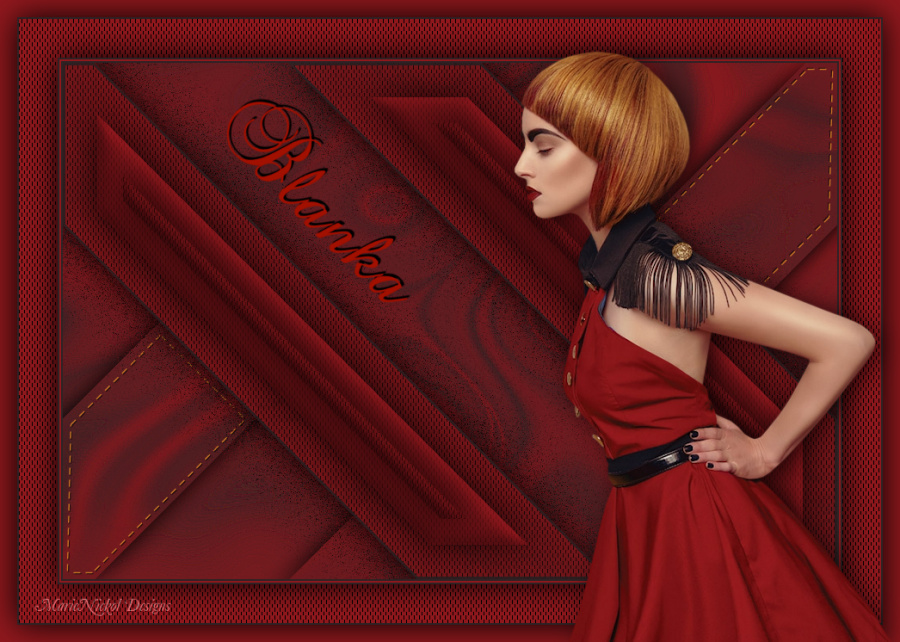
My versions with a tube by Alies
~~~~~~~
Your Versions
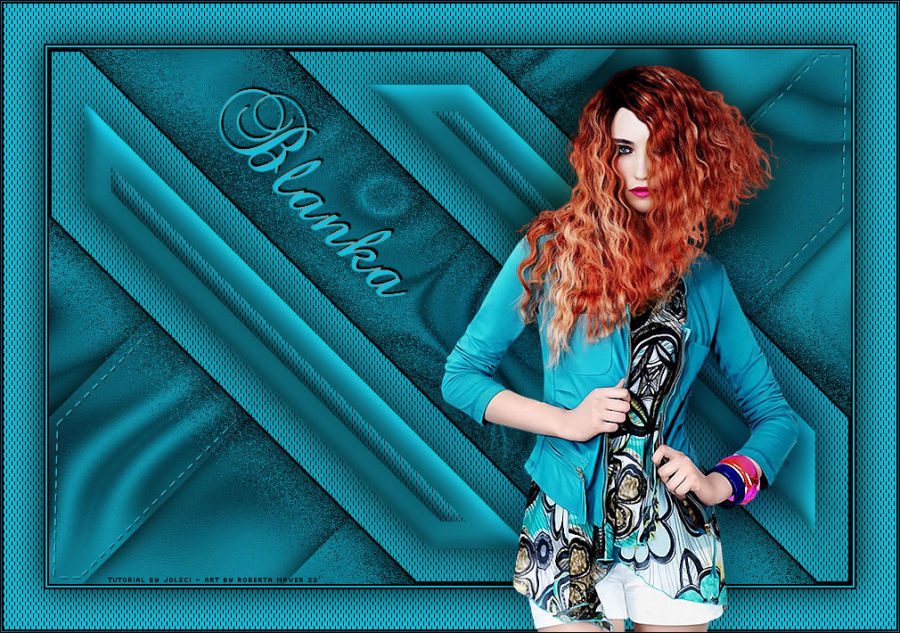
Thank you Roberta Maver for your beautiful version
~~~~~~~~~~
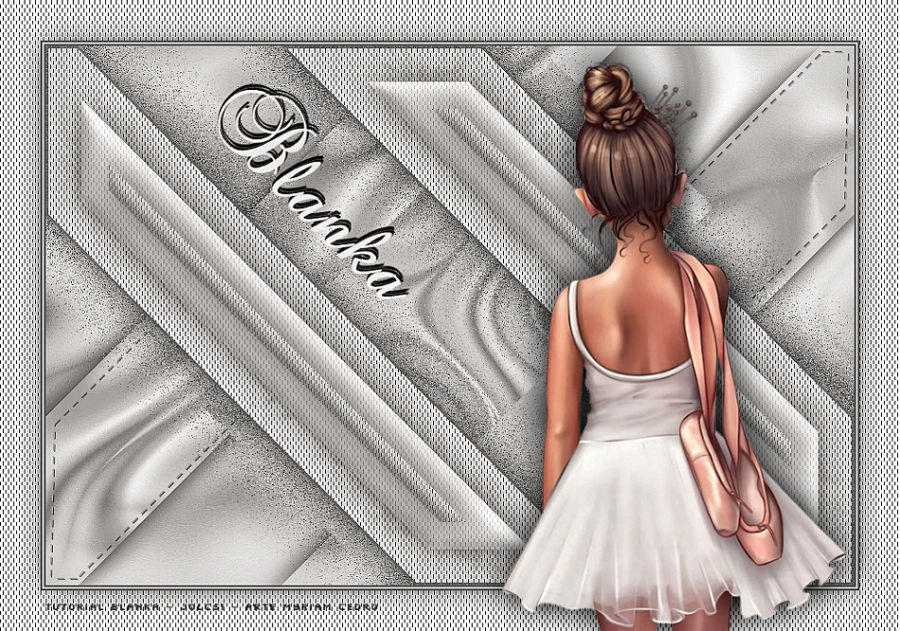
Thank you Myriam Cedro for your beautiful version
~~~~~~~~~~
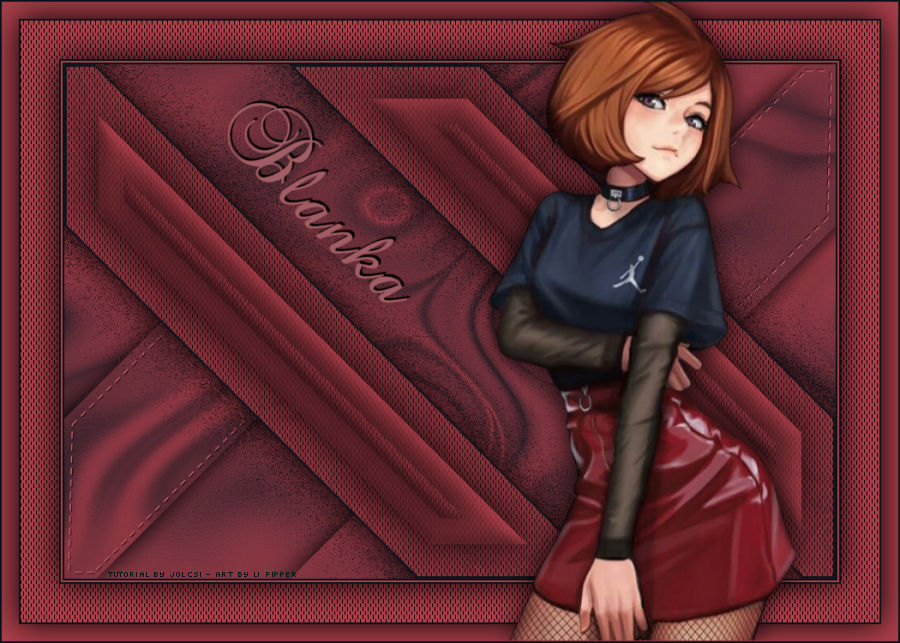
Thank you Liriani Silva for your beautiful version
~~~~~~~~~~
