
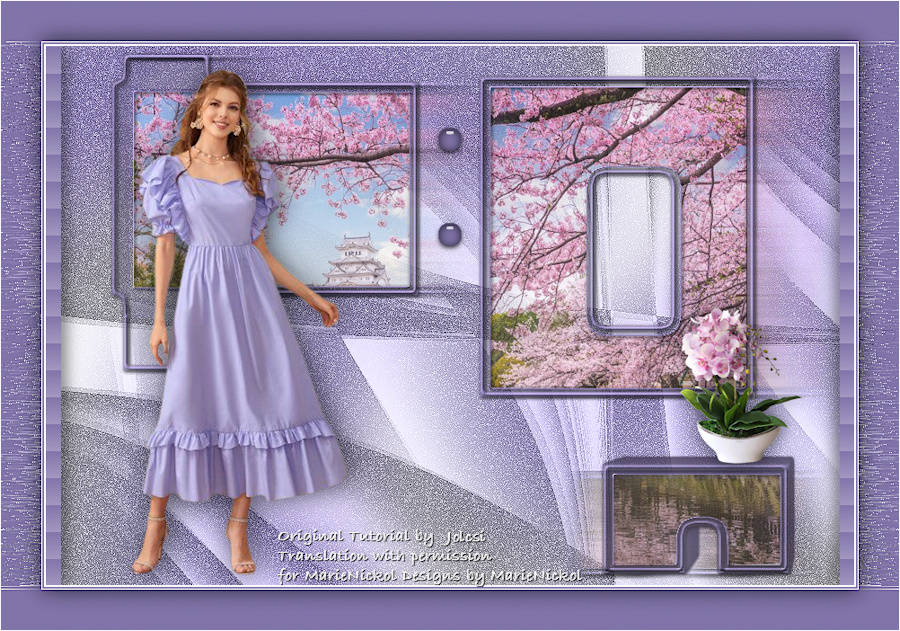
Original tutorial by Jolcsi
Thank you Jolcsi for the permission to translate your tutorial.
Translated by Marie Nickol.
You will find the original tutorial here:
This tutorial is a personal creation by Jolsci.
Any resemblance with another one would only be pure coincidence.
Thank you for the respect of Jolcsi’s work and the tubers work.
These translations are mine and are intended for personal use only and it is forbidden to copy part or all of it.
You can use this tutorial for PSP lessons but please put the link back to it.
Do not hesitate to let Jolcsi or me know if you have any problem with the present tutorial.

Materials used:
Disclaimer: Modifying or renaming files or removing watermarks from the tubes of the original tubers provided in the materials and sharing them as your own or using them for sale online or otherwise is prohibited.
1 character tube by Jolcsi
1 flowers tube by Jolcsi
1 image scenery
1 alpha selections
1 element by Jolcsi
Plugins used:
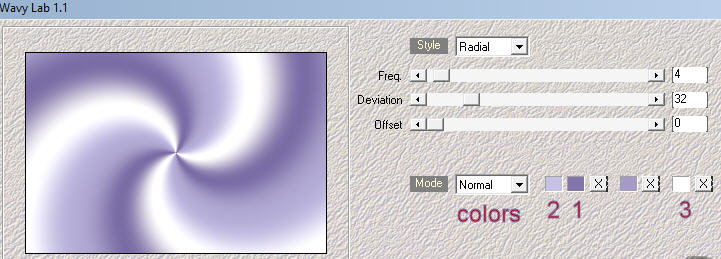
Mehdi - Wavy Lab 1.1
Alien Skin/Eye Candy5 - Impact - Glass
Alien Skin/Eye Candy5 - Impact - Extrude
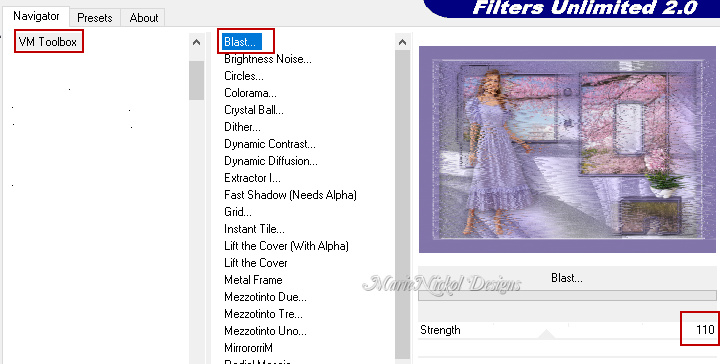
Filters Unlimited 2.0 - VM Toolbox - Blast
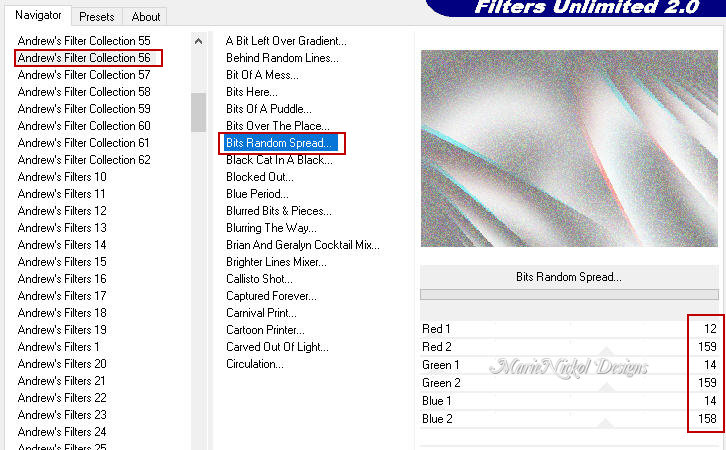
Filters Unlimited 2.0 - Andrew's Filter Collection 56 - Bits Random Spread
You can find my plugins page - Here
Materials
The original tutorial is written on PSP 2020.
This translation is written with PSP 2020.
If you work with other versions some things might be different but the result will be the same.
Note: In the latest versions of PSP the command
Image-Mirror has become Image - Mirror - Mirror Horizontal
and Image-Flip has become Image - Mirror - Mirror Vertical
Preparations
Duplicate all the tubes and work with the copies to preserve the originals.
Adjust the Blend Mode and Opacity at your own discretion.
Important Note: If using other colors, you need to colorize the element 'jolcsi_keret'
Do not apply the blend mode Luminance (Legacy) to it!!!
When you open the Selections From Alpha Channel.pspimage file you will see a blank canvas.
It is not empty: it contains all the selections needed, saved to Alpha Channels.
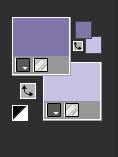
Colors used:

Material Properties - Foreground: Set your Foreground color to color 1  #8275aa
Material Properties - Background: Set your Background color to color 2  #c7c2e4
The Tutorial
Step 1
Open the Selections From Alpha Channel.pspimage file
Window - Duplicate
Close the original
The copy will be the basis of your work
Step 2
Effects - Plugins - Mehdi - Wavy Lab 1.1
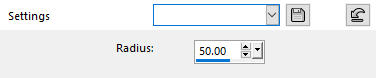
Adjust - Blur - Gaussian Blur (Radius 50)
Layers - Duplicate
Effects - Plugins - <I.C.NET Software> - Filters Unlimited 2.0 - Andrew's Filter Collection 56 - Bits Random Spread (default)
In your Layer Properties - set the Blend mode to Luminance (Legacy) and the Opacity to 85%
Effects - Edge Effects - Enhance (or Adjust - Sharpness- Sharpen)
Step 3
Open the element tube - jolcsi_keret
Remove the watermark
Edit - Copy
Edit - Paste - Paste As New Layer on your working image
Activate the Pick Tool (K) 
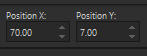
Enter these values for positions X and Y on the Toolbar
X: 70.00 Y: 7.00
Press M on your keyboard to release the Pick Tool
Step 4
Layers - New Raster Layer
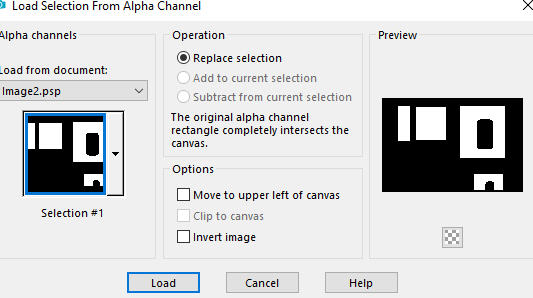
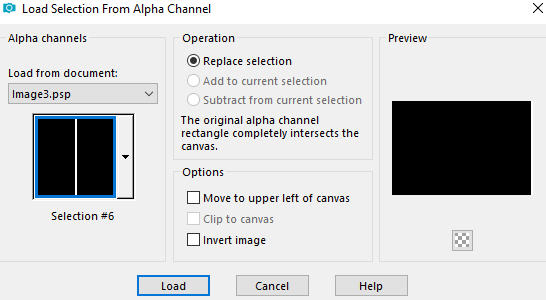
Selections - Load/Save Selection - Load Selection From Alpha Channel
Load Selection #1
Open the landscape image - tájkép
Edit - Copy
Edit - Paste - Paste into Selection on your working image
In your Layer Properties - set the Opacity to 75%
Adjust - Sharpness- Sharpen
Step 5
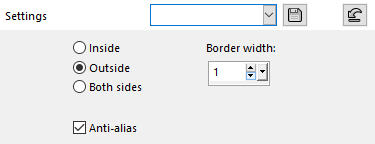
Selections - Modify - Select Selection Borders
Layers - New Raster Layer
Flood fill tool / Fill in the layer with color 1 #8275aa
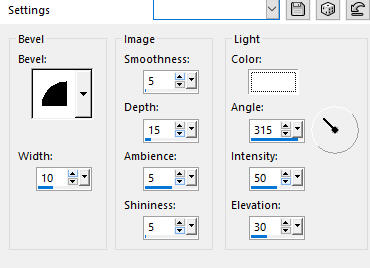
Effects - 3D Effects - Inner Bevel
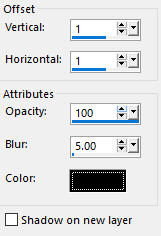
Effects - 3D Effects - Drop Shadow (1/1/100/5) color black #000000 - Shadow on new layer not checked
Selections - Select None
Layers - Merge - Merge Down (2 times)
Step 6
Layers - Duplicate
Layers - Arrange - Move Down
Effects - Distortion Effects - Wind

In your Layer Properties - set the Opacity to 75%
Step 7
Selections - Load/Save Selection - Load Selection From Alpha Channel
Load Selection #2
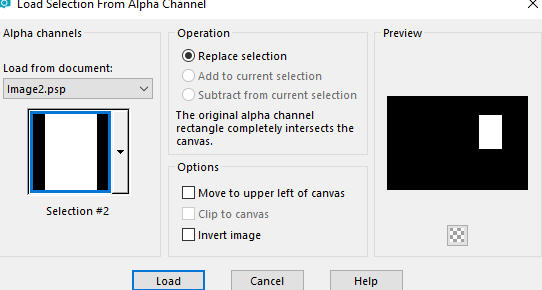
Press Delete with the Delete key on your keyboard
Selections - Select None
Step 8
Activate the top layer - Raster 2
Selections - Load/Save Selection - Load Selection From Alpha Channel
Load Selection #3
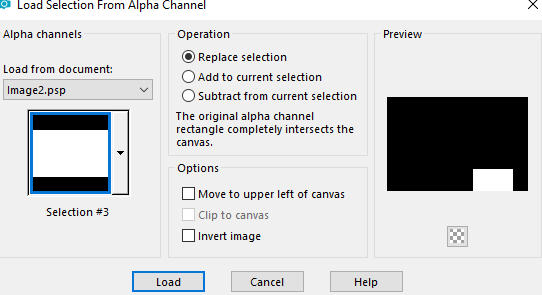
Selections - Promote Selection to Layer
Activate the layer underneath again - Raster 2
Press Delete with the Delete key on your keyboard
Selections - Select None
Step 9
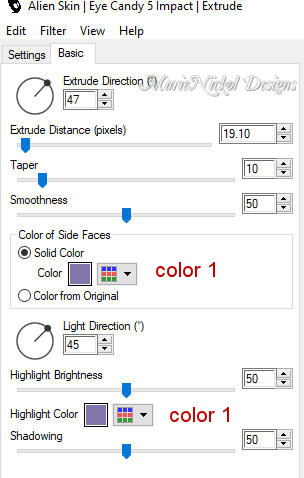
Activate the top layer - Promoted Selection
Effects - Plugins - Alien Skin Eye Candy 5 - Impact - Extrude
Use these settings in the Basic Tab:
Activate the Pick Tool (K)
Enter these values for positions X and Y on the Toolbar
X: 617.00 Y: 455.00
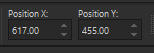
Press M on your keyboard to release the Pick Tool
Selections - Load/Save Selection - Load Selection From Alpha Channel
Load Selection #4
In your Layer Properties - set the Opacity to 77%
Selections - Select None
Step 10
Open the flower tube - jolcsi_virág
Remove the watermark
Edit - Copy
Edit - Paste - Paste As New Layer on your working image
Image - Resize - 35% - Resize All Layers - Not Checked
Activate the Pick Tool (K)
Enter these values for positions X and Y on the Toolbar
X: 706.00 Y: 291.00
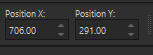
Press M on your keyboard to release the Pick Tool
Adjust - Sharpness- Sharpen
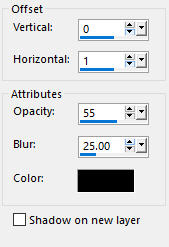
Effects - 3D Effects - Drop Shadow (0/1/55/25) color black #000000 - Shadow on new layer not checked
Step 11
Open the character tube - jolcsi213
Remove the watermark
Edit - Copy
Edit - Paste - Paste As New Layer on your working image
Image - Resize - 105% - Resize All Layers - Not Checked
Position the tube as shown on the final result above
Apply drop shadow to your own liking
Step 12
Layers - New Raster Layer
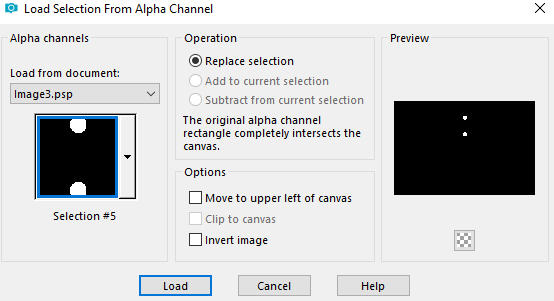
Selections - Load/Save Selection - Load Selection From Alpha Channel
Load Selection #5
Flood fill tool / Fill in the layer with color 1 #8275aa
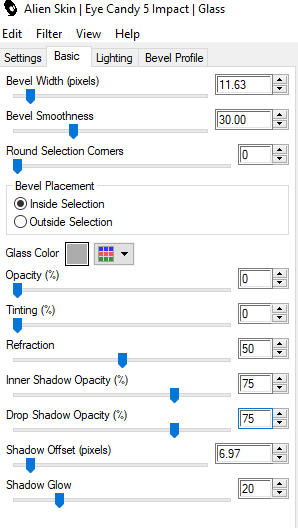
Effects - Plugins - Alien Skin - Eye Candy 5 - Impact - Glass
Use these settings in the Basic Tab:
Selections - Select None
Step 13
Layers - New Raster Layer
Selections - Load/Save Selection - Load Selection From Alpha Channel
Load Selection #6
Flood fill tool / Fill in the layer with color 1 #8275aa
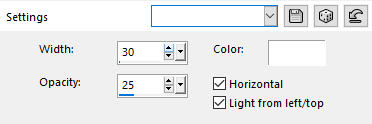
Effects - Texture Effects - Blinds
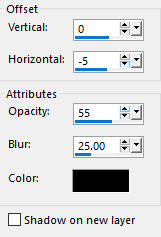
Effects - 3D Effects - Drop Shadow (0/-5/55/25) color black #000000 - Shadow on new layer not checked
Selections - Select None
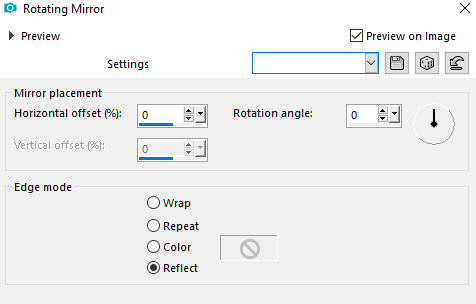
Effects - Reflection Effects - Rotating Mirror
Step 14
Image - Add Borders - 2px - Symmetric checked - color 3  #ffffff
Image - Add Borders - 2px - Symmetric checked - color 1 #8275aa
Image - Add Borders - 1px - Symmetric checked - color 3 #ffffff
Selections - Select All
Image - Add Borders - 45px - Symmetric checked - color 1 #8275aa
Selections - Invert
Step 15
Effects - Plugins - <I.C.NET Software> - Filters Unlimited 2.0 - VM Toolbox - Blast
Effects - Reflection Effects - Rotating Mirror
Adjust - Sharpness- Sharpen More
Selections - Invert
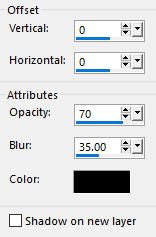
Effects - 3D Effects - Drop Shadow (0/0/70/35) color black #000000 - Shadow on new layer not checked
Selections - Select None
Image - Add Borders - 1px - Symmetric checked - color 3 #ffffff
Step 16
Layers - New Raster Layer
Add your name or watermark
Layers - Merge - Merge All (Flatten)
Image - Resize - 950 pixels width (the height will adapt)
File - Export - Save as JPG file
~~~~~~~
I hope you enjoyed this lesson.
If you do this tutorial please email your version to me
my email address -
~~~~~~~
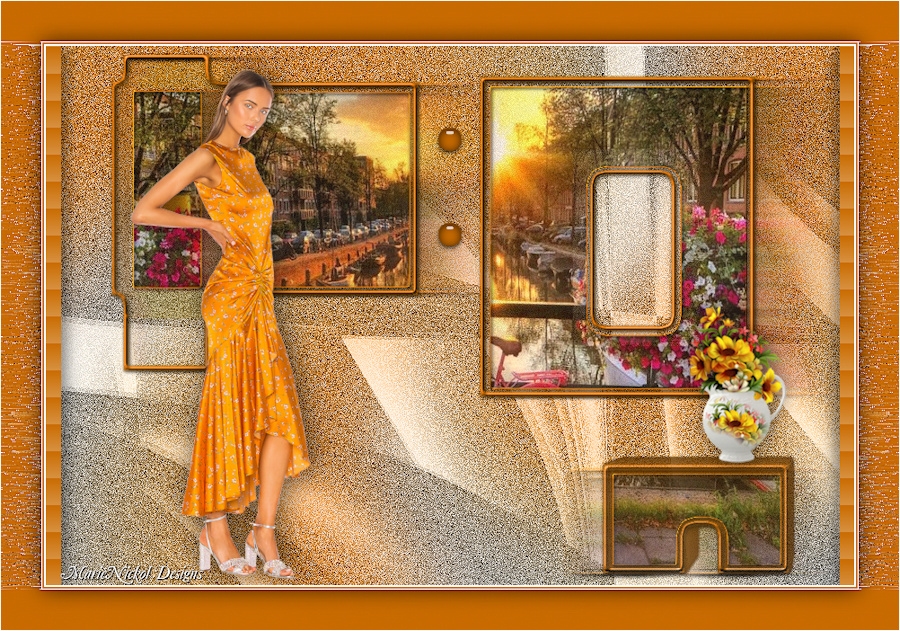
My versions with my own woman tube and flowers group shared
~~~~~~~
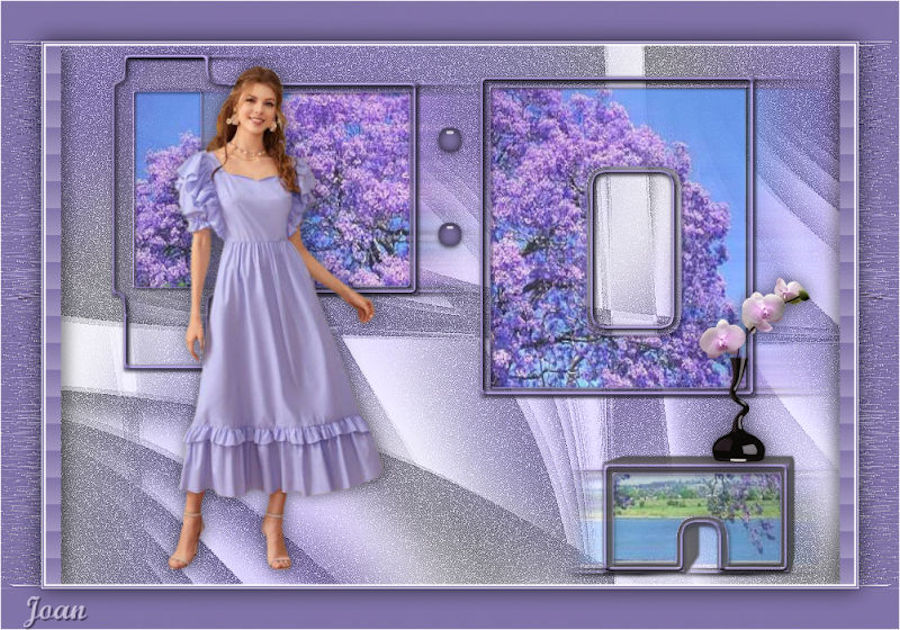
Your Versions
Thank you Joan for your beautiful version.
~~~~~~~
