Original tutorial by Animabelle
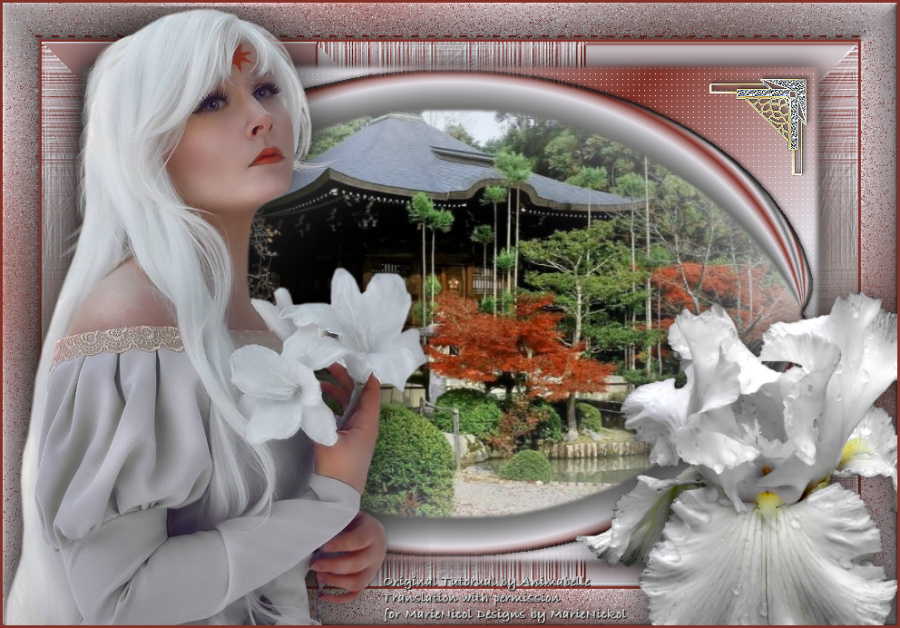
Thank you Animabelle for the permission to translate some of your tutorials.
Translated by Marie Nickol.
You will find the original tutorial here:

This tutorial is a personal creation.
Any resemblance with another one would only be pure coincidence.
Thank you for the respect of Animabelle’s work and the tubers work.
These translations are mine and are intended for personal use only and it is forbidden to copy part or all of it.
You can use this tutorial for PSP lessons but please put the link back to it.
Do not hesitate to let Animabelle or me know if you have any problem with the present tutorial.

Materials used:
Disclaimer: Modifying or renaming files or removing watermarks from the tubes of the original tubers provided in the materials and sharing them as your own or using them for sale online or otherwise is prohibited.
1 character tube by Danimage
1 flower tube by Claudia Viza
1 scenery tube by Luna
2 Selections
2 presets
Plugins used:
I.C.NET Software / Filters Unlimited 2.0
Scribe / Doughnutz - Imported into Filters Unlimited 2.0
Simple / Pizza Slice Mirror - (It can be used alone and it can also be imported into Filters Unlimited 2.0)
Alien Skin - Eye Candy 5 - Impact
Carolaine and sensibility / CS-LDots
User Defined Filter/Emboss 3
Thank you Renée for sharing your plugins page
==> Here
Materials

The original tutorial was written with PSP 12
but can be done with other versions as well.
This translation is written with PSP 2018 Ultimate, if you work with other versions some things might be different but the result will be the same.
Note: In the latest versions of PSP the command Image-Mirror has become Image - Mirror - Mirror Horizontal
and Image-Flip has become Image - Mirror - Mirror Vertical
Preparations
Duplicate all the tubes and work with the copies to preserve the originals.
Double click on the Alien Skin Presets provided in the materials and they will automatically install in the appropriate filter for your PSP
Place the selection into your Selections folder of PSP
Colors used:

Note: When
working with your own colors, adjust the Blend Mode/Opacity at your own discretion
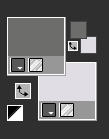
Material Properties - Foreground: Set your Foreground color to color 1  #6d6d6b
Material Properties - Background: Set your Background color to color 3  #e0dde4
The Tutorial
Step 1
File - New - Open a new Transparent image 900 x 600 pixels
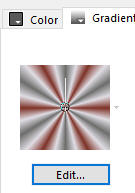
Materials Properties: Set your Foreground Color to foreground-background Gradient (Corel_06_029)
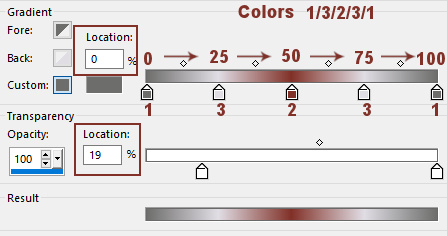
Prepare a three color Radial gradient with colors - 1/3/2/3/1 - location interval between colors 25%
Click on Edit and set the 3 colors as shown on the image below:
Click on Save as
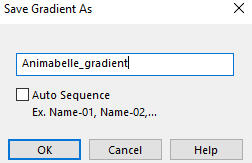
A new window opens - give your gradient a name and clcik OK
Now you have your 3 colors gradient
Materials Properties: Set your Foreground Color to foreground-background Radial gradient (Corel_06_029) with the following settings
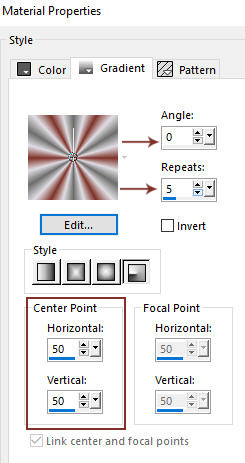
Flood fill tool / Fill in the layer - Raster 1 with the Radial gradient you just prepared
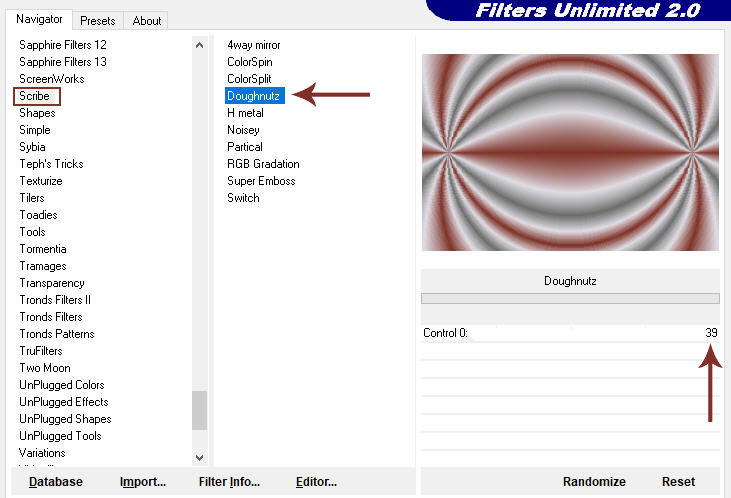
Effects - Plugins - I.C.NET Software - Unlimited 2 - Scribe - Doughnutz
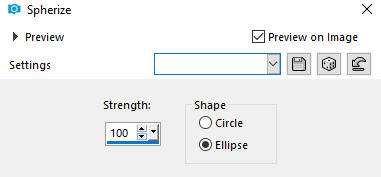
Effects - Geometric Effects - Spherize
Step 2
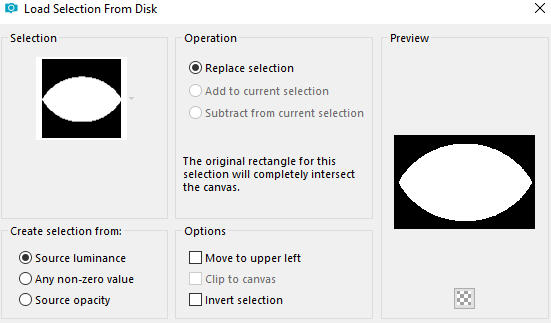
Selections - Load/Save Selection - Load Selection From Disk
Look for and load the selection purete1_animabelle
Edit - Cut
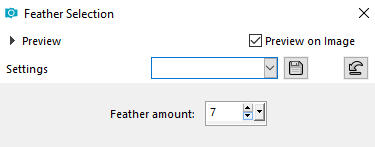
Selections - Modify - Feather - (Feather amount 7)
Press 5 times the Delete key on your keyboard
Selections - Select None
Step 3
Layers - New Raster Layer
Layers - Arrange - Move Down
Flood fill tool / Fill in the layer with your background color - Color 3  #e0dde4
Open the scenery tube lunapaisagem1679
Edit - Copy
Edit - Paste - Paste As New Layer on your working image
Activate the Pick Tool (K)  - Stretch the middle side knots on either side of the landscape to fill all the elipse space
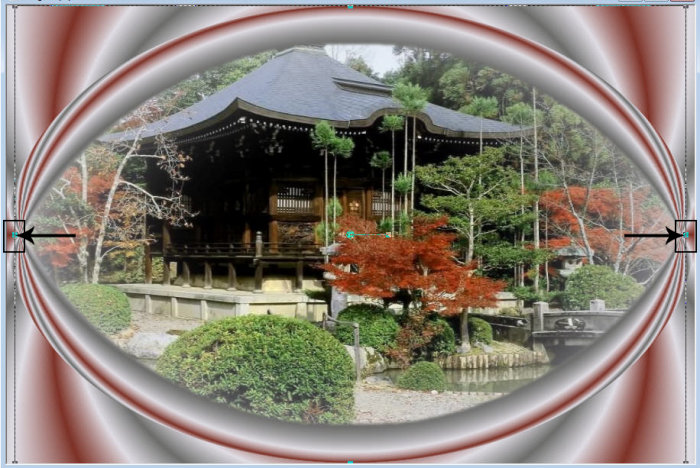
Deactivate the Pick Tool by clicking on any other tool
Layers - Merge - Merge Visible
Step 4
Layers - Duplicate
Image - Resize - 90 % - Resize All Layers - Not Checked
Selections - Load/Save Selection - Load Selection From Disk
Look for and load the selection purete2_animabelle
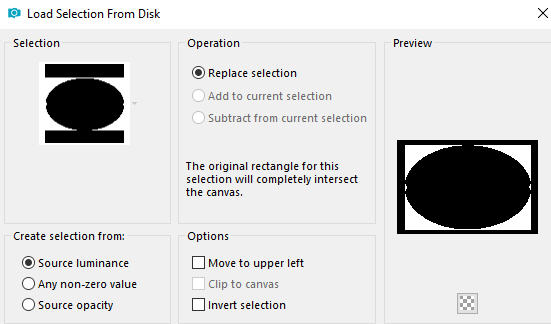
Edit - Cut
Selections - Modify - Feather - (Feather amount 7)

Press 5 times the Delete key on your keyboard
Materials Properties: Set your foreground-background gradient to Linear style with the following settings:
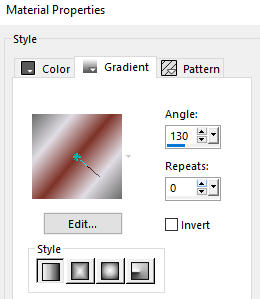
Flood fill tool / Fill in the Selection with the gradient - click 5 times into the selection
Effects - Plugins - Carolaine and sensibility - CS-LDots
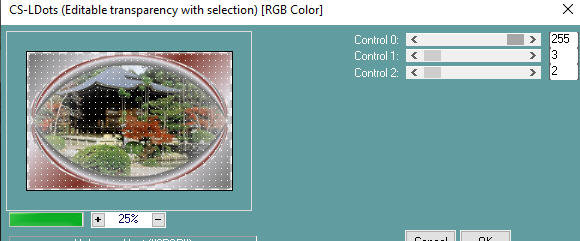
Selections - Select None
Effects - Plugins - Eye Candy 5 - Impact - Perspective Shadow
In the User Settings look for preset shadow4_animabelle provided in the materials and click OK
Note: If the Preset doesn't work for you, use these settings in the Basic Tab:
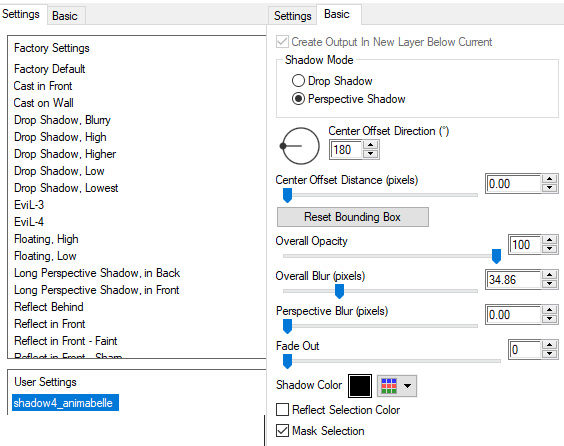
Activate the layer below - the Merged layer
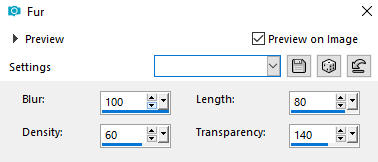
Effects - Texture Effects - Fur
Effects - Plugins - I.C.NET Software / Filters Unlimited 2.0 - Simple - Pizza Slice Mirror
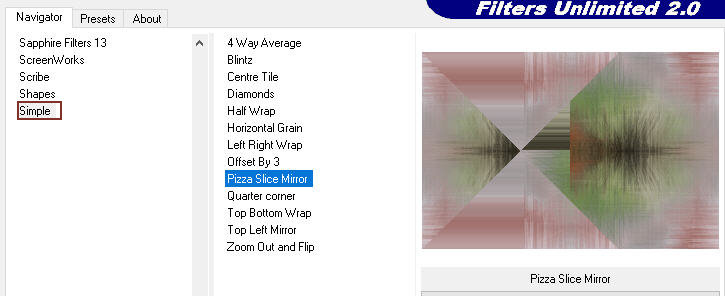
Note: If it works for you, you can also apply the plugin alone - Effects - Plugins - Simple - Pizza Slice Mirror
Edit - Repeat Pizza Slice Mirror (or apply Pizza Slice Mirror a second time if you use Filters Unlimited 2.0)
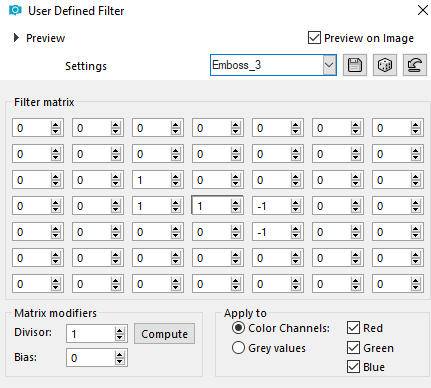
Effects - User Defined Filter - Emboss 3
Step 5
Image - Add Borders - 3px - Symmetric checked - Color 2  #813128
Image - Add Borders - 40 px - Symmetric checked - Color 3  #e0dde4
Activate the Magic Wand Tool  (Tolerance 0 and Feather 0)
Select the the 40px border
Materials Properties: Set your gradient back to Radial style gradient - Angle 130, Repeats 3
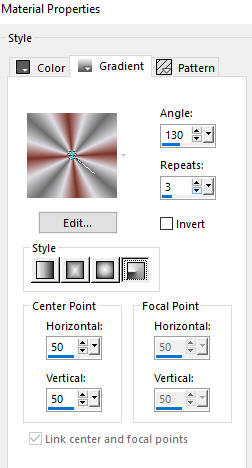
Flood fill tool / Fill in the border with the Radial style gradient
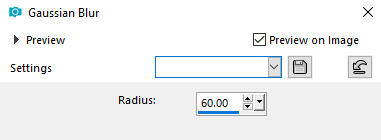
Adjust - Blur - Gaussian Blur (Radius 60)
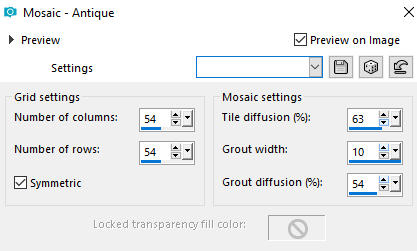
Effects - Texture Effects - Mosaic-Antique
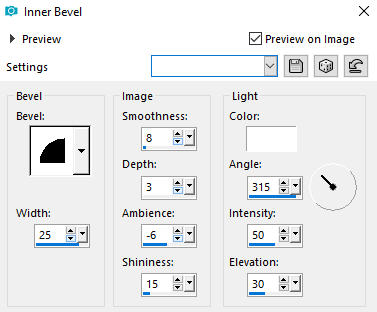
Effects - 3D Effects - Inner Bevel
Selections - Select None
Step 6
Open the character tube - pl
Edit - Copy
Edit - Paste - Paste As New Layer on your working image
Image - Resize - 90% - Resize All Layers - Not Checked
Pick Tool (K)  - Move the tube to the left as shown on the final result
(Note: If you have the option - Objects - Align - Left / Objects - Align - Bottom)
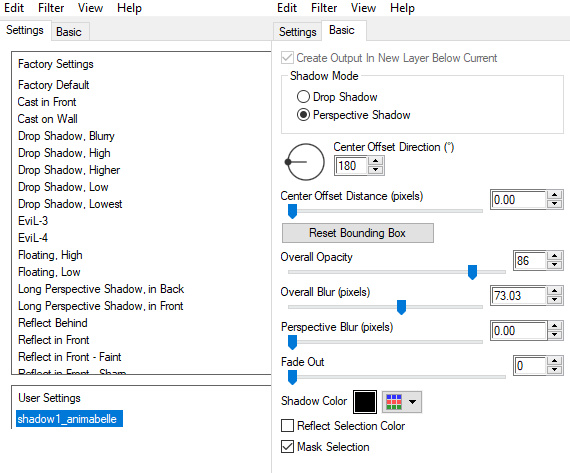
Effects - Plugins - Alien Skin Eye Candy 5 - Impact - Perspective shadow
In the User Settings look for preset shadow1_animabelle provided in the materials and click OK
Note: If the Preset doesn't work for you, use these settings in the Basic Tab:
Step 7
Open the flower tube - tubeclaudiaviza-flores146
Edit - Copy
Edit - Paste - Paste As New Layer on your working image
Image - Resize - 80% - Resize All Layers - Not Checked
Pick Tool (K)  - Move the tube to the right as shown on the final result
Adjust - Sharpness - Unsharp Mask
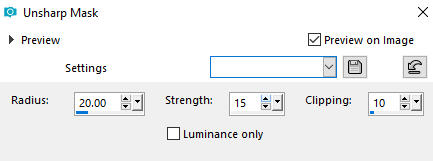
Edit - Repeat Unsharp Mask
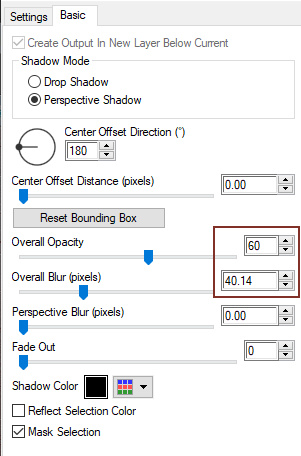
Effects - Plugins - Alien Skin Eye Candy 5 - Impact - Perspective shadow
In the Basic tab change the following parameters:
Step 8
Open the corner tube - 102ACOIN7
Edit - Copy
Edit - Paste - Paste As New Layer on your working image
Image - Mirror
Pick Tool (K) - Move the tube as shown on the final result
Effects - 3D Effects - Drop Shadow (- 3/3/40/6) - Shadow on new layer not checked - colour 4  #000000
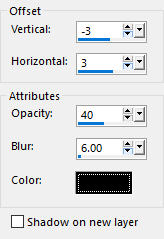
Image - Add Borders - 3px - Symmetric checked - Color 2  #813128
~~~
Layers - New Raster Layer
Add your name or watermark
Layers - Merge - Merge All (Flatten)
Optional: Image - Resize - 900 pixels width (the height will adapt)
File - Export - Save as JPG file
~~~~~~~
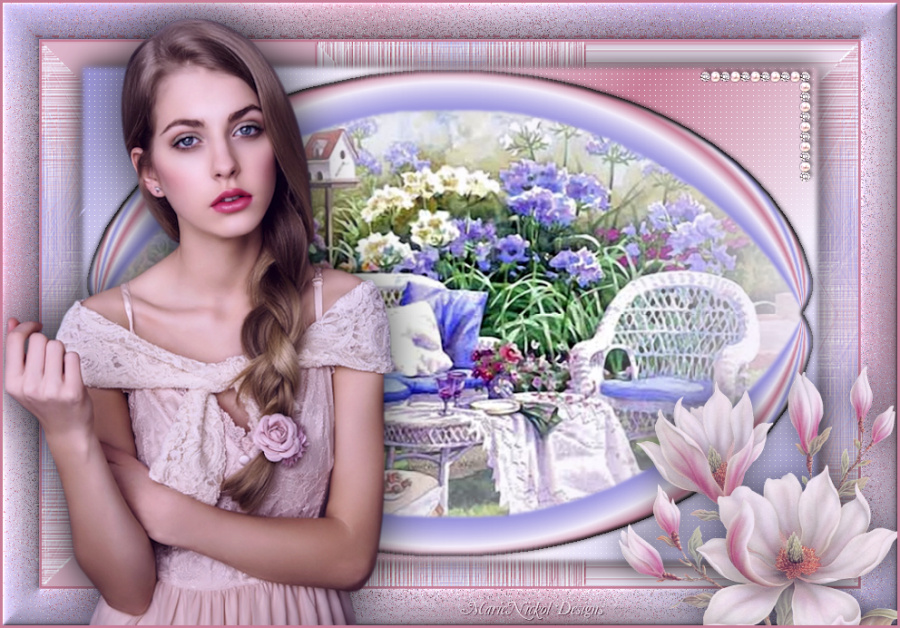
My version with a tube by Karine Dreams, flower tube by Carol_CJ, and misted scenery my own
