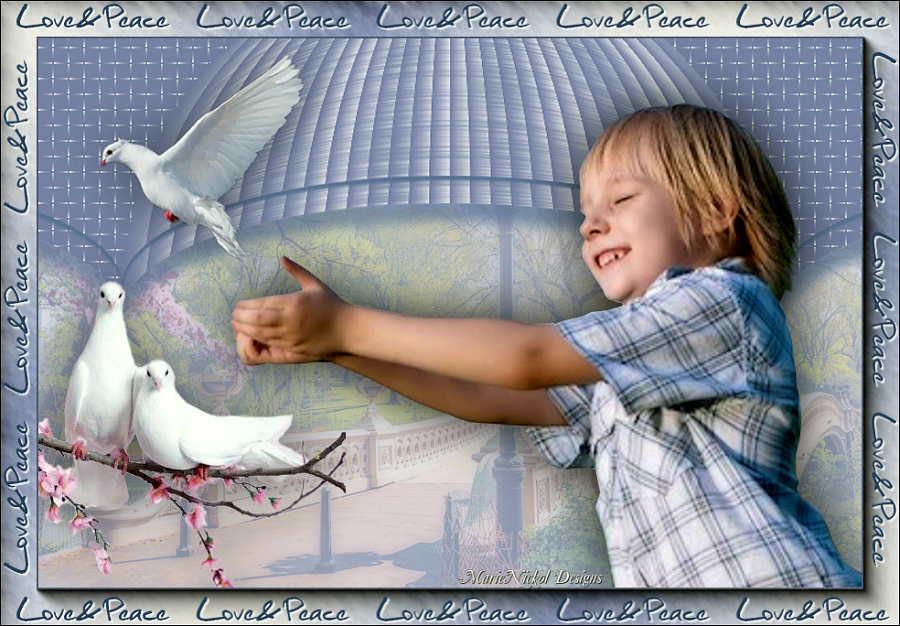
Original tutorial by Animabelle
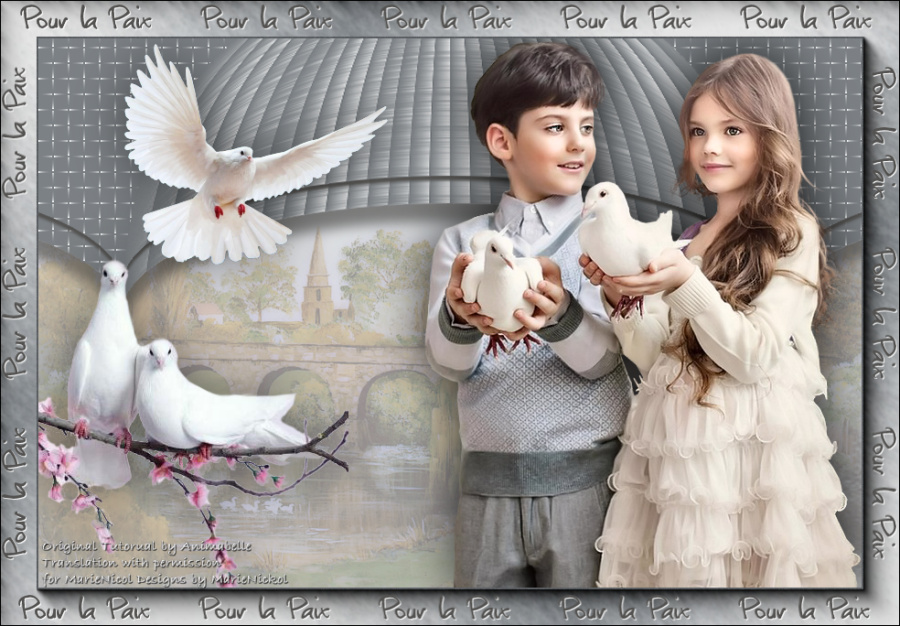
Thank you Animabelle for the permission to translate some of your tutorials.
Translated by Marie Nickol.
You will find the original tutorial here:

This tutorial is a personal creation.
Any resemblance with another one would only be pure coincidence.
Thank you for the respect of Animabelle’s work and the tubers work.
These translations are mine and are intended for personal use only and it is forbidden to copy part or all of it.
You can use this tutorial for PSP lessons but please put the link back to it.
Do not hesitate to let Animabelle or me know if you have any problem with the present tutorial.

Materials used:
Disclaimer: Modifying or renaming files or removing watermarks from the tubes of the original tubers provided in the materials and sharing them as your own or using them for sale online or otherwise is prohibited.
1 character tube by Nikita
1 scenery tube by C25 Tubes and creations
1 tube by Mentali
1 tube by Silvie
Plugins used:
Xero / Porcelain
Alien Skin - Eye Candy 5 - Impact/Perspective Shadow
AAA - Frame / Fotoframe
DSB flux / Blast
Mura's Meister/Copies
Thank you Renée for sharing your plugins page
==> Here
Materials

The original tutorial was written with PSP 12 but can be done with other versions as well.
This translation is written with PSP 2018 Ultimate, if you work with other versions some things might be different but the result will be the same.
Note: In the latest versions of PSP the command Image-Mirror has become Image - Mirror - Mirror Horizontal
and Image-Flip has become Image - Mirror - Mirror Vertical
Preparations
Duplicate all the tubes and work with the copies to preserve the originals.
Double click on the Alien Skin Preset provided in the materials and it will automatically install in the appropriate filter for your PSP
Colors used:

Note: When
working with your own colors, adjust the Blend Mode/Opacity at your own discretion
Material Properties - Foreground: Set your Foreground color to color 1  #7c8185
Material Properties - Background: Set your Background color to color 2  #ffffff
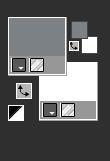
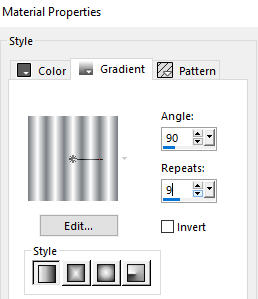
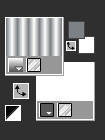
Materials Properties: Set your Foreground Color to foreground-background Linear gradient (Corel_06_029) with the following settings
The Tutorial
Step 1
File - New - Open a new Transparent image 900 x 600 pixels
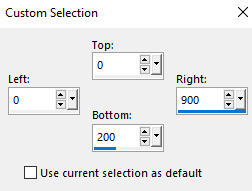
Activate the Selection Tool (S)  - Custom Selection

Flood fill tool / Fill in the Selection with the Linear gradient prepared above
Adjust - Blur - Gaussian Blur (Radius 30)

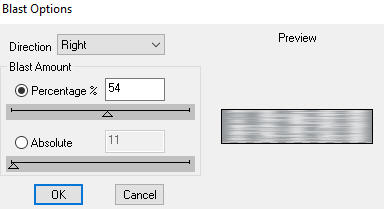
Effects - Plugins - DSB flux - Blast
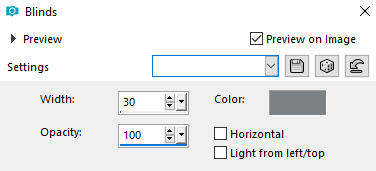
Effects - Texture Effects - Blinds - Color 1  #7c8185
Selections - Select None
Step 2
Effects - Geometric Effects - Circle
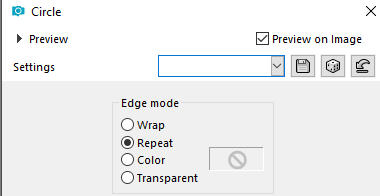
Image - Resize - 120 % - Resize All Layers - Not Checked
Activate the Magic Wand Tool  (Tolerance 0 and Feather 0)
With the Shift button pressed on your keyboard select the top two side parts
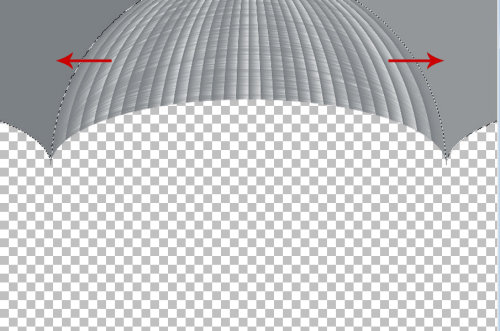
Materials Properties: Set your Foreground color to color
Flood fill tool / Fill in selected parts with color 1  #7c8185
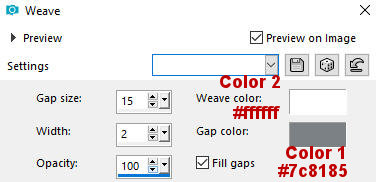
Effects - Texture Effects - Weave
Selections - Select None
Step 3
Layers - Duplicate
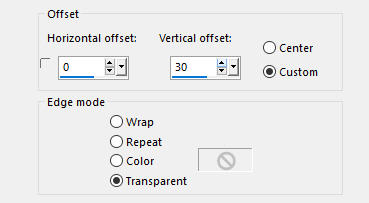
Effects -Image Effects - Offset
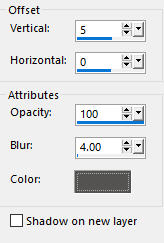
Effects - 3D Effects - Drop Shadow - (5/0/100/4) Color 4  #545351 - Shadow on new layer not checked
Activate the layer below - Raster 1
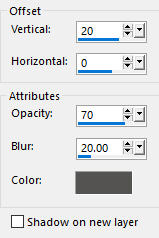
Effects - 3D Effects - Drop Shadow - (20/0/70/20) Color 4  #545351 - Shadow on new layer not checked
Layers - Merge - Merge Visible
Step 4
Layers - New Raster Layer
Layers - Arrange - Move down
Materials Color Properties: Set your Backgroundcolor to Color 3  #babbbd
Flood fill tool / Fill in the layer with Color 3  #babbbd
Open the scenery tube - 652761tempc25
Edit - Copy
Edit - Paste - Paste As New Layer on your working image
Image - Mirror
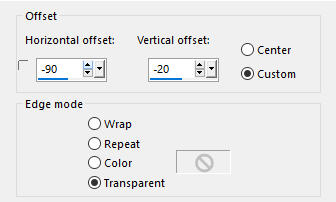
Effects - Image Effects - Offset
Step 5
Layers - Duplicate
Activate the layer below - Raster 2
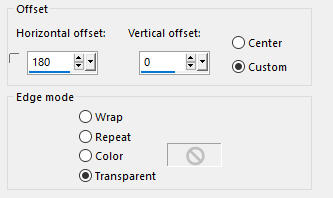
Effects - Image Effects - Offset
Your layers look like this:
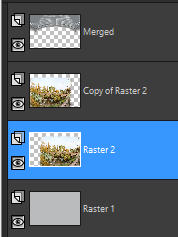
Activate the layer above - Copy of Raster 2
Layers - Merge - Merge Down
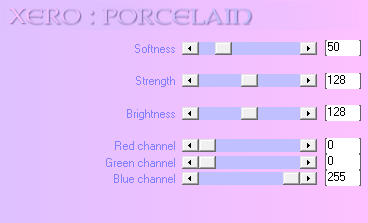
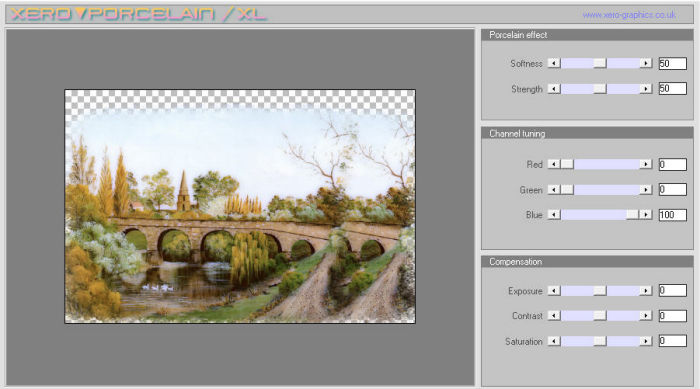
Effects - Plugins - Xero - Porcelain (default settings)
Old version - looks like this:
New version - looks like this:
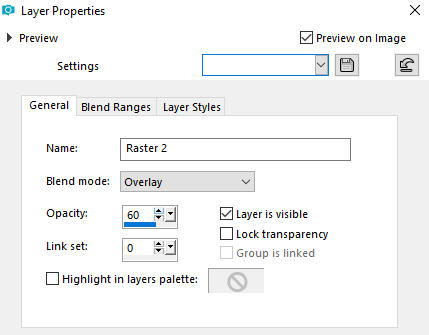
Layer Properties - set the Blend mode to Overlay and the Opacity to 60
Step 6
Activate the top Merged layer
Open the character tube -1293385558_enfants_nikita
Edit - Copy
Edit - Paste - Paste As New Layer on your working image
Pick Tool (K)  - Move the tube to the right as shown on the final result
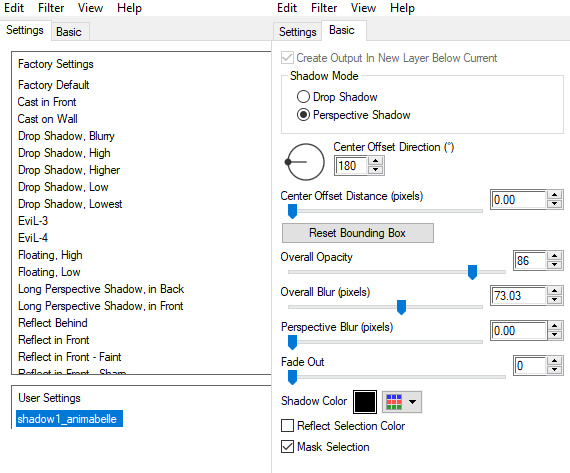
Effects - Plugins - Alien Skin - Eye Candy 5 - Impact - Perspective shadow
In the User Settings look for preset shadow1_animabelle provided in the materials and click OK
Note: If the Preset doesn't work for you, use these settings in the Basic Tab:
Step 7
Open tube -Dove_06.11.2012
Edit - Copy
Edit - Paste - Paste As New Layer on your working image
Pick Tool (K)  - Move the tube to the bottom left as shown on the final result
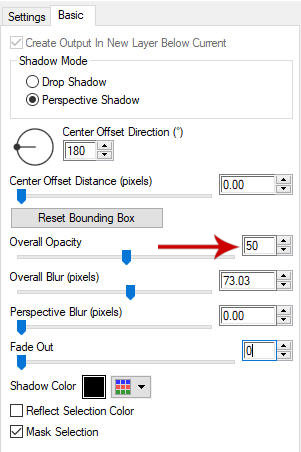
Effects - Plugins - Alien Skin Eye Candy 5 - Impact - Perspective shadow
Apply the same perspective shadow as above but use these settings in the Basic Tab:
Step 8
Open tube - mentali-oiseau47
Edit - Copy
Edit - Paste - Paste As New Layer on your working image
Image - Resize 35% - Resize all layers not checked
Effects - Plugins - Alien Skin - Eye Candy 5 - Impact - Perspective Shadow
Apply the same shadow as above - settings are still in memory
Pick Tool (K) - Move the tube to the top left as shown on the final result
Adjust - Sharpness - Sharpen
Step 9
Image - Add Borders - 2px -Symmetric checked Color 5  #5f6367
Image - Add Borders - 40px -Symmetric checked Color 2  #ffffff
Activate the Magic Wand Tool  (Tolerance 0 and Feather 0)
Select the last white border
Materials Properties: Set your Foreground color to Color 1  #7c8185
Materials Properties: Set your Background color to Color 2  #ffffff
Materials Properties: Set your Foreground Color to foreground-background Linear gradient (Corel_06_029) with the following settings:
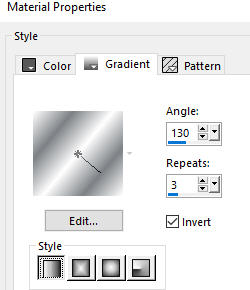
Flood fill tool / Fill in the border with the gradient
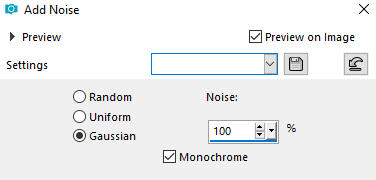
Adjust - Add/Remove Noise - Add Noise (Gaussian 100% - Monochrome checked)
Effects - Plugins - AAA Frames - Foto Frame (default settings)
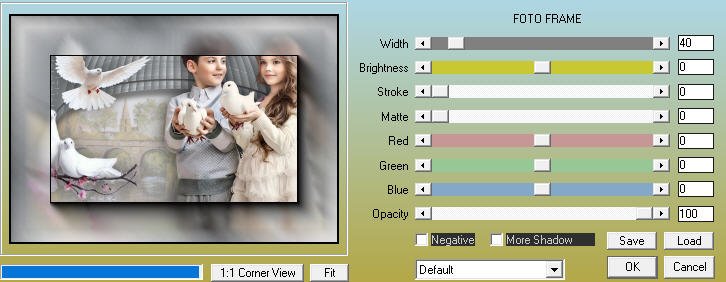
Selections - Select None
Open the frame tube - cadre_pour_la_paix_animabelle
Edit - Copy
Edit - Paste - Paste As New Layer on your working image
Do not move it - it is in the right place.
~~~~~~~~~~~~~~
If you want to do your own text Animabelle explains below how to add your text around the image frame:
Step 10
Animabelle supplied in the materials comesinhandy font - Font Christopherhand
On Windows 10 you either have to install the font, or if you have a font viewer program (e.g. Nexus font) to open it in the program.
Activate the Text Tool 
Materials Properties: Set your Background color to Color 6  #535250
On the dropdown menu choose font Christopherhand size 48

Type: Pour la Paix (or any text of choice)
Layers - Convert to Raster Layer
Pick Tool (K)  - Move the text to the top left as shown below
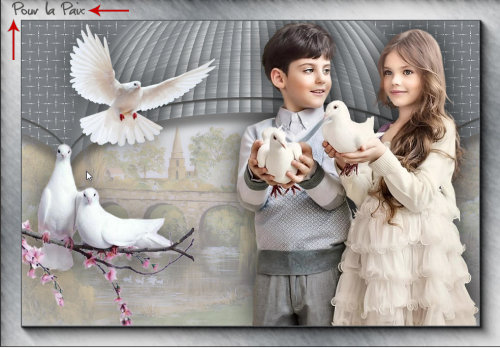
Step 11
Effects - Plugins - Mura's Meister - Copies
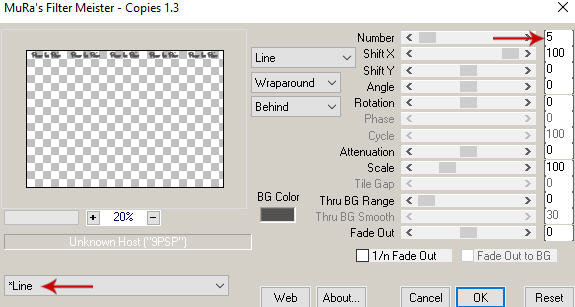
Note: Your 3 copied words should be well centered both horizontally and vertically
Step 12
Layers - Duplicate
Pick Tool (K) - Move the text all the way down on the frame as shown below:
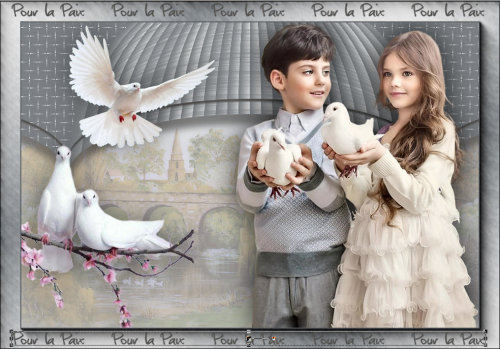
Deactivate the Pick Tool by clicking on any other tool (e.g. Selection Tool S)
Step 13
Layers - Duplicate
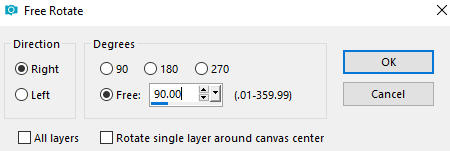
Image - Free Rotate -Right 90 - Nothing checked
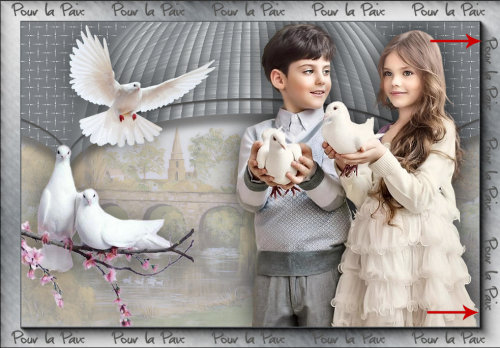
Pick Tool (K) - Move the text to the right side of the frame - position it as shown below
Carefully erase or with the selection tool remove the part exceeding the frame
Step 14
Layers - Duplicate
Image - Mirror
Image - Flip
Be sure you have all the words correctly placed around the frame.
Close eye of the bottom Background Layer
Step 15
Layers - Merge - Merge Visible
Open the eye of the bottom Background layer again
Activate the top Merged Layer of the text
Effects - 3D Effects - Drop Shadow (1/1/100/1) color 2  #ffffff - Shadow on new layer not checked
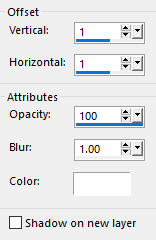
Edit - Repeat Drop Shadow
Step 16
Layers - New Raster Layer
Add your name or watermark
Layers - Merge - Merge All (Flatten)
Image - Resize - 900 pixels width (the height will adapt)
File - Export - Save as JPG file
~~~~~~~
My version with my own tubes and a dove tube from the tutorial
