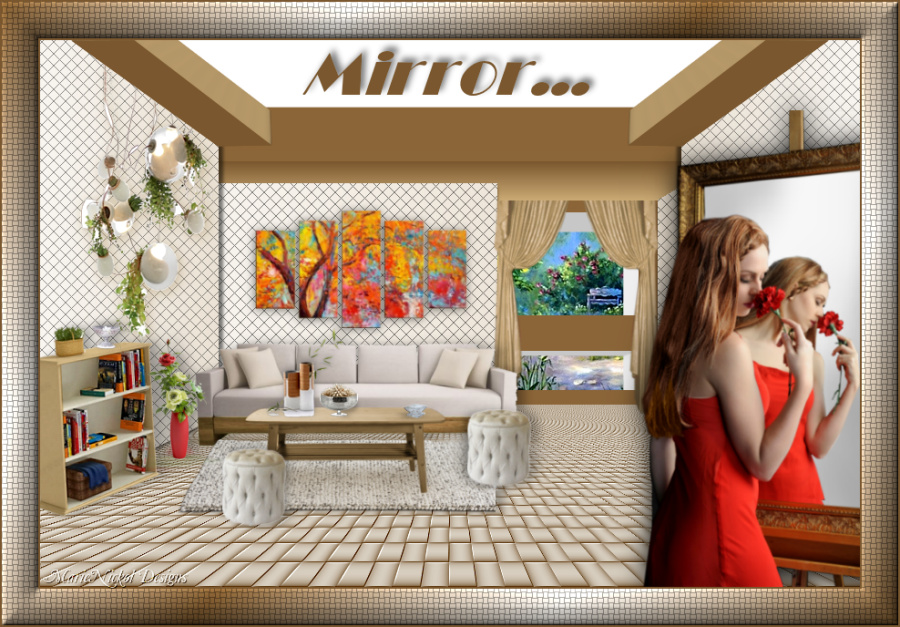
Original tutorial by Animabelle

Thank you Animabelle for the permission to translate some of your tutorials.
Translated by Marie Nickol.
You will find the original tutorial here:

This tutorial is a personal creation.
Any resemblance with another one would only be pure coincidence.
Thank you for the respect of Animabelle’s work and the tubers work.
These translations are mine and are intended for personal use only and it is forbidden to copy part or all of it.
You can use this tutorial for PSP lessons but please put the link back to it.
Do not hesitate to let Animabelle or me know if you have any problem with the present tutorial.

Materials used:
Disclaimer: Modifying or renaming files or removing watermarks from the tubes of the original tubers provided in the materials and sharing them as your own or using them for sale online or otherwise is prohibited.
1 character tube by Maryse
1 deco tube by Grisi
3 images images found on the Net
5 Selections
Plugins used:
Alien Skin / Eye Candy 5 - Impact / Extrude
AP LInes / Lines - Silverlining
Alien Skin / Eye Candy 5 - Impact / Perspective shadow
Mura's Meister / Perspective Tiling
FM Tiles Tools / Blend Emboss
Graphic Plus / Weaver (It can be used alone and it can also be imported into Filters Unlimited 2.0)
Thank you Renée for sharing your plugins page
==> Here
Materials

The original tutorial was written with PSP 12
but can be done with other versions as well.
This translation is written with PSP 2018 Ultimate, if you work with other versions some things might be different but the result will be the same.
Note: In the latest versions of PSP the command Image-Mirror has become Image - Mirror - Mirror Horizontal
and Image-Flip has become Image - Mirror - Mirror Vertical
Preparations
Duplicate all the tubes and work with the copies to preserve the originals.
Double click on the Alien Skin Preset provided in the materials and it will automatically install in the appropriate filter for your PSP
Place the Selections into your Selections folder of PSP
Colors used:

Note: When
working with your own colors, adjust the Blend Mode/Opacity at your own discretion
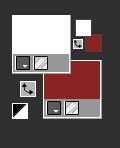
Material Properties - Foreground: Set your Foreground color to color 1  #ffffff
Material Properties - Background: Set your Background color to color 2  #8d2323
The Tutorial
Step 1
File - New - Open a new Transparent image 900 x 600 pixels
Flood fill tool / Fill the layer with your foreground color 1  ##ffffff
Layers - New Raster Layer
Selections - Load/Save Selection - Load Selection From Disk
Look for and load the selection - miroir1_animabelle
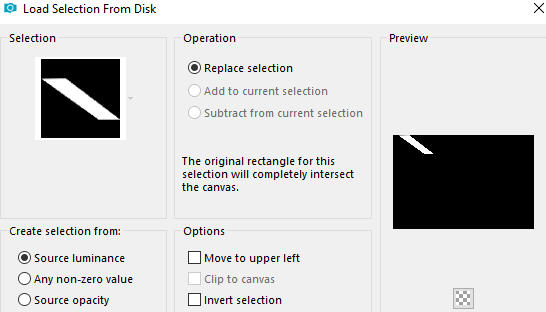
Flood fill tool / Fill the layer with your foreground color 2  #8d2323
Selections - Select None
Effects - Plugins - Alien Skin - Eye Candy 5 - Impact - Extrude
Settings: Factory default - Basic Tab as shown below:
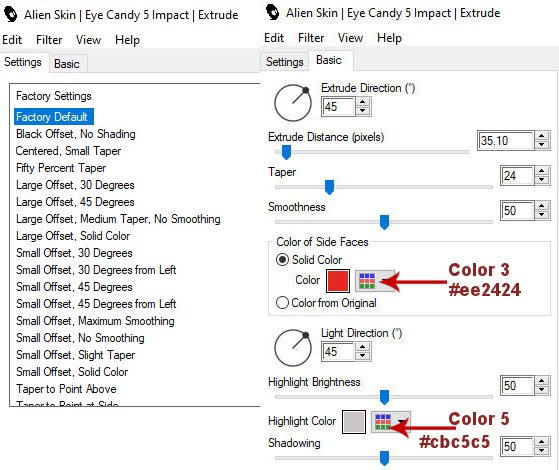
Layers - Duplicate
Image - Mirror
Layers - Merge - Merge Down
Step 2
Materials Properties: Set your Foreground back to color 2  #8d2323
Materials Properties: Set your Foreground back to color 3  #ee2424
Materials Properties: Set your Foreground Color to foreground-background Linear gradient (Corel_06_029) with the following settings
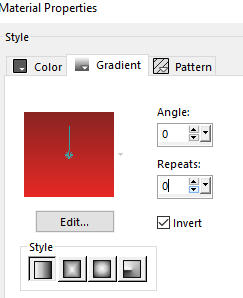
Layers - New Raster Layer
Selections - Load/Save Selection - Load Selection From Disk
Look for and load the selection - miroir2_animabelle

Flood fill tool / Fill the selection with the Linear gradient you just prepared
Selections - Select None
Effects - Plugins - Alien Skin - Eye Candy 5 - Impact - Extrude
Settings: Factory default - Basic Tab as shown below:
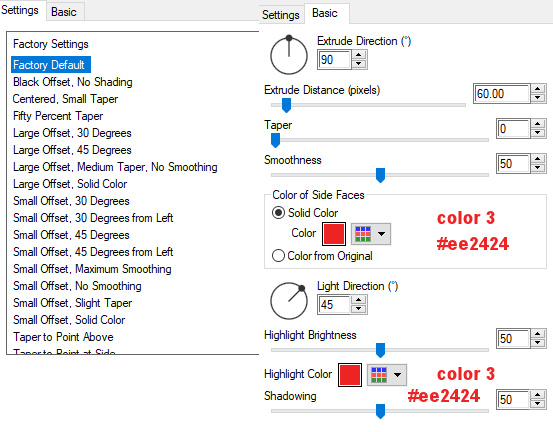
Layers - Arrange - Move down
Step 3
Materials Properties: Set your Foreground to color 4  #908e8f
Materials Properties: Set your Foreground to color 5  #cbc5c5
Materials Properties: Set your Foreground Color to foreground-background Linear gradient (Corel_06_029) with the following settings
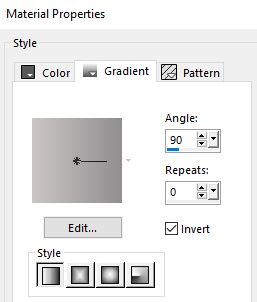
Layers - New Raster Layer
Selections - Load/Save Selection - Load Selection From Disk
Look for and load the selection - miroir3_animabelle
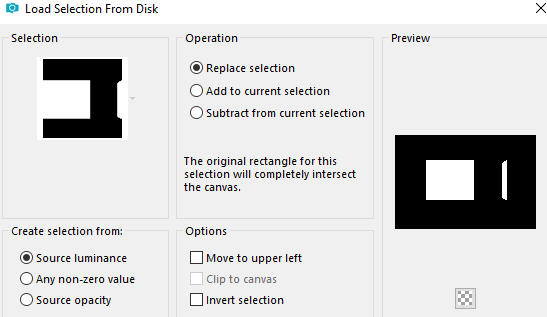
Flood fill tool / Fill the selection with the Linear gradient you just prepared
Effects - Plugins - AP LInes - Lines - Silverlining
On the drop down menu choose Diamond Bill and Blend mode Overlay with the following settings:
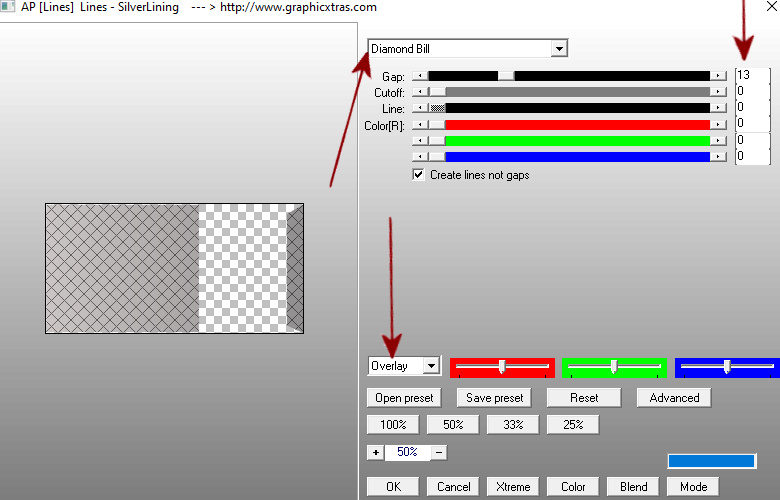
Selections - Select None
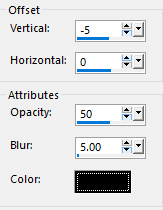
Effects - 3D Effects - Drop Shadow (-5/0/50/5) color 6  #000000 - Shadow on new layer not checked
Step 4
Materials Properties: Set your Foreground back to color 2  #8d2323
Layers - New Raster Layer
Selections - Load/Save Selection - Load Selection From Disk
Look for and load the selection - miroir4_animabelle
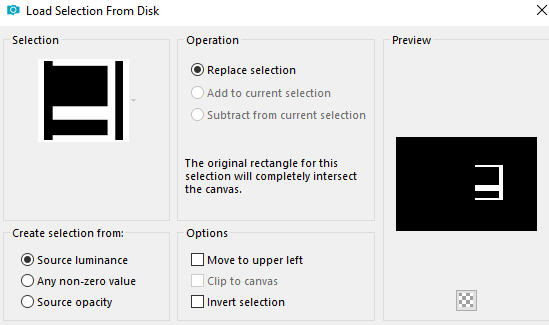
Flood fill tool / Fill the selection with color 2  #8d2323
Selections - Select None
Effects - Plugins - Alien Skin - Eye Candy 5 - Impact - Extrude
Settings: Factory default - Basic Tab as shown below:
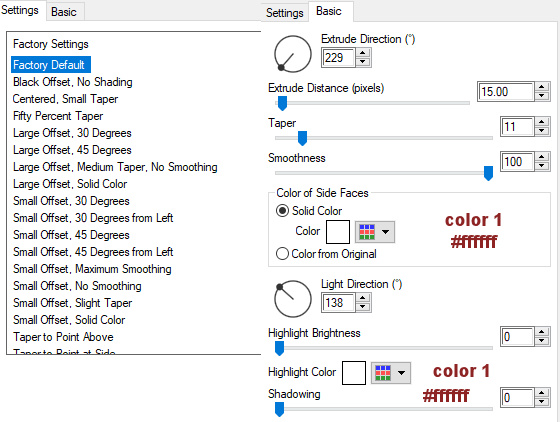
Layers - Arrange - Move down
Step 5
Materials Properties: Set your Foreground back to color 4  #908e8f
Materials Properties: Set your Foreground back to color 5  #cbc5c5
Materials Properties: Set your Foreground Color back to foreground-background Linear gradient (Corel_06_029) with the following settings

Layers - New Raster Layer
Selections - Load/Save Selection - Load Selection From Disk
Look for and load the selection - miroir5_animabelle
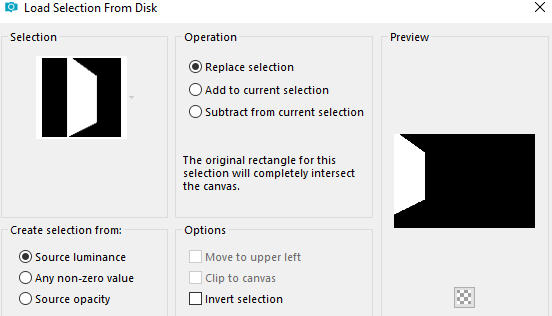
Flood fill tool / Fill the selection with the Linear gradient above
Selections - Select None
Effects - Plugins - AP LInes - Lines - Silverlining (the same settings as before - settings are still in memory)
Effects - 3D Effects - Drop Shadow (0/5/50/5) color 6  #000000 - Shadow on new layer not checked
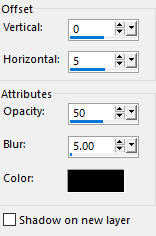
Layers - Arrange - Move Up
Layers - Duplicate
Image - Mirror
Step 6
Layers - New Raster Layer
Activate the Selection Tool (S)  - Custom Selection

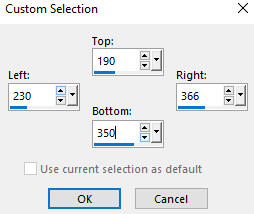
Open - image 1
Edit - Copy
Edit - Paste - Paste into Selection on your working image
Selections - Select None
Activate the Selection Tool (S)  - Custom Selection
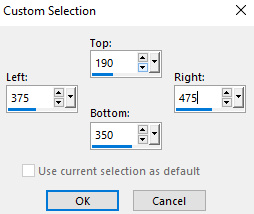
Open - image 2
Edit - Copy
Edit - Paste - Paste into Selection on your working image
Selections - Select None
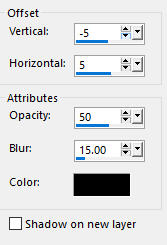
Effects - 3D Effects - Drop Shadow (-5/5/50/15) color 6  #000000 - Shadow on new layer not checked
Step 7
Materials Properties: Set your Foreground to color 1  #ffffff
Layers - New Raster Layer
Selections - Load/Save Selection - Load Selection From Disk
Look for and load again selection - miroir6_animabelle
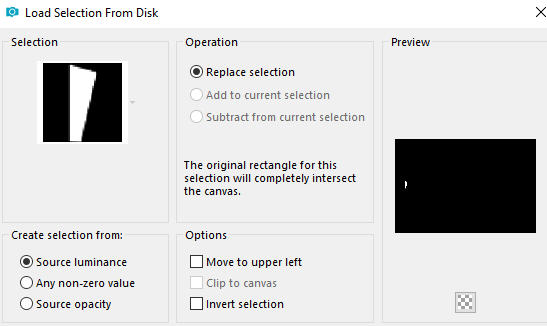
Flood fill tool / Fill the selection with color 1  #ffffff
Selections - Select None
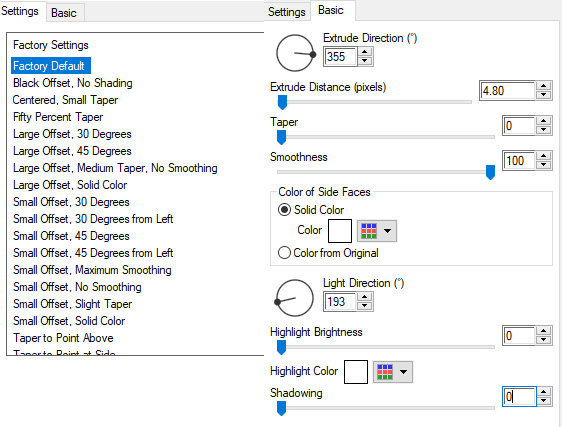
Effects - Plugins - Alien Skin - Eye Candy 5 - Impact - Extrude
Settings: Factory default - Basic Tab as shown below - use the same color white as before:
Layers - Duplicate
Image - Resize - 90% - Resize All Layers - Not Checked
Activate the Pick Tool (K)  - Move the lamp to position X=140 and Y=265
Layers - Merge - Merge Down
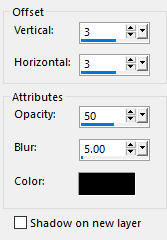
Effects - 3D Effects - Drop Shadow (3/3/50/5) color 6  #000000 - Shadow on new layer not checked
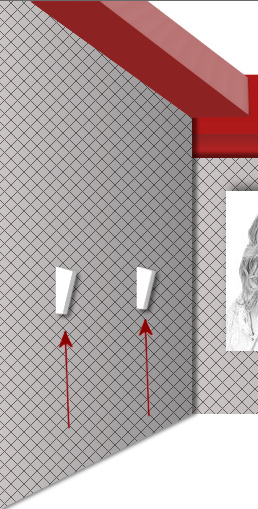
Your left wall image looks like this:
Step 8
Layers - New Raster Layer
Activate the Freehand Selection Tool 
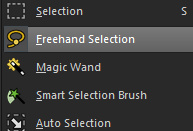
Selection type - Point to point - Feather 40

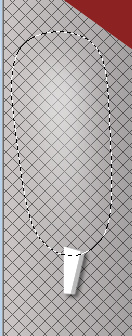
Draw a downward facing triangle-shaped figure above the lamp on the left
Flood fill tool / Fill in the Selection with Color 1  #ffffff (click on once)
Your layer should look somewhat like this:
Selections - Select None
Position the light correctly on the wall above the lamp
Layers - Duplicate
Image - Resize - 90% - Resize All Layers - Not Checked
Activate the Pick Tool (K)  and move the light layer above the the lamp at the right side of the wall
Layers - Merge - Merge Down
Layer Properties - set the Opacity to 70
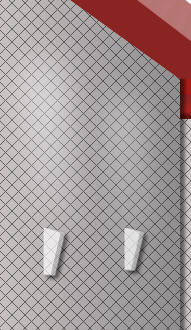
You should have a similar effect to this:
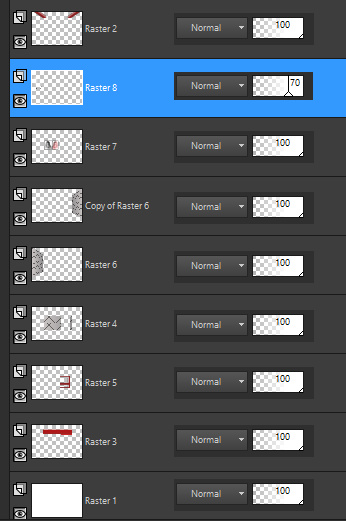
Your layers look like this:
Step 9
Close the eye of the bottom layer Raster 1 (the white background layer)
Stay on one of the top layers
Layers - Merge - Merge Visible
Open the eye of the bottom layer Raster 1 and stay on this layer
Step 10
Layers - New Raster Layer
Flood fill tool /Fill in the Layer with the Foregound Color 1  #ffffff
Effects - Texture Effects - Weave (Color #676564)
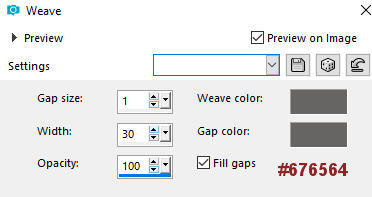
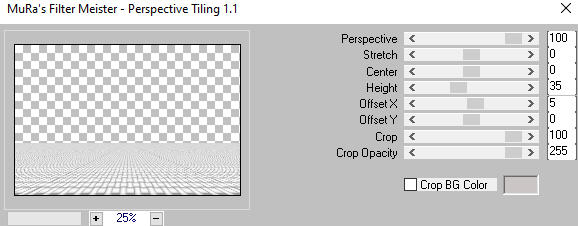
Effects - Plugins - Mura's Meister - Perspective Tiling
Effects - Plugins - FM Tile Tools - Blend Emboss - default settings
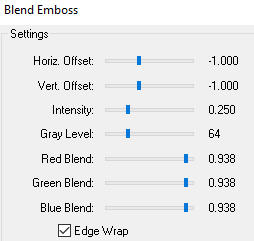
Step 11
Layers - New Raster Layer
Activate the Selection Tool (S)  - Custom Selection
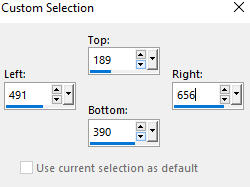
Open - image 3
Edit - Copy
Edit - Paste - Paste into Selection on your working image
Your working image looks like this:
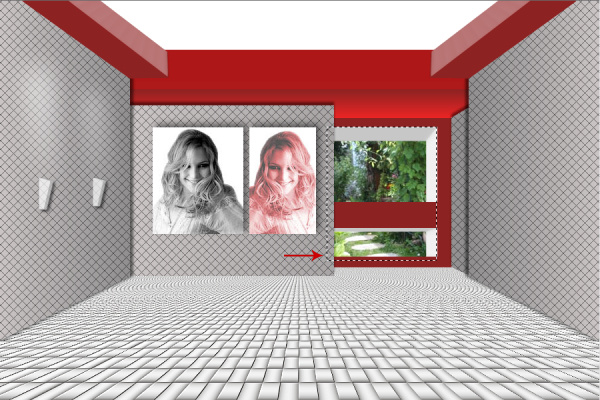
Selections - Select None
Your layers look like this:
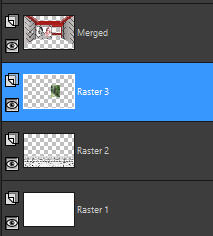
Step 12
Activate the top Merged layer
Open tube - Grisi_Tube_Living
Edit - Copy
Edit - Paste - Paste As New Layer on your working image
Image - Mirror
Image - Resize 70% - Resize all layers not checked
Move the tube to the left as shown on the final result
Adjust - Sharpness- Sharpen
Effects - 3D Effects - Drop Shadow (-9/9/40/15) Color 6  #000000
Your working image now looks like this:

Step 13
Image - Add Borders - Symmetric checked - 2px - Color 2  #8d2323
Image - Add Borders - Symmetric checked - 40px - Color 4  #908e8f
Materials Properties: Set your Foregroundcolor to color 1  #ffffff
Materials Properties: Set your Backgroundcolor to color 4  #908e8f
Materials Properties: Set your Foreground Color to foreground-background Linear gradient (Corel_06_029) with the following settings
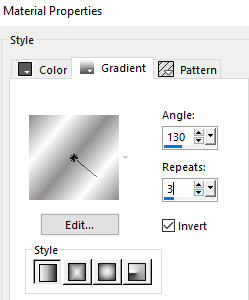
Activate the Magic Wand  (Tolerance 0 and Feather 0) - Select the last 40px border
Flood fill tool / Fill in the border with the above gradient
Effects - Plugins - Graphic Plus - Weaver

Effects - 3D Effects - Inner Bevel
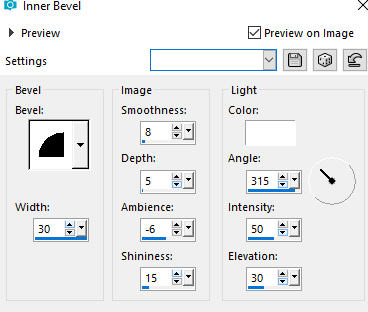
Selections - Select None
Step 14
Open tube - MR_Retouche maquillage
Remove the watermark on the tube
Edit - Copy
Edit - Paste - Paste As New Layer on your working image
Image - Mirror
Pick Tool (K)  - Move the tube to the right as shown on the final result above
Effects - Plugins - Alien Skin Eye Candy 5 - Impact - Perspective shadow
In the User Settings look for preset shadow4_animabelle provided in the materials and click OK
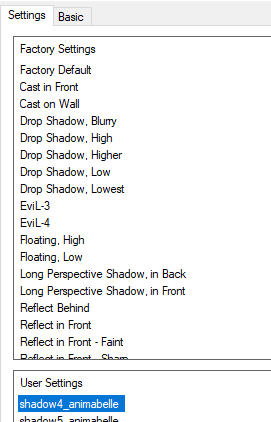
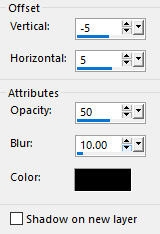
Note: If the Preset doesn't work for you, use these settings in the Basic Tab:

Image - Add Borders - Symmetric checked - 2px - Color 2  #8d2323
Optional:
You can add your own text with a font of choice at the top on the white space like Animabelle did.
Animabelle used font Broadway size 60 pixels - Font style Italic - color 2  #8d2323
(the font is not provided in the materials - if you don't have it and would like to use it, you can download it - Here )
Activate the Text Tool  and type the word Miroir ... (or any word you prefer)

Move the text nicely in the middle of the white space.
Layers - Convert to Raster Layer
Effects - 3D Effects - Drop Shadow
(Note: You can apply a Drop Shadow to your own liking)
Layers - New Raster Layer
Add your name or watermark
Layers - Merge - Merge All (Flatten)
Image - Resize - 900 pixels width (the height will adapt)
File - Export - Save as JPG file
~~~~~~~
My version with my own tubes - woman tube reference faestock deviantart
