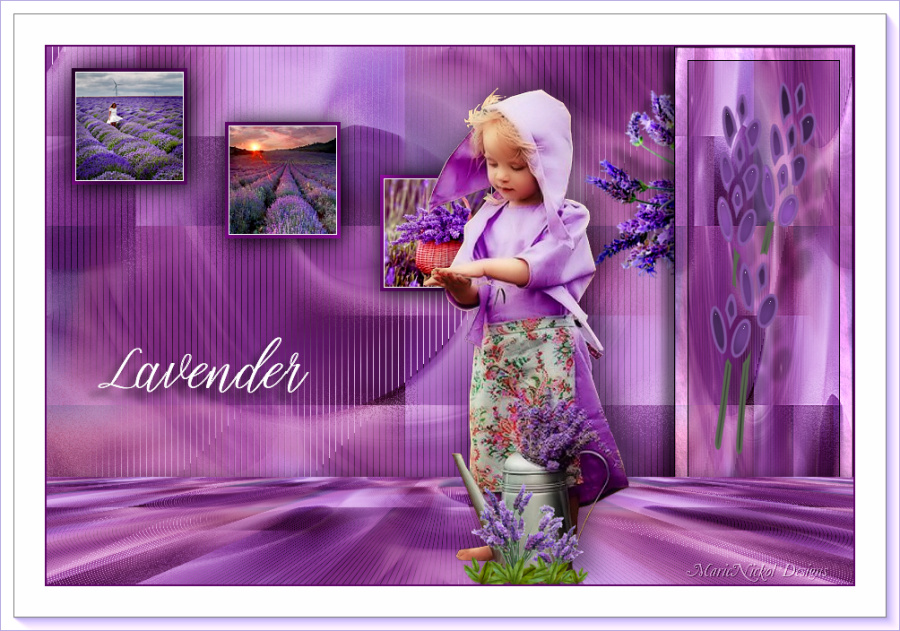
Original tutorial by Animabelle
Thank you Animabelle for the permission to translate some of your tutorials.
Translated by Marie Nickol.
You will find the original tutorial here:

Tutorial revised and modified by Animabelle in June 2017
This tutorial is a personal creation.
Any resemblance with another one would only be pure coincidence.
Thank you for the respect of Animabelle’s work and the tubers work.
These translations are mine and are intended for personal use only and it is forbidden to copy part or all of it.
You can use this tutorial for PSP lessons but please put the link back to it.
Do not hesitate to let Animabelle or me know if you have any problem with the present tutorial.

Materials used:
Disclaimer: Modifying or renaming files or removing watermarks from the tubes of the original tubers provided in the materials and sharing them as your own or using them for sale online or otherwise is prohibited.
1 Image base by Animabelle
1 mask by Animabelle
1 character tube by Animabelle
3 images scenery by Animabelle
2 selections by Animabelle
1 wordart image by Animabelle
Plugins used:
Mehdi
I.C. NET Software/Filters Unlimited 2.0 - Noise Filters
Tramages (It can be used alone or imported into Filters Unlimited 2.0)
MuRa's Meister
Alien Skin / Eye Candy 5 - Impact
AAA Frames
Thank you Renée for sharing your plugins page
==> Here
Materials

The original tutorial was written with PSP
X9 but can be done with other versions as well.
This translation is written with PSP 2018 Ultimate, if you work with other versions some things might be different but the result will be the same.
Note: In the latest versions of PSP the command Image-Mirror has become Image - Mirror - Mirror Horizontal
and Image-Flip has become Image - Mirror - Mirror Vertical
Preparations
Duplicate all the tubes and work with the copies to preserve the originals.
Place the Selections into your Selections folder of PSP
Colors used:

Note: When
working with your own colors, adjust the Blend Mode/Opacity at your own discretion
Activate your Eye Dropper Tool  and choose 3 colors matching your own tubes, images, misted images.
Animabelle chose colors 1  , 2
, 2  , and 4
  above.
Material Properties - Foreground: Set your Foreground color to color 1  #a47cb1
Material Properties - Background: Set your Background color to color 2  #6c4f7b
The Tutorial
Step 1
Open image - Image_base_Lavandine_Animabelle
(Note: Use this image if you want to have the same effect - you can colorize later)
Window - Duplicate
Close the original we will work on the copy
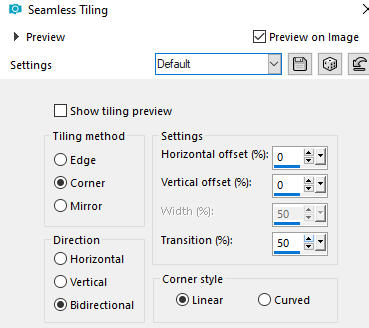
Effects - Image Effects - Seamless Tiling (default settings)
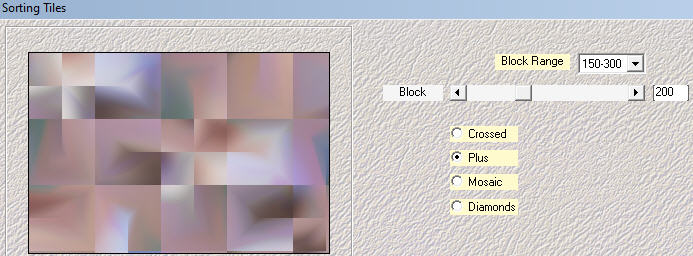
Effects - Plugins - Mehdi - Sorting Tiles
Layers - Duplicate
Effects - Plugins - - I.C.NET Software - Filters Unlimited 2.0 - Noise Filters - Noisy Rotation
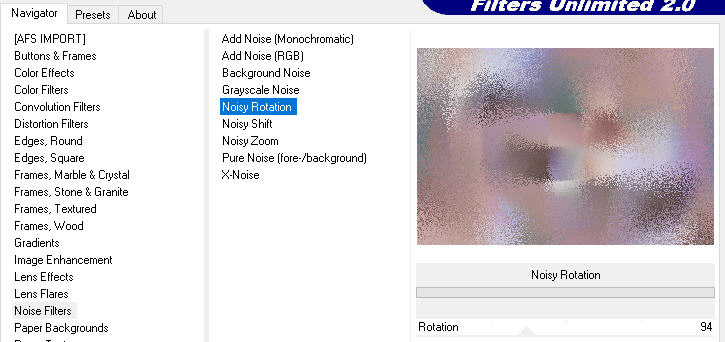
In your Layer Properties: Set the Blend Mode to Soft Light
Step 2
Layers - New Raster Layer
Flood fill tool / Fill in the layer with color 2  #6c4f7b
Open mask Masque_Lavandine-Animabelle
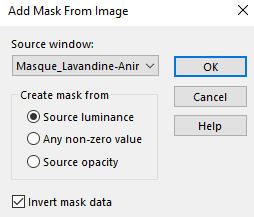
Layers - New Mask Layer - From Image
Apply mask Masque_Lavandine-Animabelle - Invert mask data checked
Layers - Merge - Merge Group
Effects - Plugins - Tramages - Tow The Line (default settings)

Effects - Image Effects - Seamless Tiling (default settings)

Effects - 3D Effects - Drop Shadow (5/5/50/5) color 2  #6c4f7b - Shadow on new layer checked
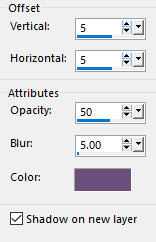
Stay on the Shadow layer - Group - Raster 1 Shadow 1
Layer Properties: Set the Blend Mode to Burn
Your layers look like this:
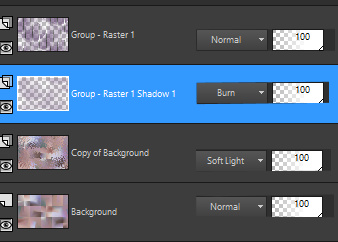
Layers - Merge - Merge Visible
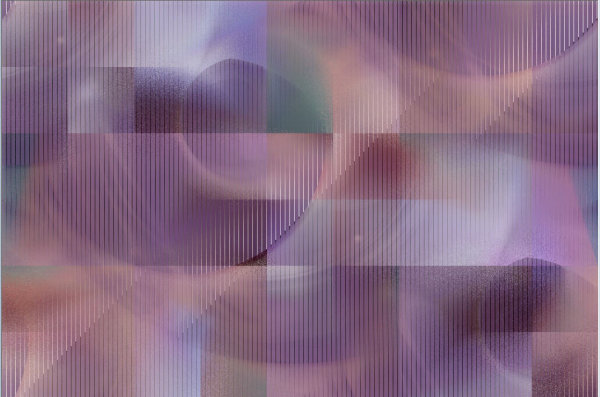
Your working image looks like this:
Step 3
Layers - Duplicate
Image - Mirror
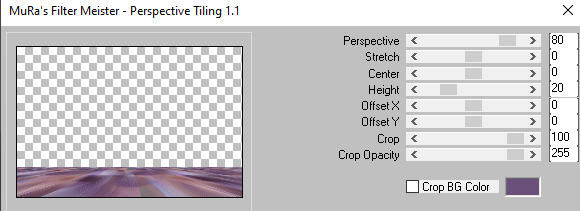
Effects - Plugins - MuRa's Meister - Perspective Tiling
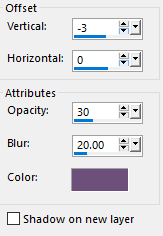
Effects - 3D Effects - Drop Shadow (-3/0/30/20) color 5 #000000 - Shadow on new layer not checked
Layers - Duplicate
Layer Properties: Set the Blend Mode to Hard Light and the Opacity to 65
Step 4
Layers - New Raster Layer
Selections - Load/Save Selection - Load Selection From Disk
Look for and load the selection - animabelle_sel_lavandine
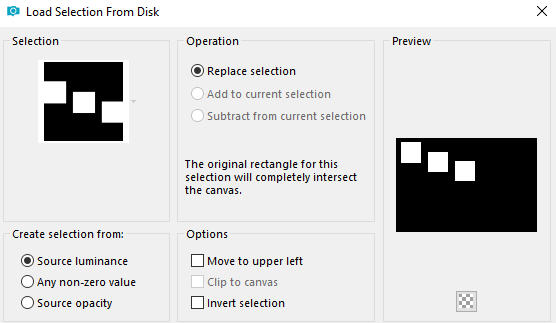
Flood fill tool / Fill in the Selection with color 2  #6c4f7b
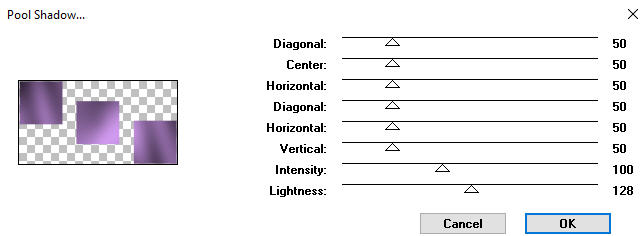
Effects - Plugins - Tramages - Pool Shadow
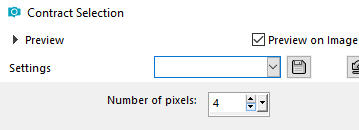
Selections - Modify - Contract - 4 px
Layers - New Raster Layer
Flood fill tool / Fill in the Selection with color 3  #ffffff
Selections - Select None
Step 5
Activate the Magic Wand tool  (Tolerance 0 and Feather 0)

Select the first white square on the left
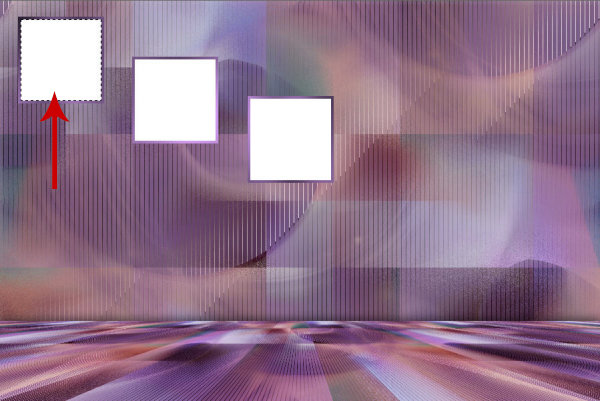
Selections - Modify - Contract 1 px
Open image - Image1_Lavandine_Animabelle
Edit - Copy
Edit - Paste - Paste into Selection on your working image
Selections - Select None
Step 6
Activate the Magic Wand tool  again (Tolerance 0 and Feather 0)
Select the second white square in the middle
Selections - Modify - Contract 1 px
Open image - Image2_Lavandine_Animabelle
Edit - Copy
Edit - Paste into Selection on your working image
Selections - Select None
Step 7
Activate the Magic Wand tool  again (Tolerance 0 and Feather 0)
Select the third white square to the right
Selections - Modify - Contract 1 px
Open image - Image3_Lavandine_Animabelle
Edit - Copy
Edit - Paste into Selection on your working image
Selections - Select None
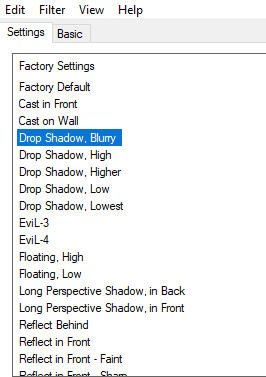
Effects - Plugins - Alien Skin Eye Candy 5 - Impact - Perspective Shadow
In the Settings select Drop Shadow, Blurry and click OK
Step 8
Activate the bottom Merged layer
* Edit - Copy
Stay on this layer
Layers - New Raster Layer
Selection Tool (S) - Custom Selection

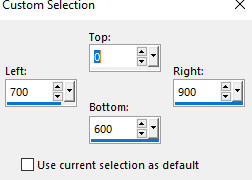
*Edit - Paste - Paste into Selection
Adjust - Sharpness - Sharpen More
Effects - Plugins - AAA Frames - Texture Frame

Selections - Select None
Effects - 3D Effects - Drop Shadow (0/-12/50/15) color 4  #321730 - Shadow on new layer not checked
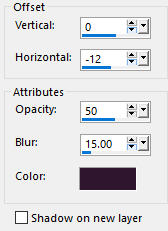
Stay on this layer
Step 9
Layers - New Raster Layer
Selections - Load/Save Selection - Load Selection From Disk
Look for and load the selection - animabelle_sel2_lavandine
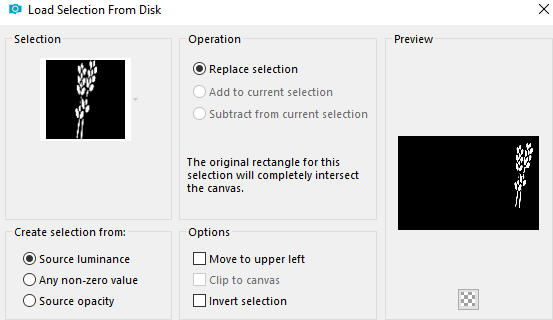
Flood fill tool / Fill in the Selection with color 4  #321730
Selections - Modify - Contract - 3 px

Effects - Plugins - Tramages - Pool Shadow
(the same settings as before - settings are still in memory if you use the plugin alone)
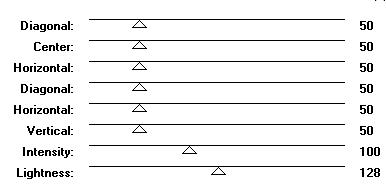
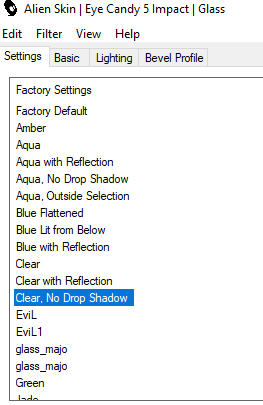
Effects - Plugins - Alien Skin Eye Candy 5 - Impact - Glass
In the Settings choose Clear, No Drop Shadow and click OK
Selections - Select None
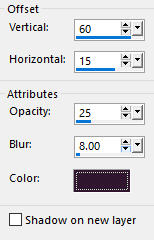
Effects - 3D Effects - Drop Shadow (60/15/25/8) color 4  #321730 - Shadow on new layer not checked
Step 10
Image - Add Borders - Symmetric not checked - color 4  #321730
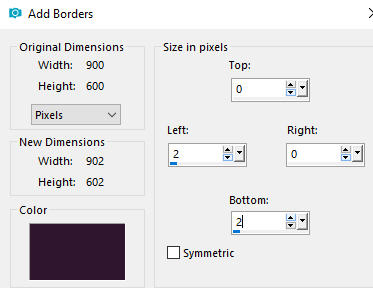
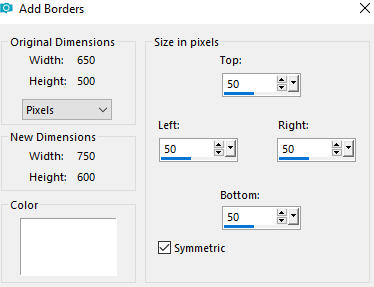
Image - Add Borders - Symmetric checked - 50 pixels - color 3  #ffffff
Effects - Plugins - AAA Frames - Foto Frame
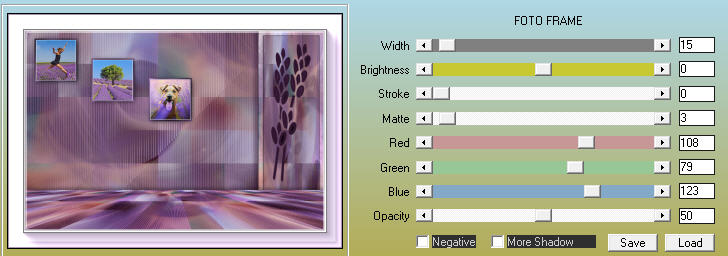
Note: Change the decimal Red, Green and Blue color codes according to your personal colors
Step 11
Open tube - 107_enfant_p2_animabelle
Remove the watermark
Edit - Copy
Edit - Paste - Paste As New Layer on your working image
Image - Resize 85% - Resize all layers not checked
Pick tool  : Position the tube at the bottom and a little to the right by putting the lavender flowers against the right frame
(Explanatory Note by me: Pick tool: Position X 280 and Position Y 136 - this refers to Animabelle's tube only. When you use your own tube or tubes parameters will be different.)
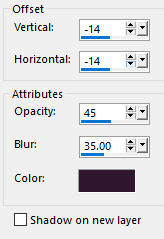
Effects - 3D Effects - Drop Shadow (-14/-14 /45/35) color 4  #321730 - Shadow on new layer not checked
Step 12
Activate the Text Tool 
Material Properties - Background: Set your Background color to color 3  #ffffff
With a font of your choice and Create as Vector type the word Lavandine
Layers - Convert to Raster Layer
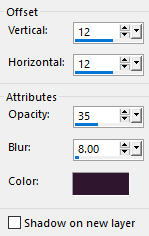
Effects - 3D Effects - Drop Shadow (12/12/35/8 ) color 4  #321730 - Shadow on new layer not checked
(Note: you may use the wordart text Texte_Lavandine_Animabelle - provided in the materials - Edit-Copy; Edit-Paste as a New Layer on your working image)
Pick Tool  : Move the text to your liking
Layers - Merge - Merge Visible
Image - Resize to 900 pixels width - Resize all layers checked (the height will adapt)
Adjust - Sharpness- Sharpen (if needed)
Step 13
Layers - New Raster Layer
Add your name or watermark
Layers - Merge - Merge All (Flatten)
~~~~~~~
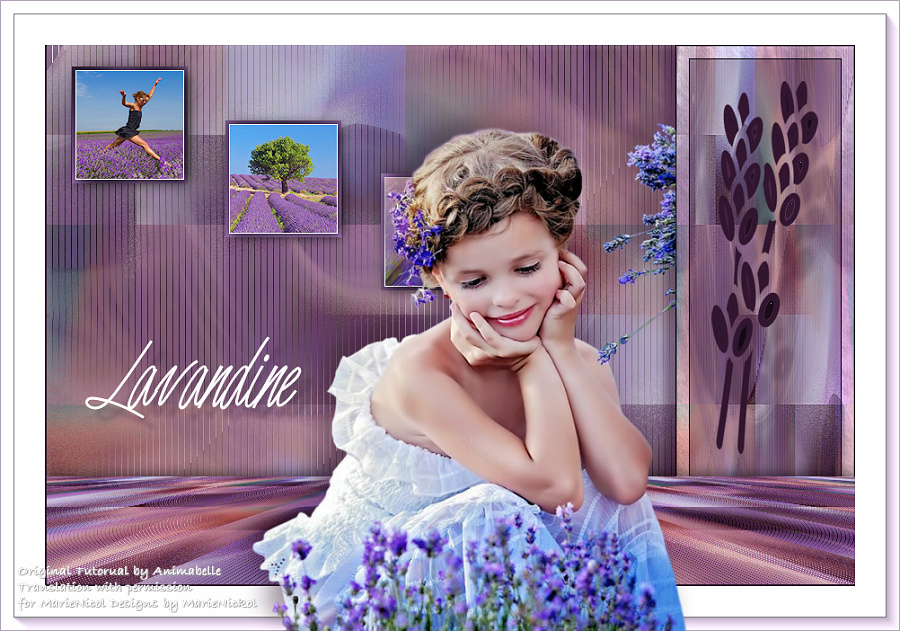
My version with my own tubes
