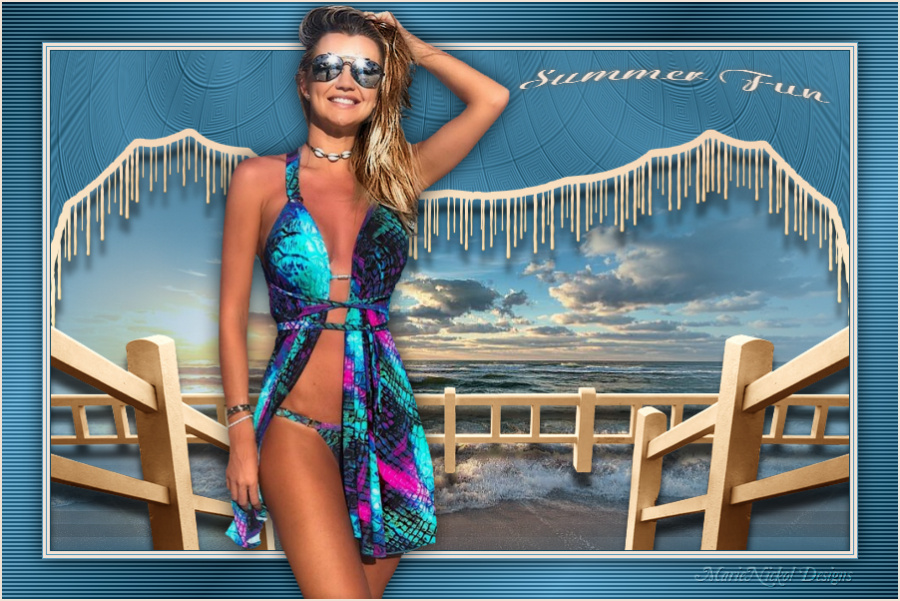
Original tutorial by Animabelle - July 2014
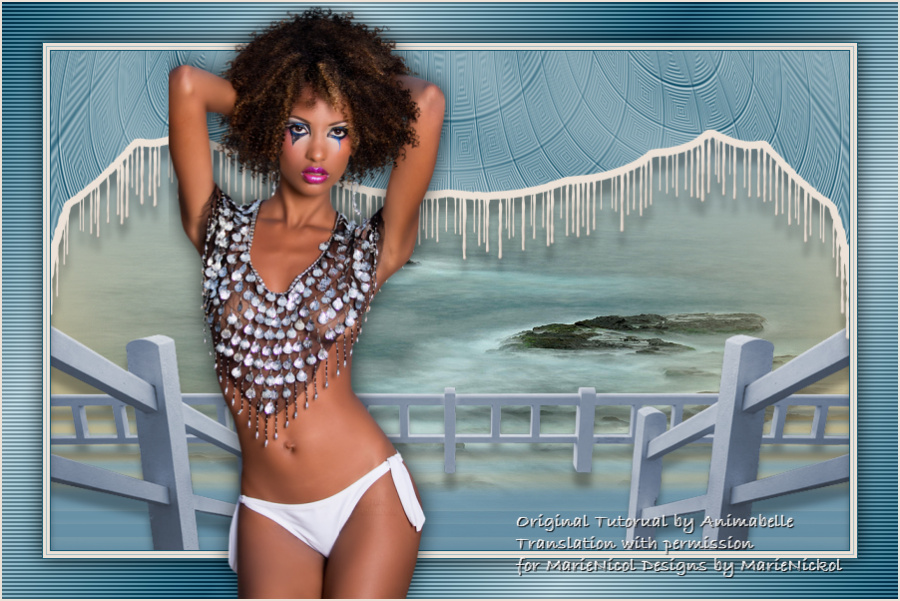
Thank you Animabelle for the permission to translate some of your tutorials.
Translated by Marie Nickol.
You will find the original tutorial here:

This tutorial is a personal creation.
Any resemblance with another one would only be pure coincidence.
Thank you for the respect of Animabelle’s work and the tubers work.
These translations are mine and are intended for personal use only and it is forbidden to copy part or all of it.
You can use this tutorial for PSP lessons but please put the link back to it.
Do not hesitate to let Animabelle or me know if you have any problem with the present tutorial.

Materials used:
Disclaimer: Modifying or renaming files or removing watermarks from the tubes of the original tubers provided in the materials and sharing them as your own or using them for sale online or otherwise is prohibited.
Important Note: To protect the rights to her work, Animabelle does not provide her own tubes with the materials.
You will need a misted landscape tube and a character tube of your own choice
2 tubes by Animabelle
1 misted tube by Animabelle
1 texture
1 alpha canal
1 preset
Plugins used:
I.C. NET Software - Filters Unlimited 2.0
User Defined Filter/Emboss 3
Alien Skin Eye Candy 5: Nature
Flaming Pear / Flexify 2
Nik Software Color Efex Pro 3.0 Complete
Bkg Designs sf10 IV (It is imported into Filters Unlimited 2.0)
VM Extravaganza (It can be used alone and it can also be imported into Filters Unlimited 2.0)
Thank you Renée for sharing your plugins page
==> Here
Materials

The original tutorial was written with PSP 12 but can be done with other versions as well.
This translation is written with PSP 2018 Ultimate, if you work with other versions some things might be different but the result will be the same.
Note: In the latest versions of PSP the command Image-Mirror has become Image - Mirror - Mirror Horizontal
and Image-Flip has become Image - Mirror - Mirror Vertical
Preparations
Duplicate all the tubes and work with the copies to preserve the originals.
Double click on the Alien Skin Preset provided in the materials and it will automatically install in the appropriate filter for your PSP
Place the texture into your Textures folder of PSP
Note: The texture provided in the materials is in case you don't have it - it is Squares or
Corel_15_012
When you open the canal_alpha_plaisirs_d_ete_animabelle.pspimage file you will see a blank canvas. It is not empty: it contains all the selections needed, saved to Alpha Channels.
Colors used:

Note: When
working with your own colors, adjust the Blend Mode/Opacity at your own discretion
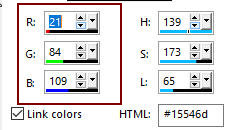
Material Properties - Foreground: Set your Foreground color to color 1  #15546d
Material Properties - Background: Set your Background color to color 2  #a1bbc5
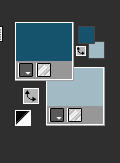
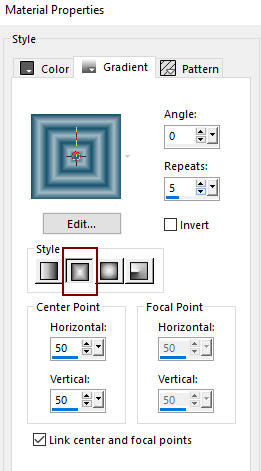
Materials Properties: Set your Foreground Color to foreground-background Rectangular style gradient (Corel_06_029) with the following settings
The Tutorial
Step 1
Open the canal_alpha_plaisirs_d_ete_animabelle
Window - Duplicate
Close the original and work on the copy
Step 2
Flood fill tool / Fill in the layer - Raster 1 with the Rectangular style gradient you prepared above
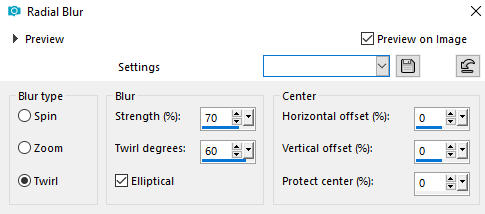
Adjust - Blur - Radial Blur
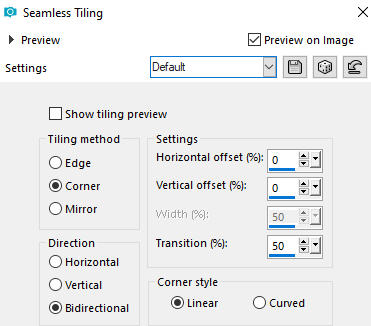
Effects - Image Effects - Seamless Tiling (default settings)
Step 3
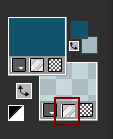
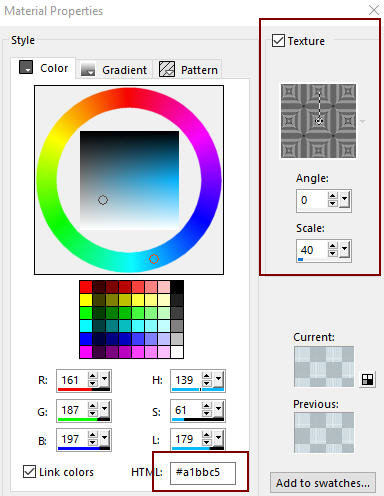
Materials Properties: Set your Background Color to Texture - click on the small square to activate Texture - see below:
Open the Texture window and choose Squares or Corel_15_012 (if you don't have it, choose texture_plaisir_dete.bmp provided in the materials)
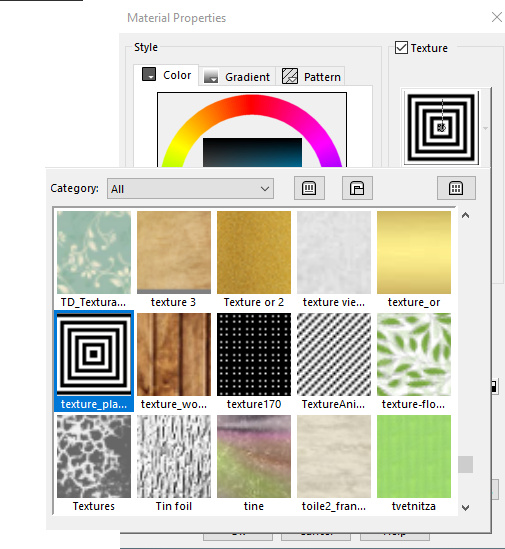
Use the following settings:
Step 4
Layers - New Raster Layer
Note: (In the older versions there is no need of a New Raster Layer)
Flood fill tool / Fill in the layer with texture by right clicking with the mouse
Layers - Merge - Merge Down
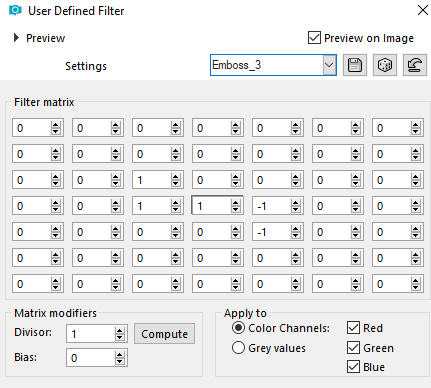
Effects - User Defined Filter - Emboss 3
Step 5
Selections - Load/Save Selection - Load Selection From Alpha Channel
Load Selection 1
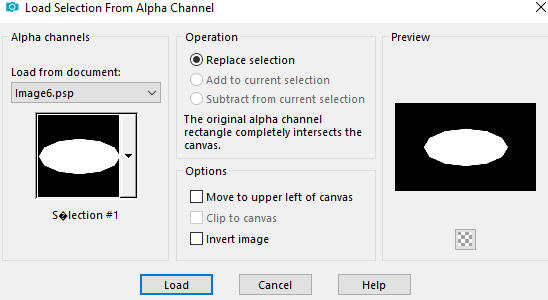
Press Delete with the Delete key on your keyboard
Selections - Select None
Step 6
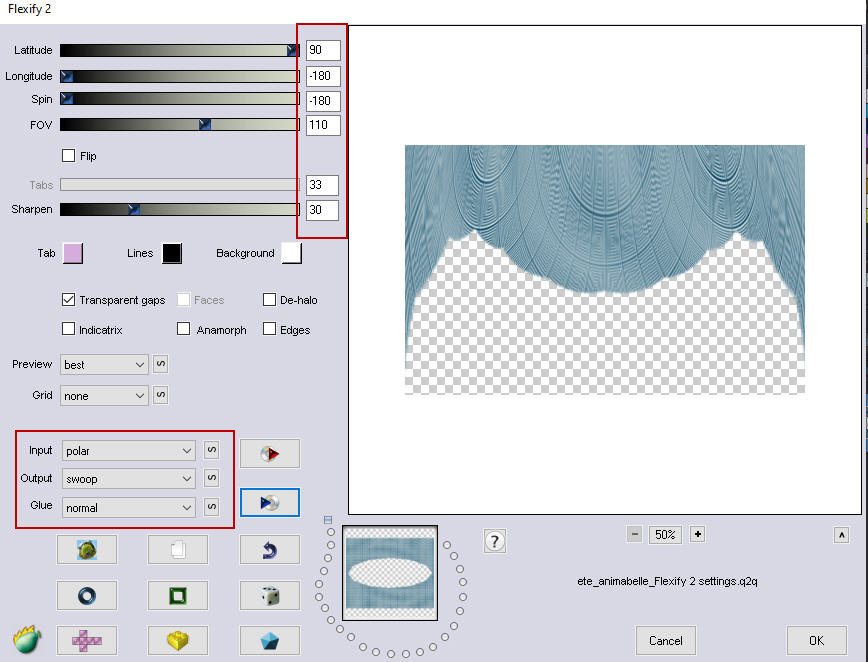
Effects - Plugins - Flaming Pear - Flexify 2
Step 7
View - Rulers
Activate the Pick Tool (K)  - Mode Scale
Move the bottom middle knot up to 250 px
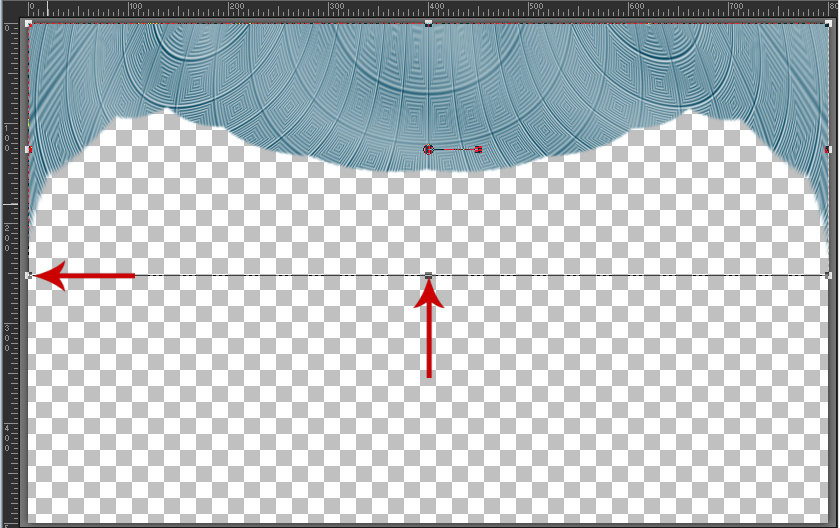
or position it manually as shown:

*Note: in the older versions of PSP (as in PSP 12) use the Raster Deform Tool (D)
View - Rulers - untick the Rulers
Click on any other tool to release the Prick Tool (K)
Step 8
Materials Properties: uncheck the Texture square on the Background color to restore the background color

Step 9
Materials Properties: Set your Backgroundcolor to Color 3  #ede2d7
Activate the Magic Wand  (Tolerance 20 and Feather 0)

Select the empty space on Raster 1 layer
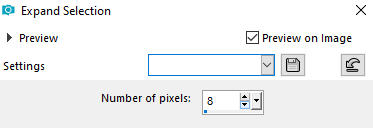
Selections - Modify - Expand - 8 px
Step 10
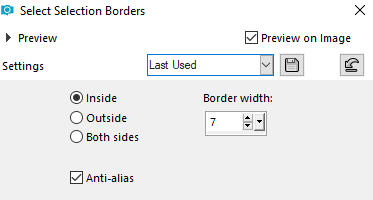
Selections - Modify - Select Selections Borders
Layers - New Raster Layer
Flood fill tool /Fill in the selected border with your Background color - Color 3  #ede2d7
Layers - Merge - Merge Down
(*Note: In older versions of PSP, as in PSP 12, there is no need of a New Raster Layer to fill in the border color)
Step 11
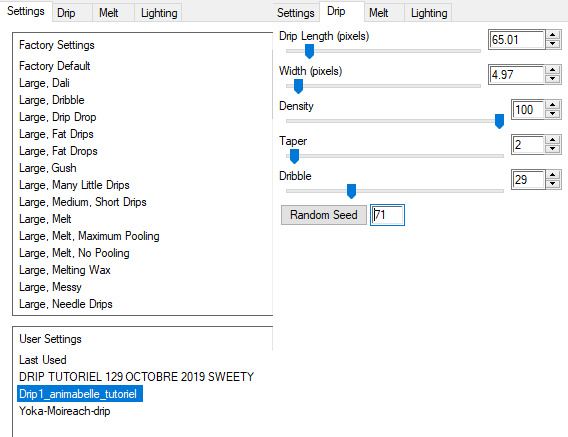
Effects - Plugins - Alien Skin - Eye Candy 5: Nature - Drip
In the User Settings look for preset - Drip1_animabelle_tutoriel - and click OK
Note: If the Preset doesn't work for you, use these settings in the Basic Tab:
Selections - Select None
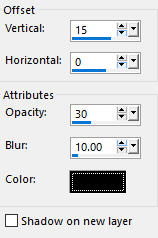
Effects - 3D Effects - Drop Shadow - Color black #000000 - Shadow on new layer not checked
Step 12
Layers - New Raster Layer
Layers - Arrange - Move down
Materials Properties: Set your Background color back to color 2  #a1bbc5
Flood fill tool /Fill in the Layer with the Background Color 2  #a1bbc5
Effects - Plugins - Nik software - Color Efex Pro 3.0 Complete - Bi-Color (default settings)
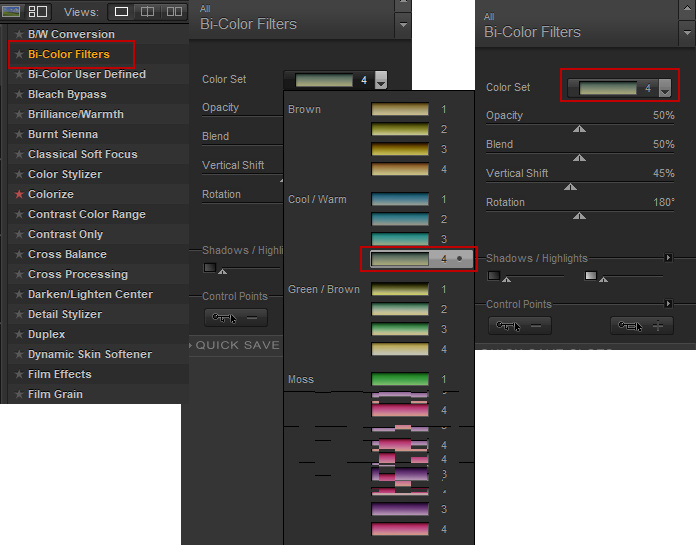
Note: Animabelle chose color set 4 (Warm-Green) for the tutorial. You can choose your own color set according to your preference.
Step 13
Effects - Plugins - I.C. NET Software - Filters Unlimited 2.0 - &<Bkg Designs sf10 IV> - <Lakeside Reflection>
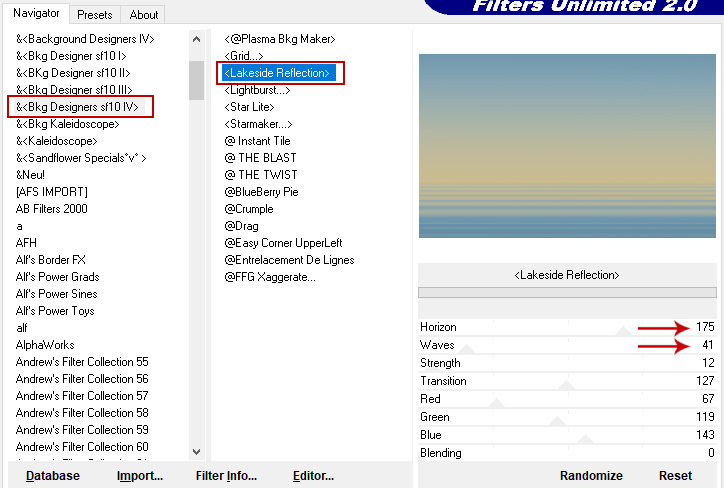
*Note: You can change the Red-Green-Blue color according to your preference - Use the decimal code for the RGB color
Step 14
Open your misted landcape tube
Edit - Copy
Edit - Paste - Paste As New Layer on your working image
Use the Pick tool (K)  mode Scale to position it nicely on the free space between the curtain and the bottom of the background layer.
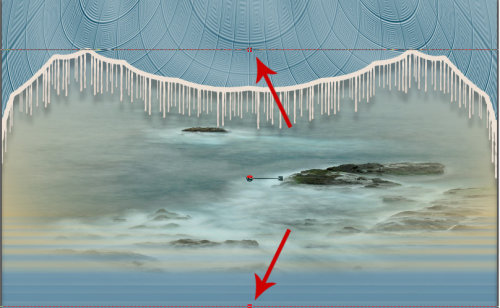
Adjust - Sharpness- Sharpen
Step 15
Open tube barriere_animabelle
Edit - Copy
Edit - Paste - Paste As New Layer on your working image
Effects - Image Effects - Offset
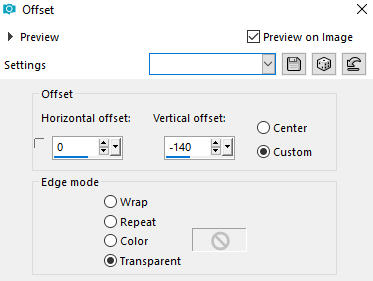
Effects - 3D Effects - Drop Shadow - Color black #000000 - Shadow on new layer not checked

Your layers look like this:
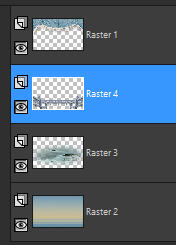
Step 16
Image - Add Borders - 1px - Symmetric checked - Color 1  #15546d
Image - Add Borders - 3px - Symmetric checked - Color 3  #ede2d7
Image - Add Borders - 1px - Symmetric checked - Color 2  #a1bbc5
Image - Add Borders - 3px - Symmetric checked - Color 3  #ede2d7
Image - Add Borders - 1px - Symmetric checked - Color 1  #15546d
Step 17
Selections - Select All
Image - Add Borders - 40px -Symmetric checked - Color 3  #ede2d7
Selections - Invert
Step 18
Materials Properties: Set your Foreground Color to foreground-background Linear style gradient (Corel_06_029) with the following settings
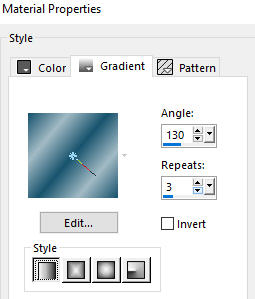
Flood fill tool / Fill in the 40px border with the gradient
Effects - Plugins - VM Extravaganza - Transmission

Note: (If the plugin does not work for you, import it into Filters Unlimited 2.0)
Selections - Invert
Effects - 3D Effects - Drop Shadow - Color black #000000 - Shadow on new layer not checked
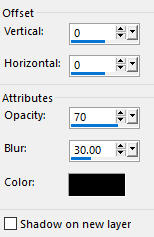
Selections - Select None
Step 19
Open your character tube
Edit - Copy
Edit - Paste - Paste As New Layer on your working image
Resize if necessary
Pick tool (K) - Move the tube a little to the left as shown on the final result
Effects - 3D Effects - Drop Shadow - Color black #000000 - Shadow on new layer not checked

Step 20
Image - Add Borders - 2px -Symmetric checked - Color 3  #ede2d7
Step 21
Layers - New Raster Layer
Add your name or watermark
Layers - Merge - Merge All (Flatten)
Optional: Image - Resize - 900 pixels width (the height will adapt)
File - Export - Save as JPG file
~~~~~~~
My version with my own tubes
