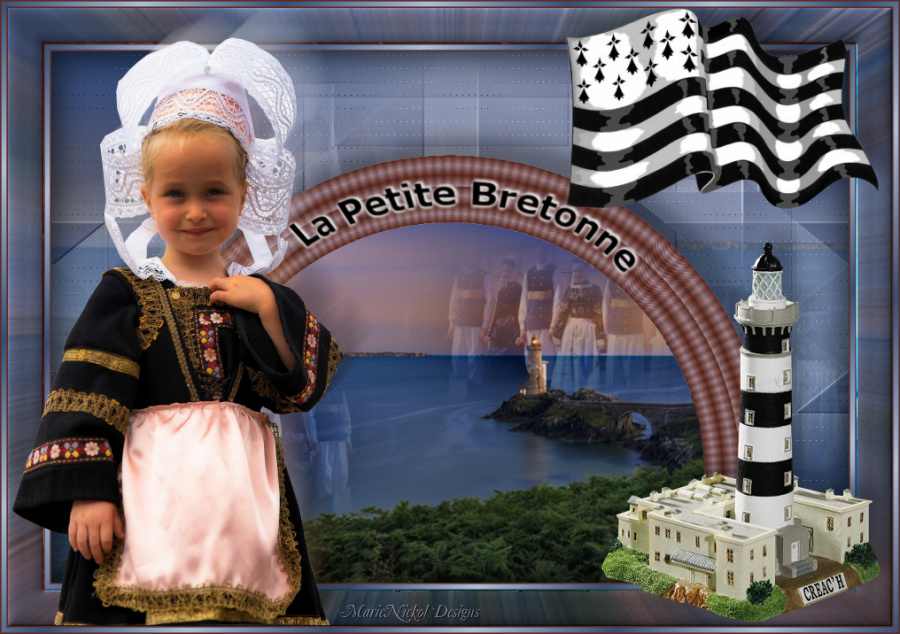
Original tutorial by Animabelle
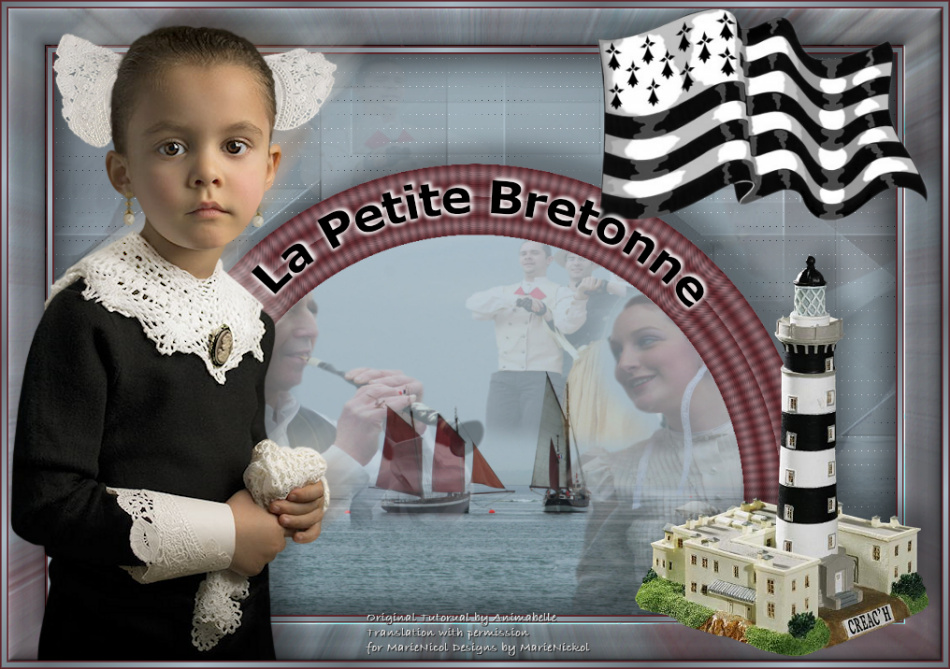
Thank you Animabelle for the permission to translate some of your tutorials.
Translated by Marie Nickol.
You will find the original tutorial here:

This tutorial is a personal creation.
Any resemblance with another one would only be pure coincidence.
Thank you for the respect of Animabelle’s work and the tubers work.
These translations are mine and are intended for personal use only and it is forbidden to copy part or all of it.
You can use this tutorial for PSP lessons but please put the link back to it.
Do not hesitate to let Animabelle or me know if you have any problem with the present tutorial.

Materials used:
Disclaimer: Modifying or renaming files or removing watermarks from the tubes of the original tubers provided in the materials and sharing them as your own or using them for sale online or otherwise is prohibited.
1 tube by Annelies
2 tubes deco by Animabelle
1 mask by Narah
Plugins used:
L en K Landksiteofwonders / L en K's Zitah
Mura's Meister / Copies
Simple / Diamonds
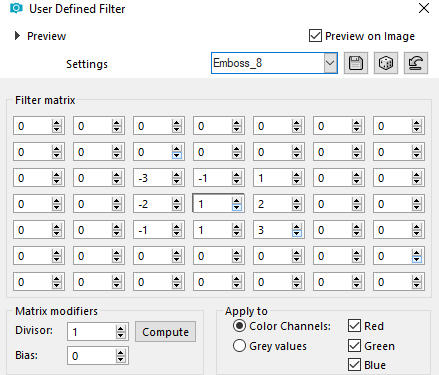
User Defined Filter / Emboss 3 and Emboss 8
Thank you Renée for sharing your plugins page
==> Here
Materials

The original tutorial was written with PSP 12 but can be done with other versions as well.
This translation is written with PSP 2018 Ultimate, if you work with other versions some things might be different but the result will be the same.
Preparations
Duplicate all the tubes including the mask and work with the copies to preserve the originals.
Note: (If you don't have the preset Emboss 3, you can download it - Here - Place it into your Presets folder of PSP
If you don't have the preset Emboss 8, you can download it - Here - Place it into your Presets folder of PSP )
Colours used:

Note: When
working with your own colors, adjust the Blend Mode/Opacity at your own discretion
The Lesson
Step 1
File - New - Open a new Transparent image 900 x 600 pixels
Set your Foreground color to color 3  #69747a
Set your Background color to color 4  #a7b9c3
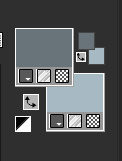
Flood fill tool / Fill in the layer with your foreground color 3  #69747a
Layers - New Raster Layer
Flood fill tool / Fill in the layer with your background color 4  #a7b9c3
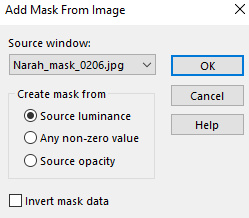
Layers - New Mask Layer - From Image
Look for and Load mask Narah_mask_0206 - Invert mask data not checked
Layers - Merge - Merge All (Flatten)
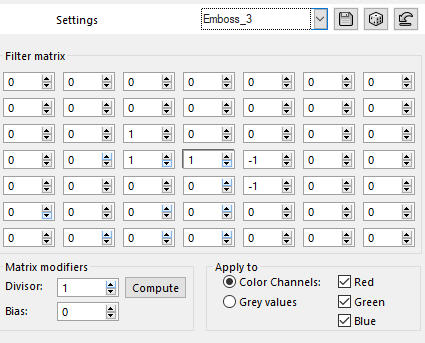
Effects - User Defined Filter - Emboss 3
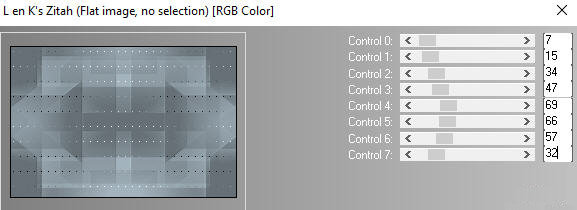
Effects - Plugins - L en K Landksiteofwonders - L en K's Zitah
Step 2
Layers - New Raster Layer
Selections - Select All
Open image fond
Edit - Copy (don't close it - leave it aside as you will need it later)
Edit - Paste - Paste into Selection on your working image
Selections - Select None
In your Layer Properties - set the opacity of this layer on 30
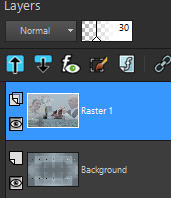
Layers - Merge - Merge Visible
Step 3
Materials Color Properties: Set your Foreground color to color 1  #5c252a
Materials Color Properties: Set your Background color to color 2  #937479
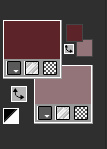
Color Properties: Set your Foreground Color to foreground-background gradient Style Linear with the following settings
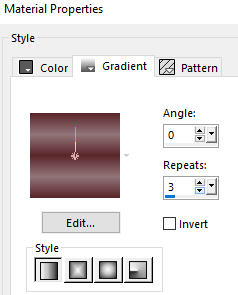
Layers - New Raster Layer
Flood fill tool / Fill in the layer with the Linear gradient you just prepared
Adjust - Blur - Gaussian Blur (Radius 20)
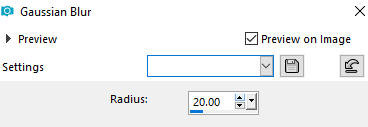
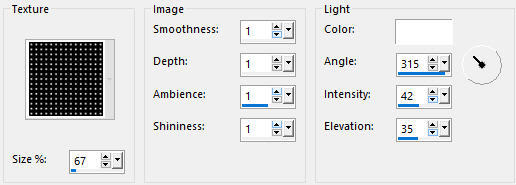
Effects - Texture Effects - Texture
Look for texture Grid or Corel_15_006 (If you don't have it - you can download it - Here )
Use the following Settings:
Effects - Plugins - Mura's Meister - Pole Transform
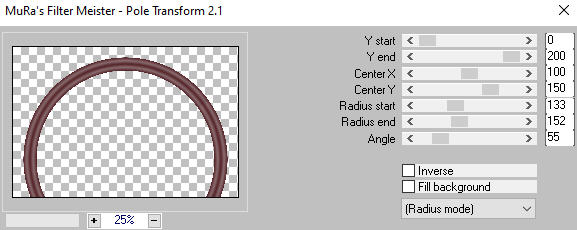
Image - Resize - 80 % - Resize All Layers - Not Checked
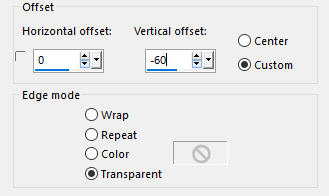
Effects - Image effects - Offset
Step 4
Leave your working image aside for a moment
Activate the image fond again - the one you used above
Image - Mirror
Edit - Copy
Activate your working image
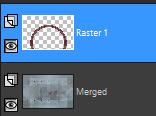
With the Magic Wand tool  (Tolerance 0 ; Feather 0) select the center part of the red shape on layer Raster 1
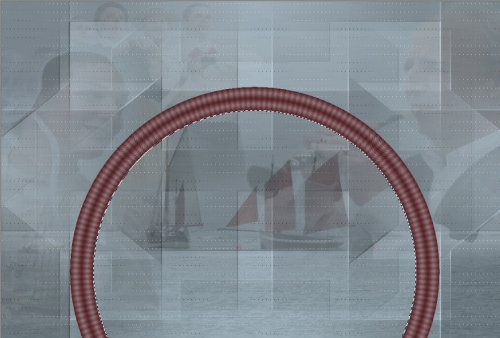
Edit - Paste - Paste into Selection on your working image
Selections - Select None
You may close your image fond - you will not need it anymore.
Step 5
Layers - Duplicate
Activate the layer below - Raster 1
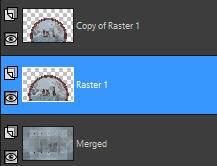
Image - Resize - 110 % - Resize All Layers - Not Checked
Effects - Image effects - Offset
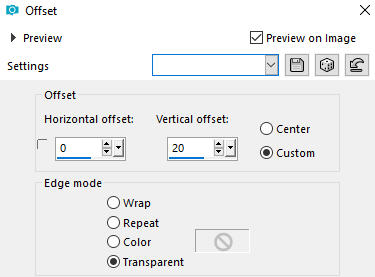
Activate the top layer - Copy of Raster 1
Layers - Merge - Merge Down
Effects - 3D Effects - Drop Shadow: (-20 / 20 / 30 / 30 /) Color 5  #000000 - Shadow on new layer not checked
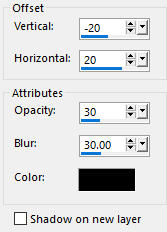
Repeat Drop Shadow with (20 / -20)
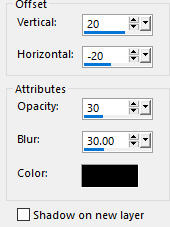
Layers - Merge - Merge All (Flatten)
Step 6
Selections - Select All
Effects - 3D Effects - Cutout (Shadow color black)
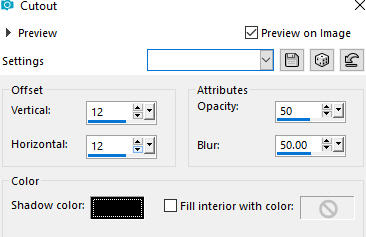
Repeat Cutout with (-12 /-12)
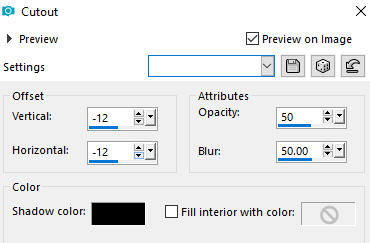
Selections - Select None
Step 7
Image - Add Borders - 2px - color 1  #5c252a - Symmetric checked
Image - Add Borders - 5px - color 3  #69747a - Symmetric checked
Image - Add Borders - 2px - color 1  #5c252a - Symmetric checked
With Magic Wand Tool  (Tolerance 0, Feather 0) select the 5 px blue border(color 3)
Materials Color Properties: Set your Foreground color back to color 3  #69747a
Materials Color Properties: Set your Background color back to color 4  #a7b9c3
Materials Properties: Set your Foreground Color to foreground-background gradient Style Linear with the following settings:
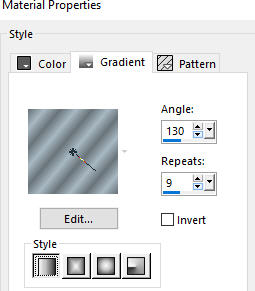
Flood fill tool / Fill in the layer with the Linear gradient you just prepared
Selections - Select None
Step 8
Image - Add Borders - 40px - color 3  #69747a - Symmetric checked
With Magic Wand Tool  (Tolerance 0 ; Feather 0) select the 5 px blue border
Effects - Plugins - Simple - Diamonds
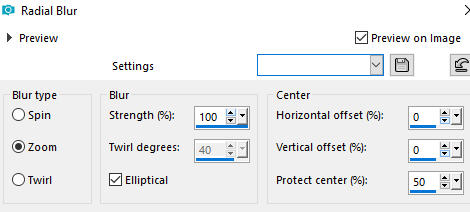
Adjust - Blur - Radial Blur - use the following settings:
Effects - User Defined Filter - Emboss 8
Effects - 3D Effects - Inner Bevel
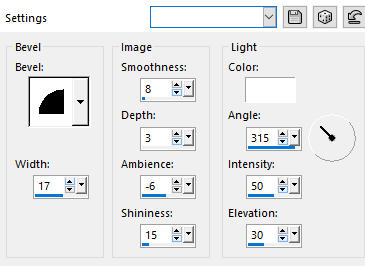
Selections - Select None
Step 9
Open the little girl tube Alies 12CH26-girl-10012013
Edit - Copy
Edit - Paste as New Layer on your working image
Image - Miroir
Move the tube to the left side as shown on the final result
Layers - Duplicate
Activate the layer below (Raster 1 layer)
Adjust - Blur - Motion Blur
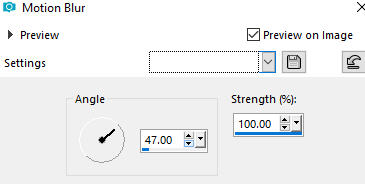
In your Layer Properties - set the opacity of this layer on 45
Step 10
Open tube drapeau_breton_animabelle
Edit - Copy
Edit - Paste as New Layer on your working image
Image - Resize 90 % - Resize all layers not checked
Pick Tool  - Move to the top right as shown on the final result
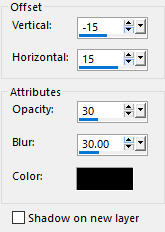
Effects - 3D Effects - Drop Shadow: (-15/15/30/30) Color: 5  #000000 - Shadow on new layer not checked
Step 11
Open the tube phare_animabelle
Edit - Copy
Edit - Paste as New Layer on your working image
Image - Resize 75 % - Resize all layers not checked
Pick Tool  - Move the tube to the bottom right as shown on the final result
Effects - 3D Effects - Drop Shadow: (-15/15/30/30) Color: 5  #000000 - Shadow on new layer not checked

Adjust - Sharpness- Sharpen
Step 12
Image - Add Borders - 2px - color 1  #5c252a - Symmetric checked
Image - Add Borders - 5px - color 3  #69747a - Symmetric checked
Image - Add Borders - 2px - color 1  #5c252a - Symmetric checked
With Magic Wand Tool (Tolerance 0, Feather 0) select the 5 px blue border(color 3  )
)
Flood fill tool / Fill in the layer with the Linear gradient prepared in Step 7

Selections - Select None
Step 13
If you want to add Text on Curve as Animabelle did on this tutorial, follow her little tutorial ==> Here
Add your name or watermark, resize if you wish, and save it as JPG file.
~~~~~~~
My version with my own tube
